IMPORTANT NOTE
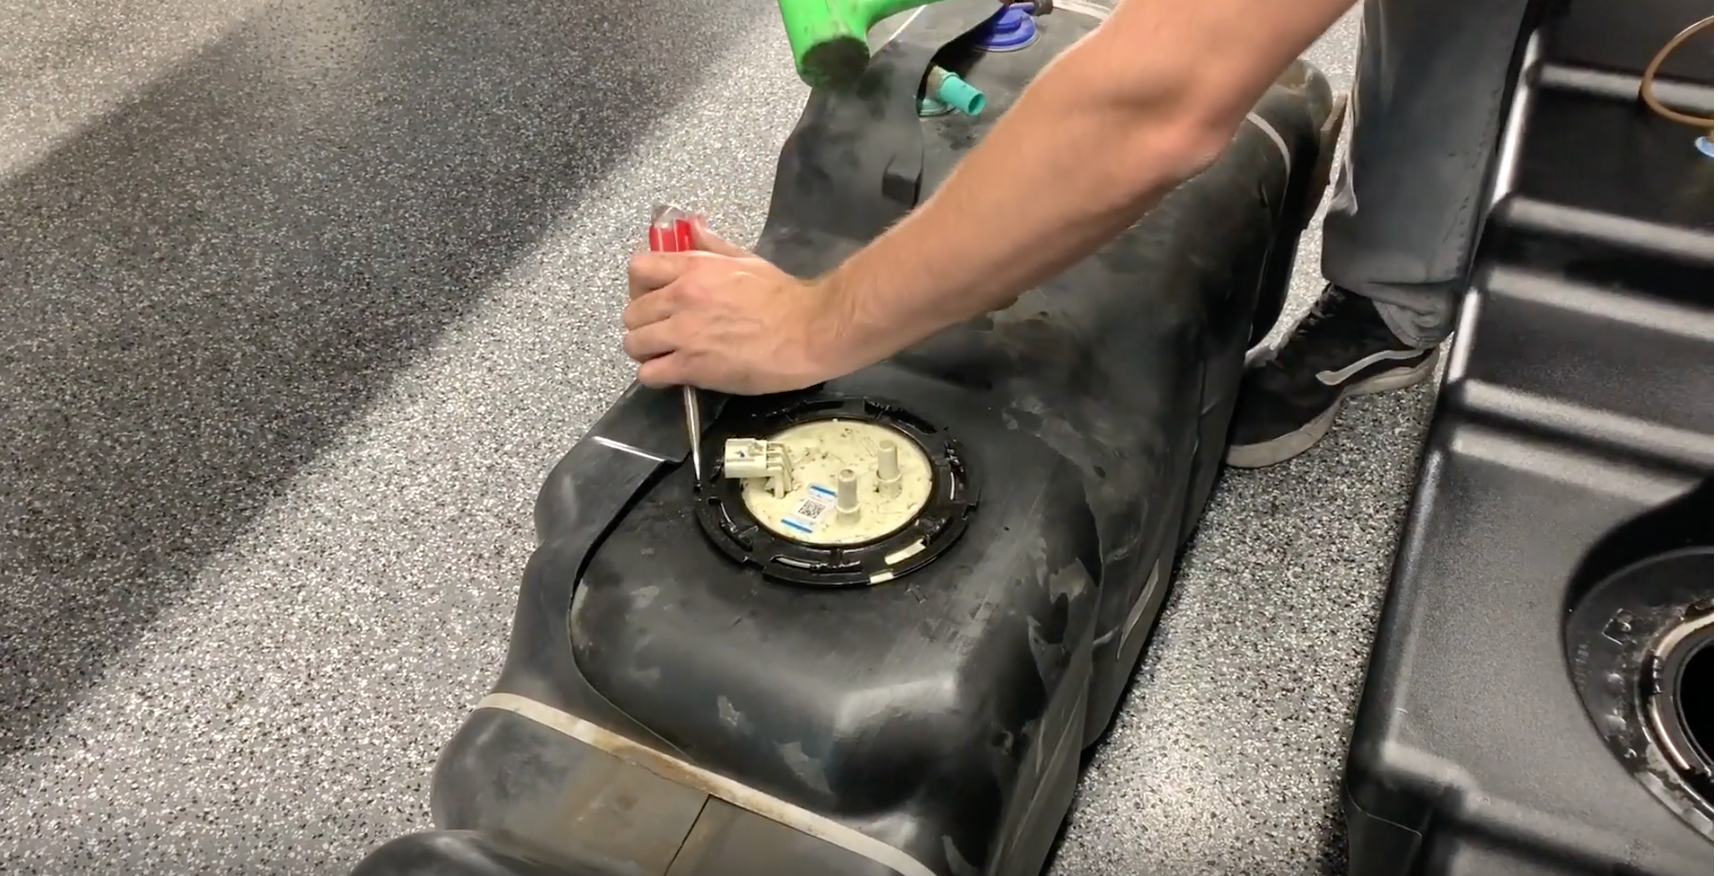
If your tank came out with a cutout in the baffle like this. You will be using the OEM fuel float
- Disconnect and isolate both of the negative battery cables
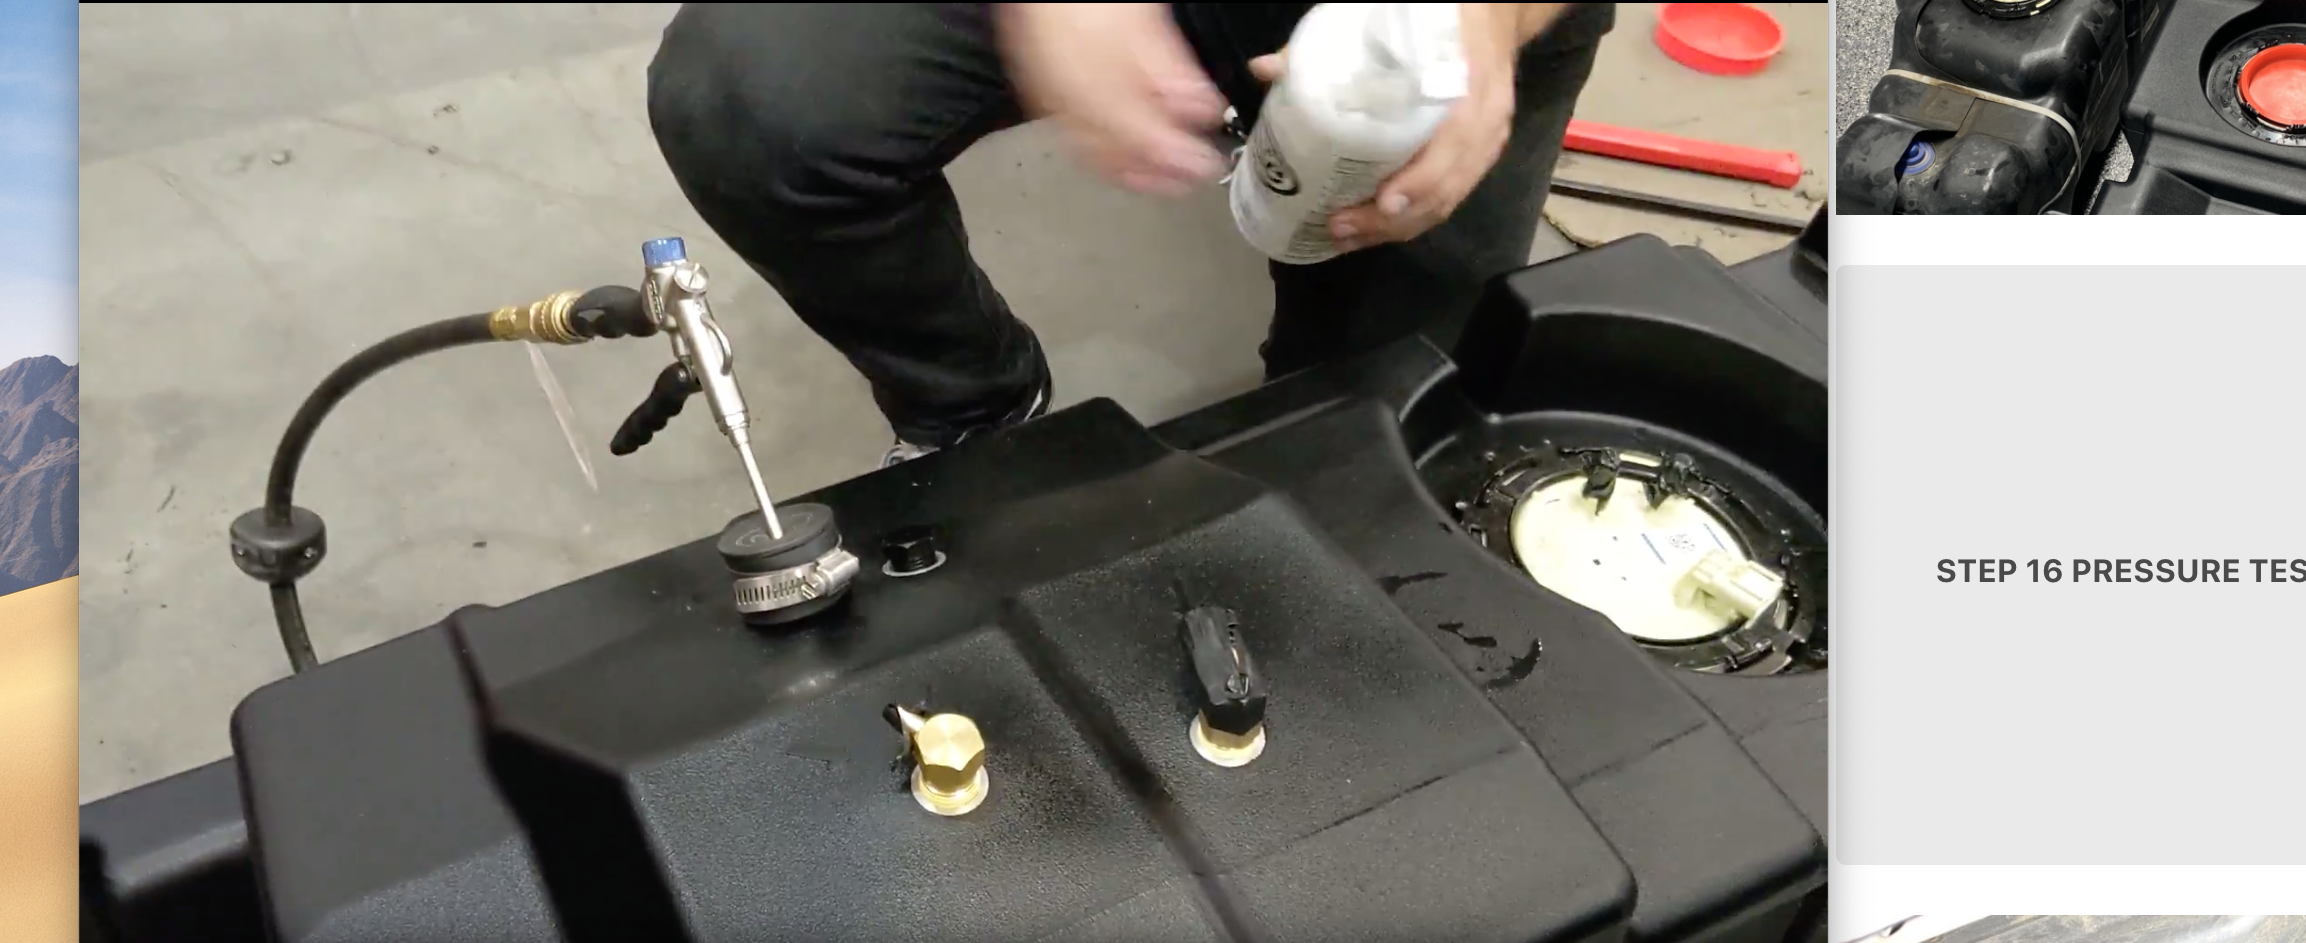
- Before installing S&B Tank, conduct pressure test to ensure o'ring is properly seated.
- In-bed Auxiliary Fuel Tanks will void the Lifetime Warranty.
- Nozzle at high flow fuel station may continue to "click off". Tank is designed to work at regular fuel stations.
Important Note: Incorrect hardware was included with some of these tanks. If your tank came with the nuts on the left(black nylon), do not install them. The ones on the right are correct and are 1/2"-13. Please call us at 909.675.1313 to be sent correct hardware. If you don't want to wait 1 business day to receive these, hardware from a local hardware store can be used temporarily.
If your tank came out with a cutout in the baffle like this. You will be using the OEM fuel float
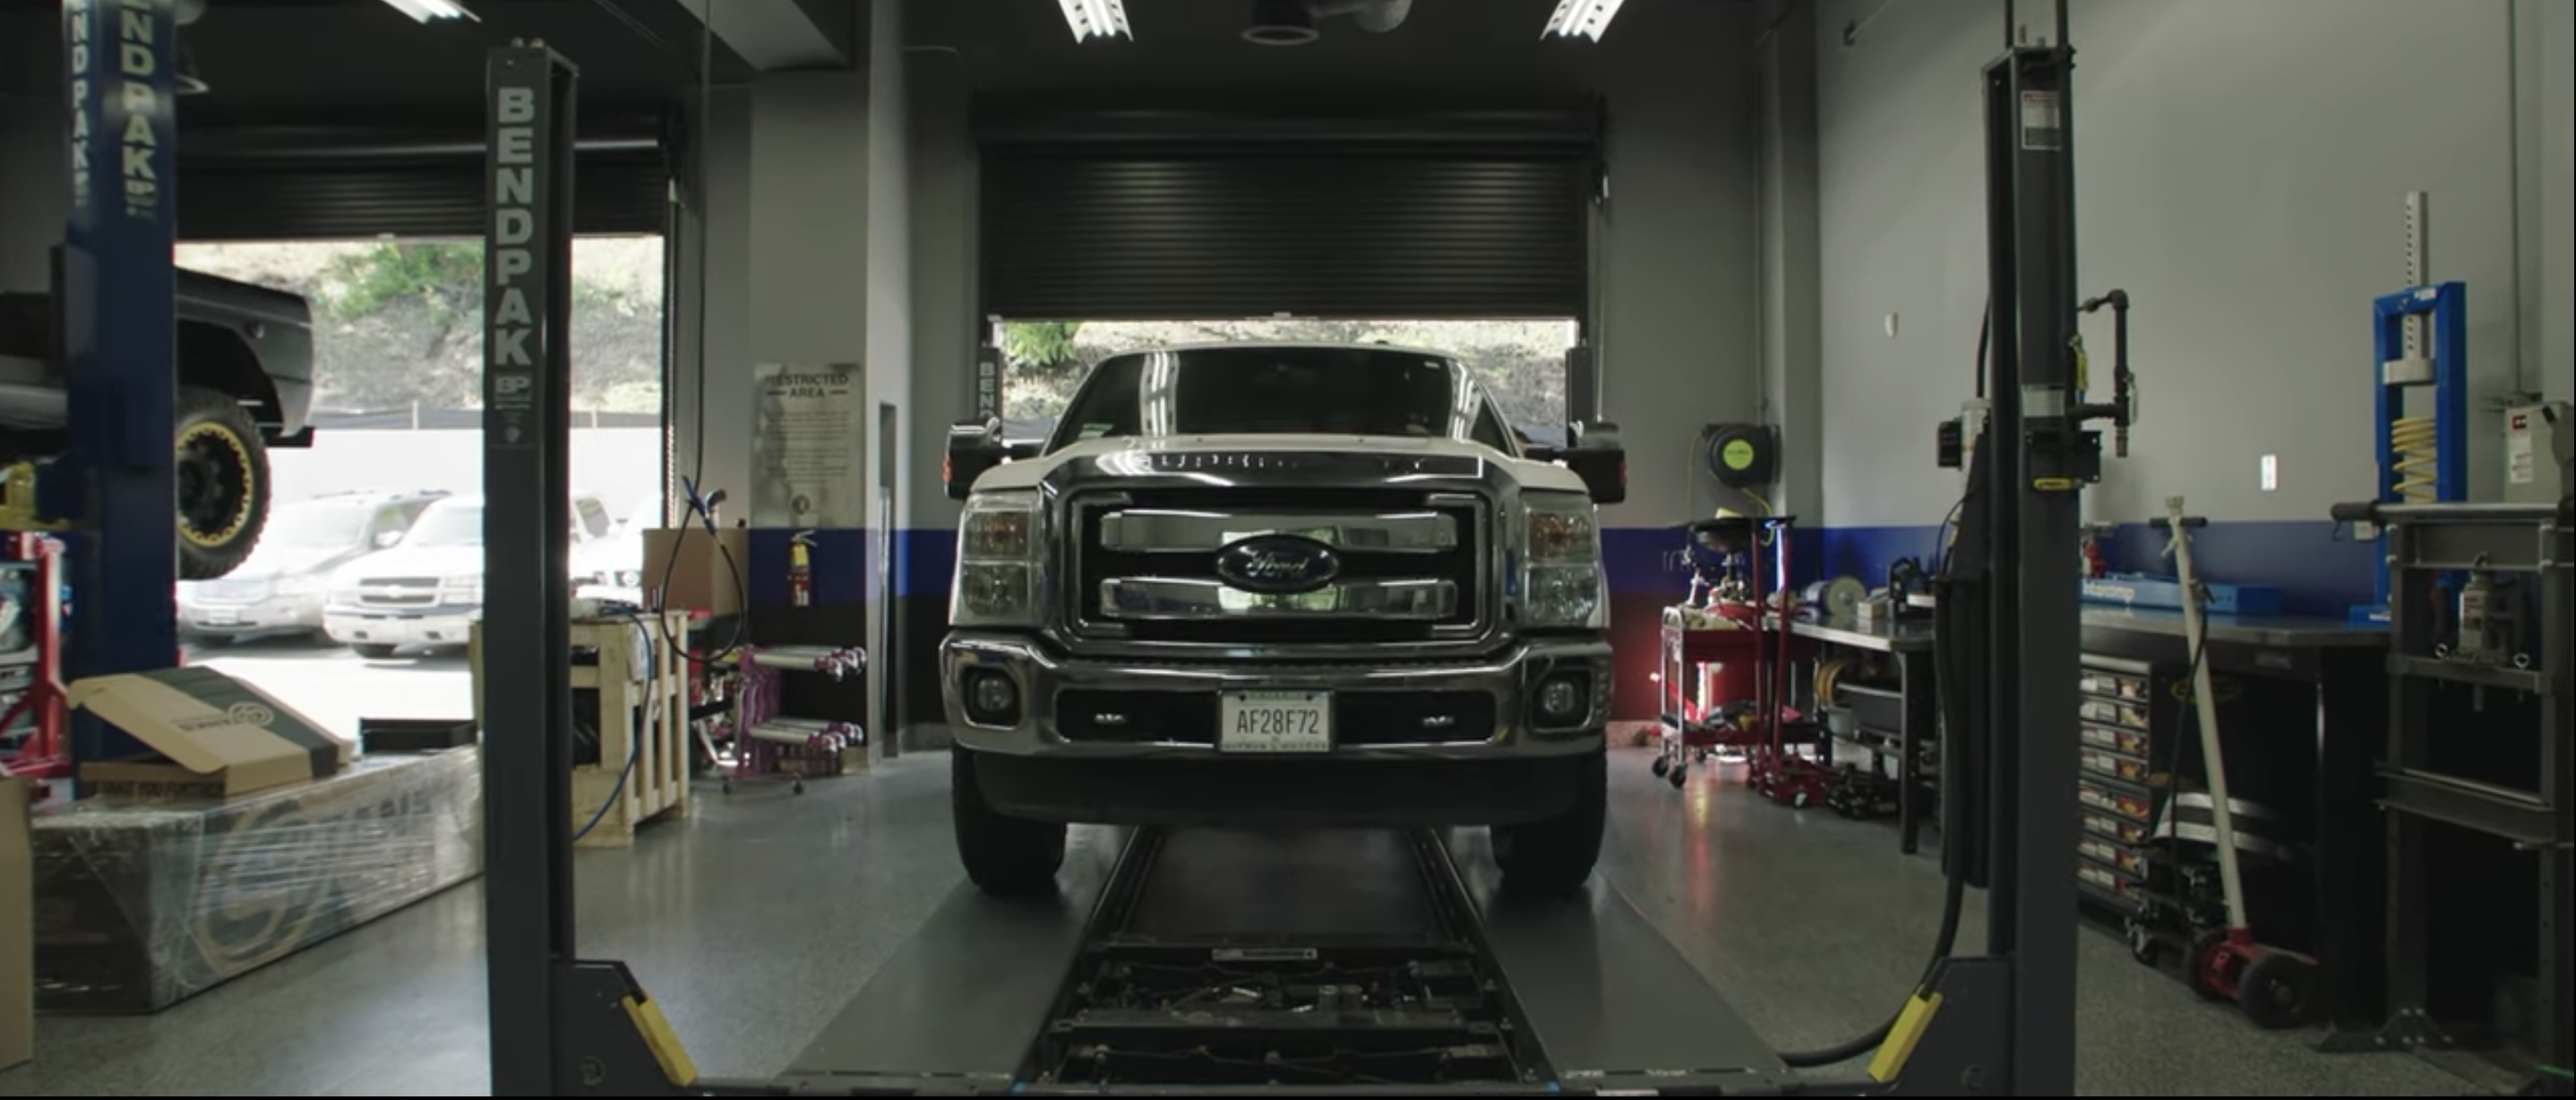
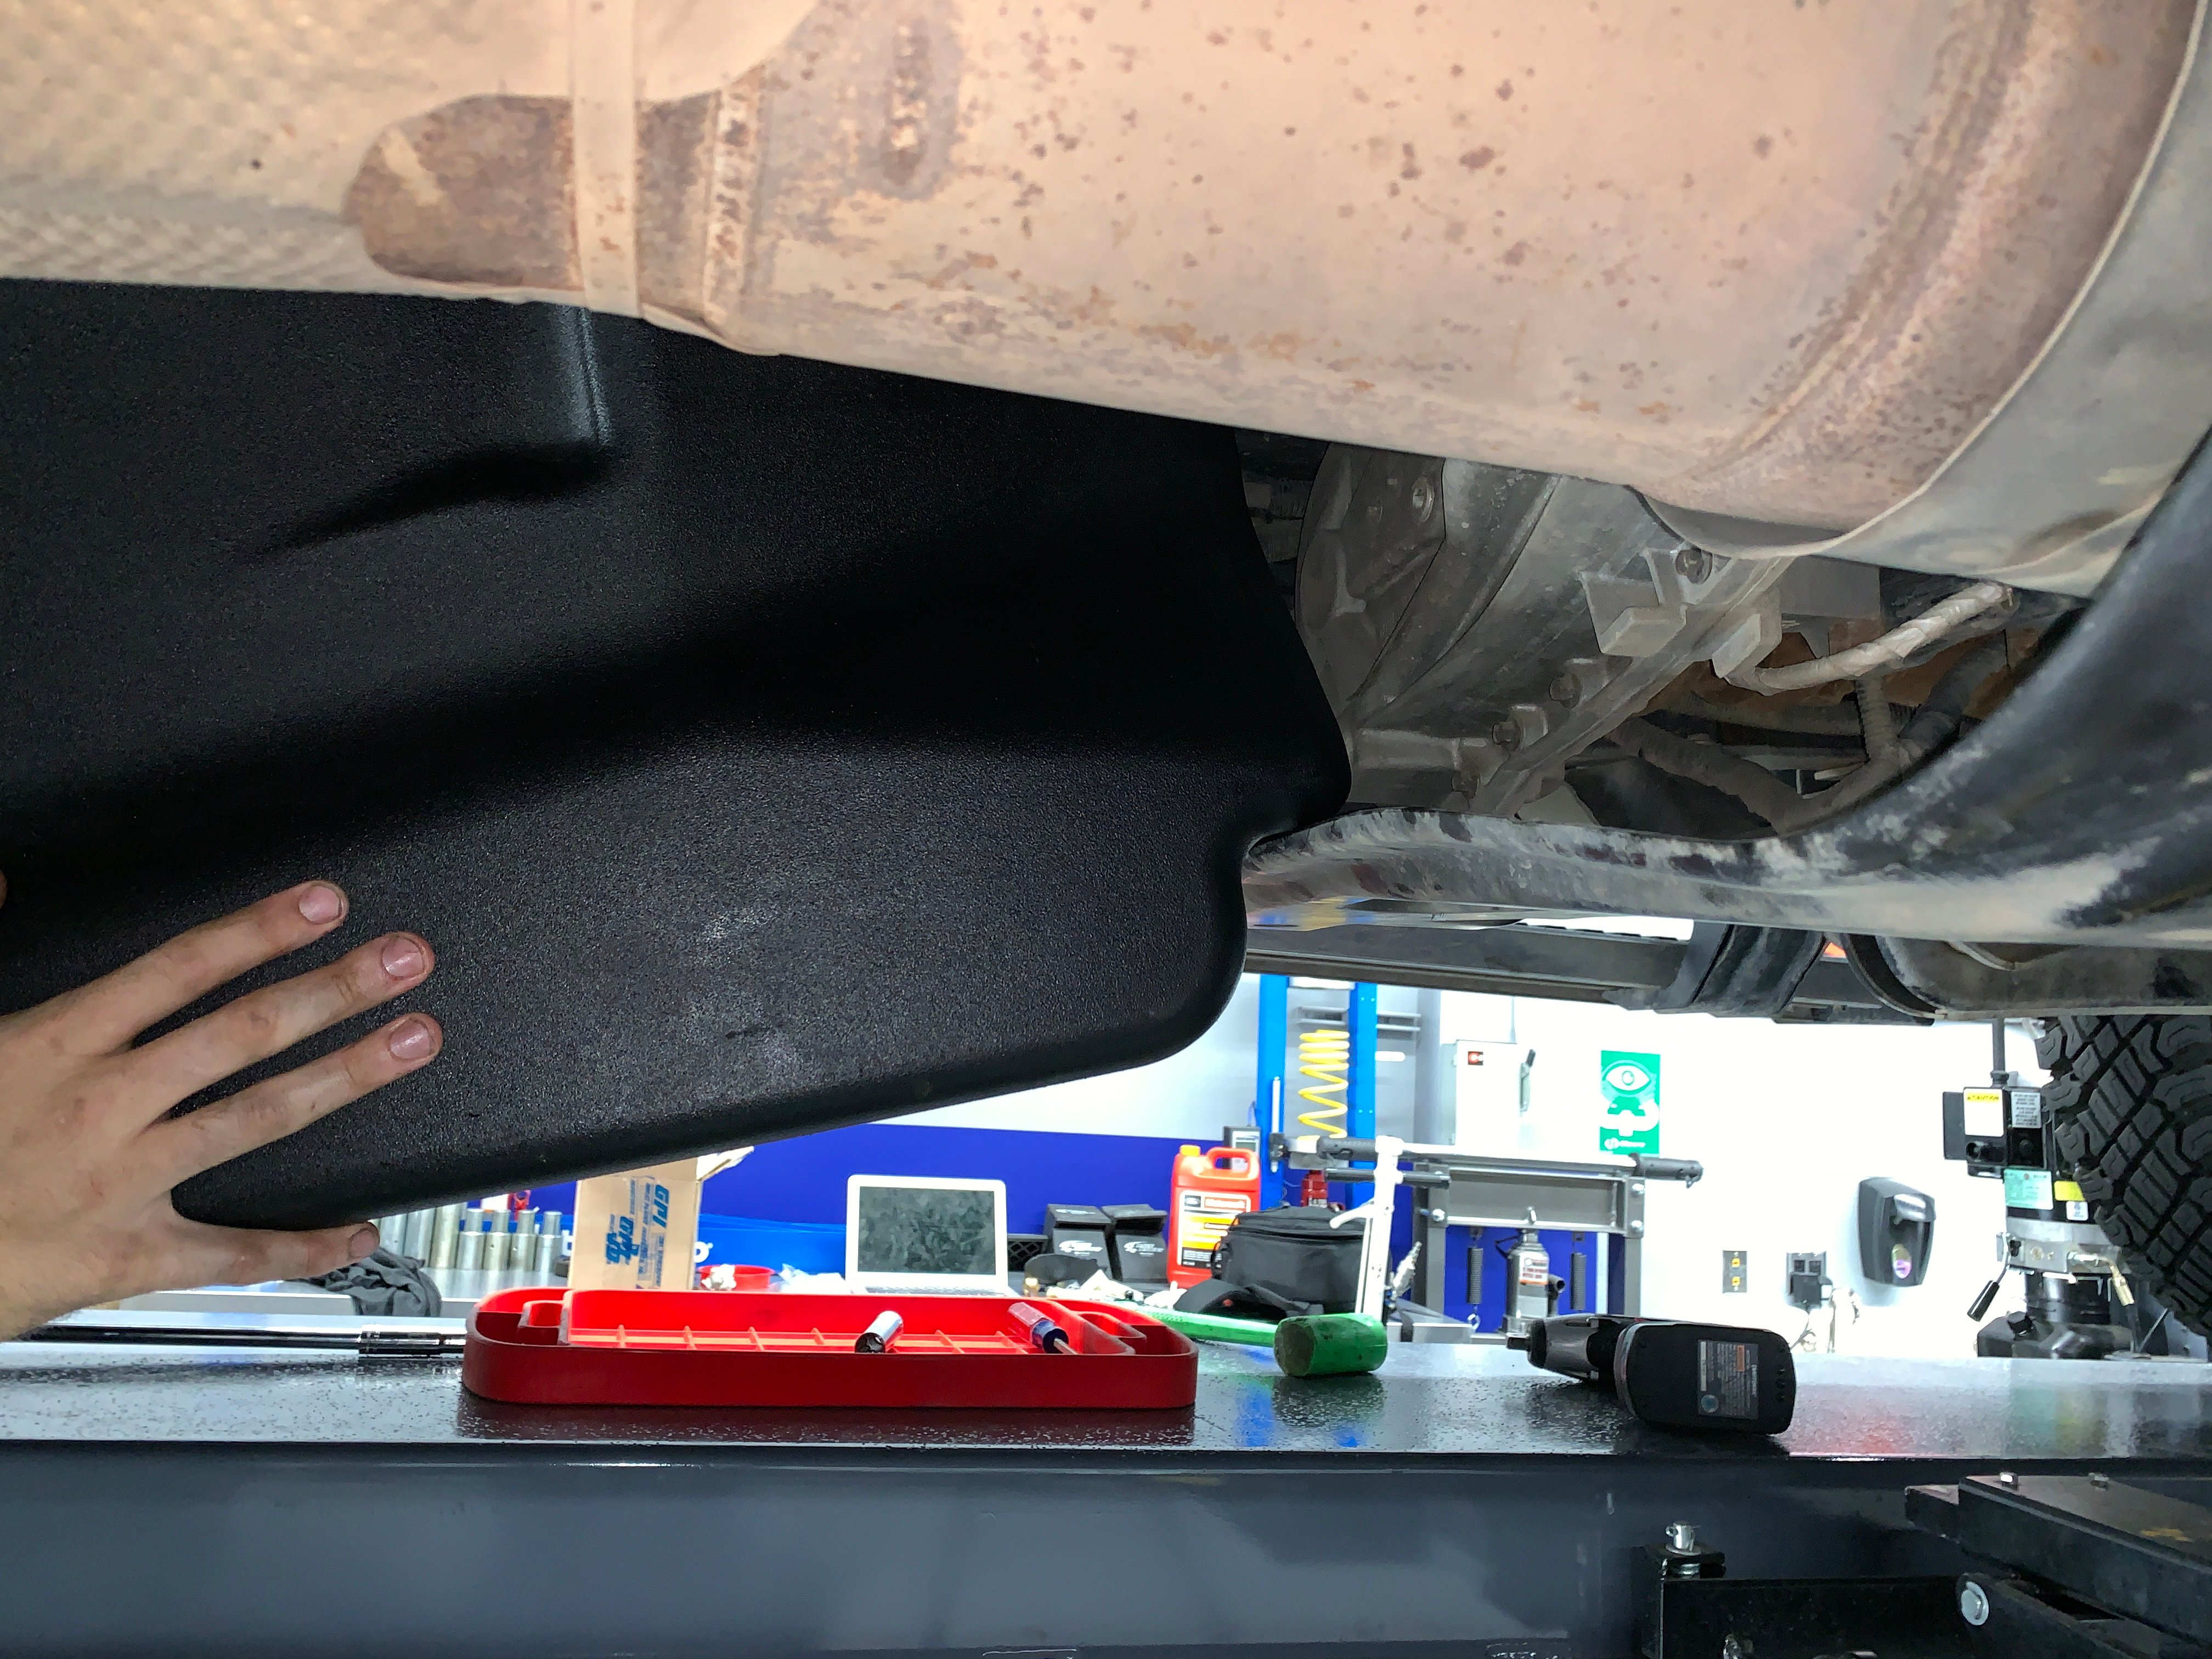
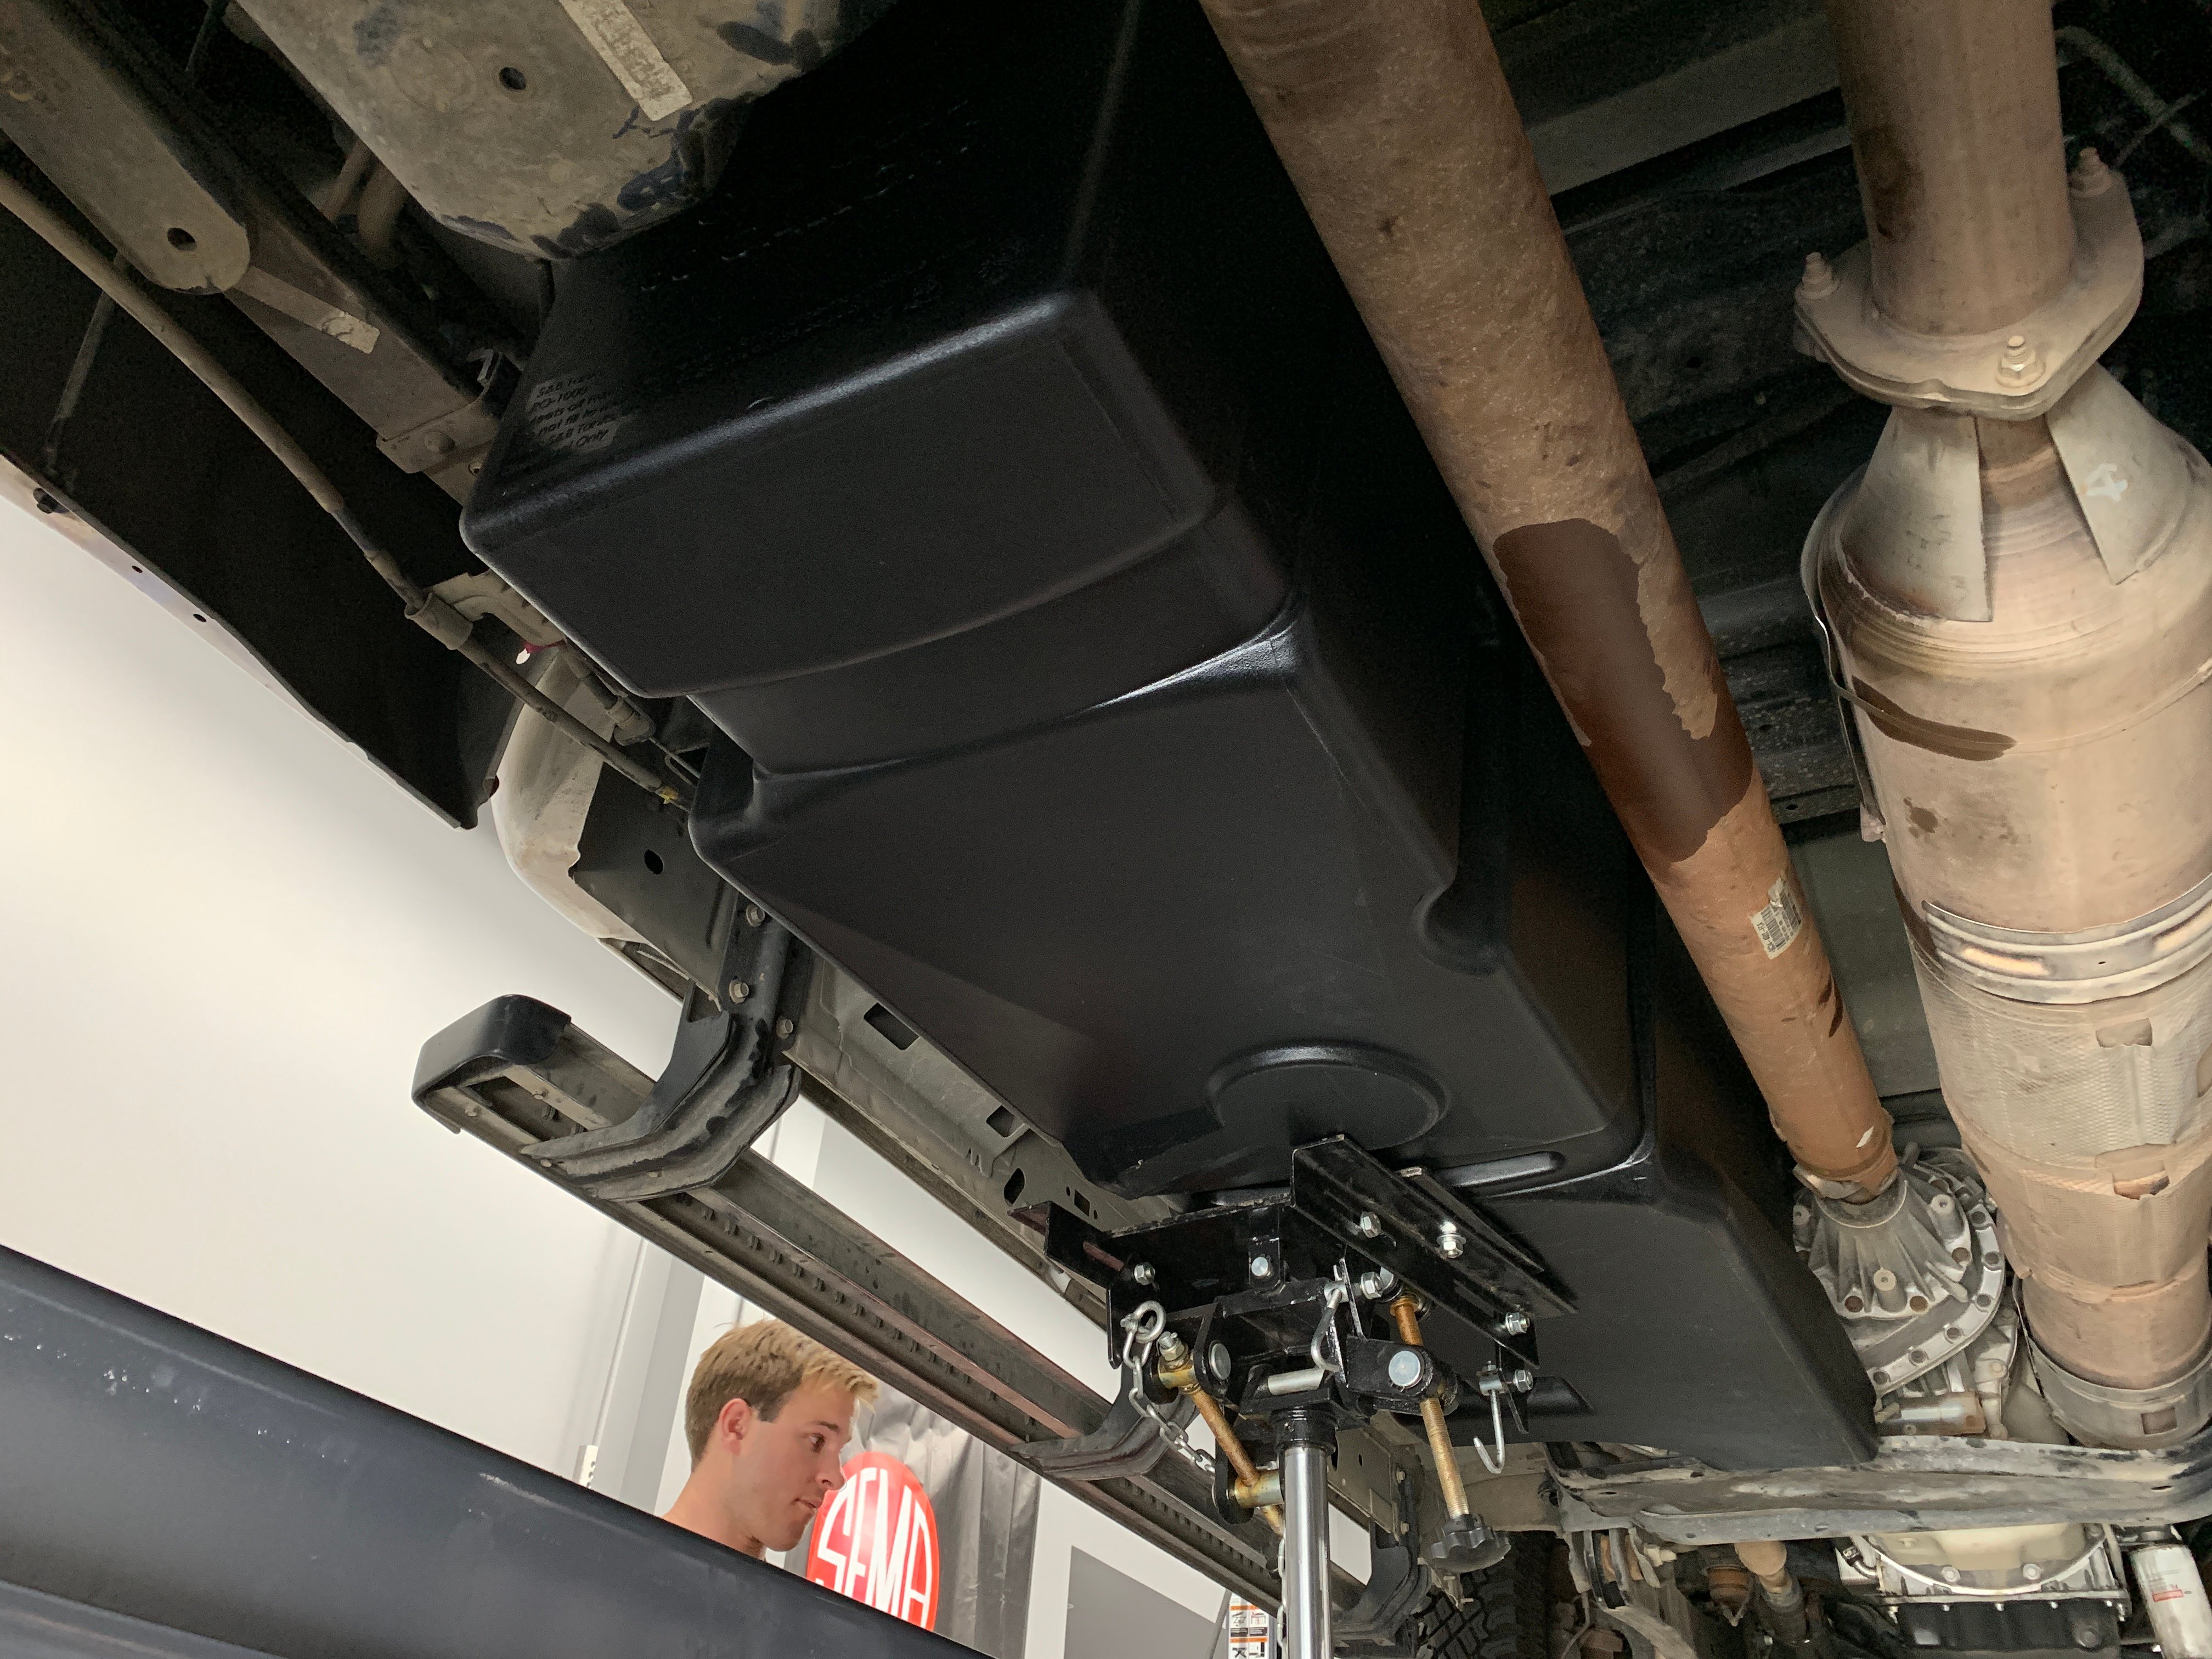
Raise the vehicle up on a lift to working height. The rear of the drivers side frame rail needs to be unobstructed as the S&B Tank will protrude under the frame rail.
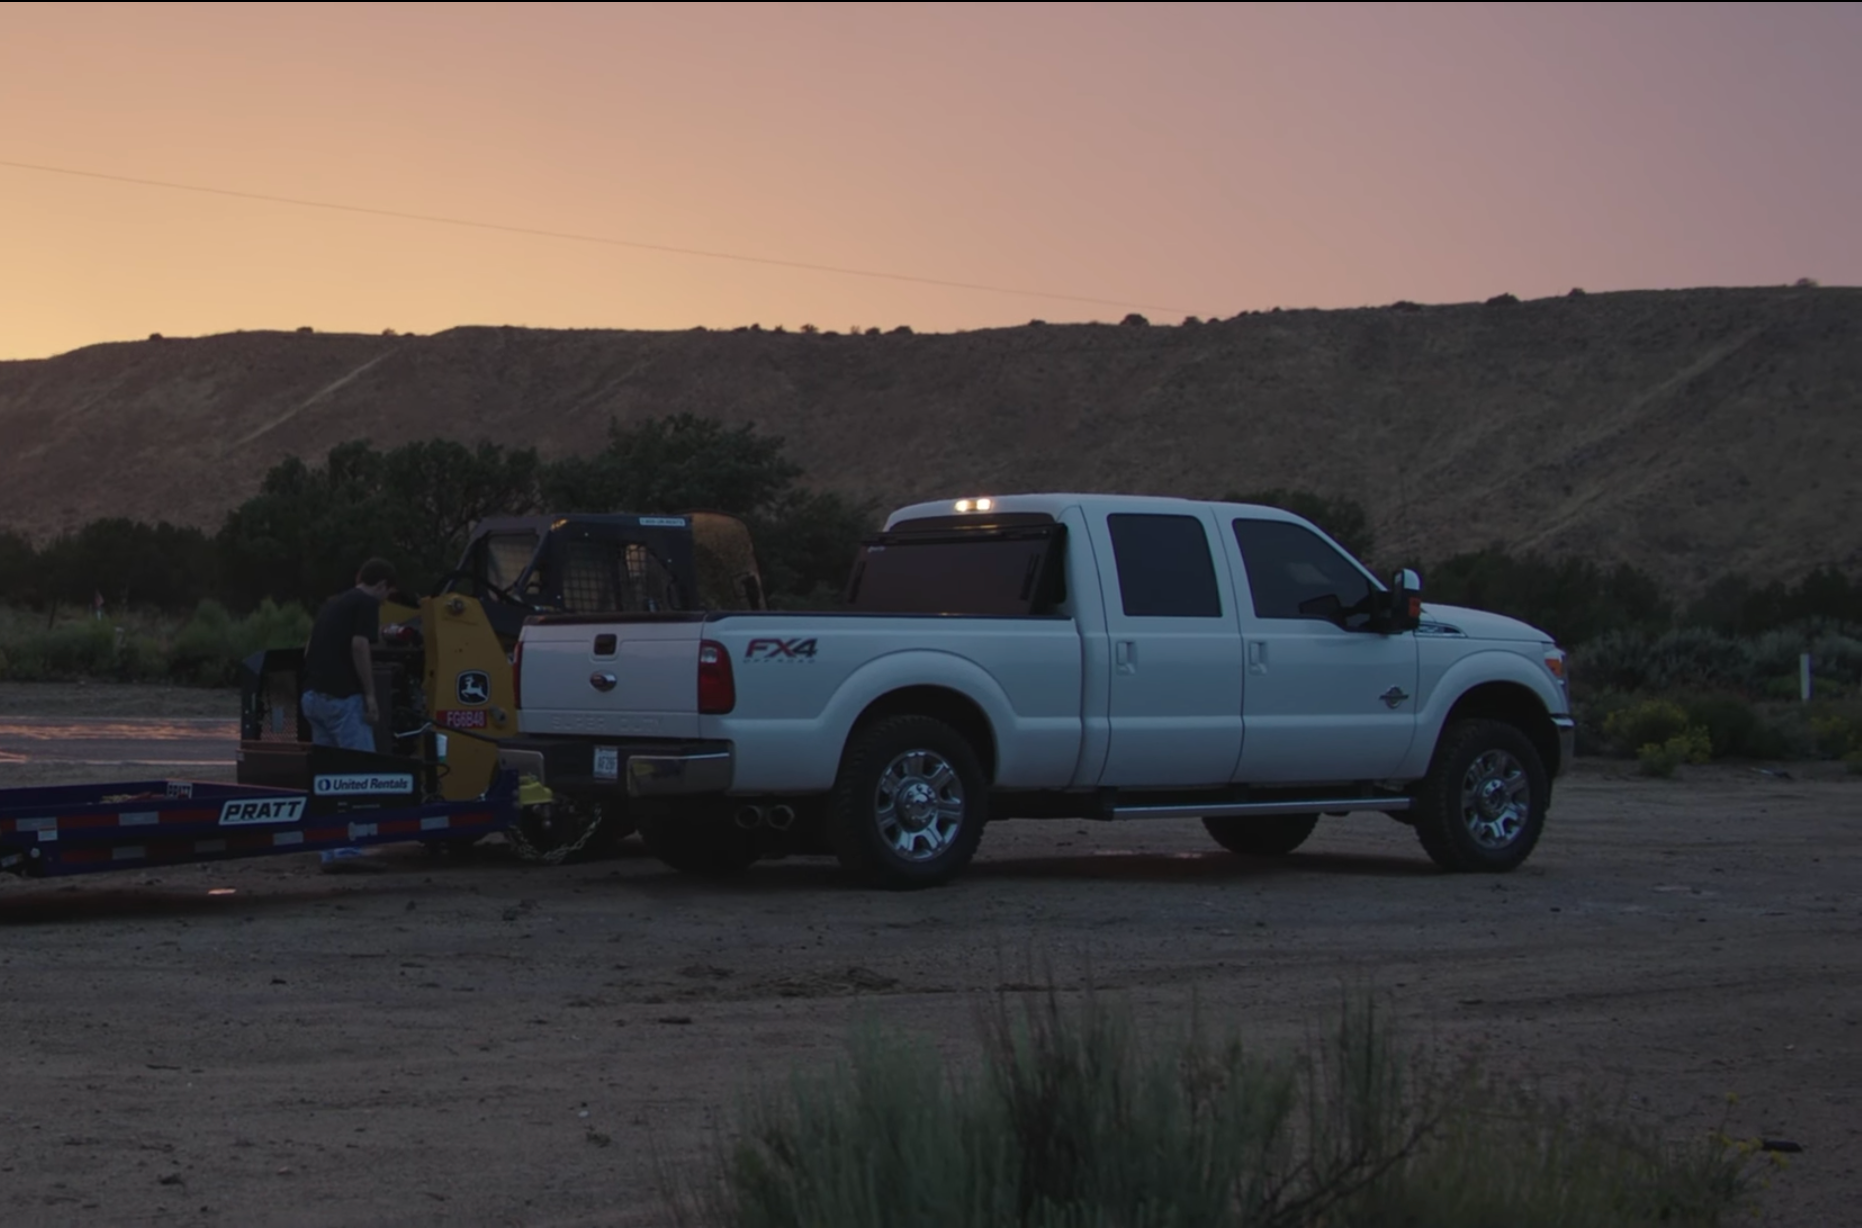
- Installation can be completed without a lift. Make sure the vehicle is safely parked with the parking brake set. If your truck is lowered or has running boards you may have to use a jack to get the S&B Tank in position.
Disconnect the vent and fill hose from the filler/vent neck assembly.

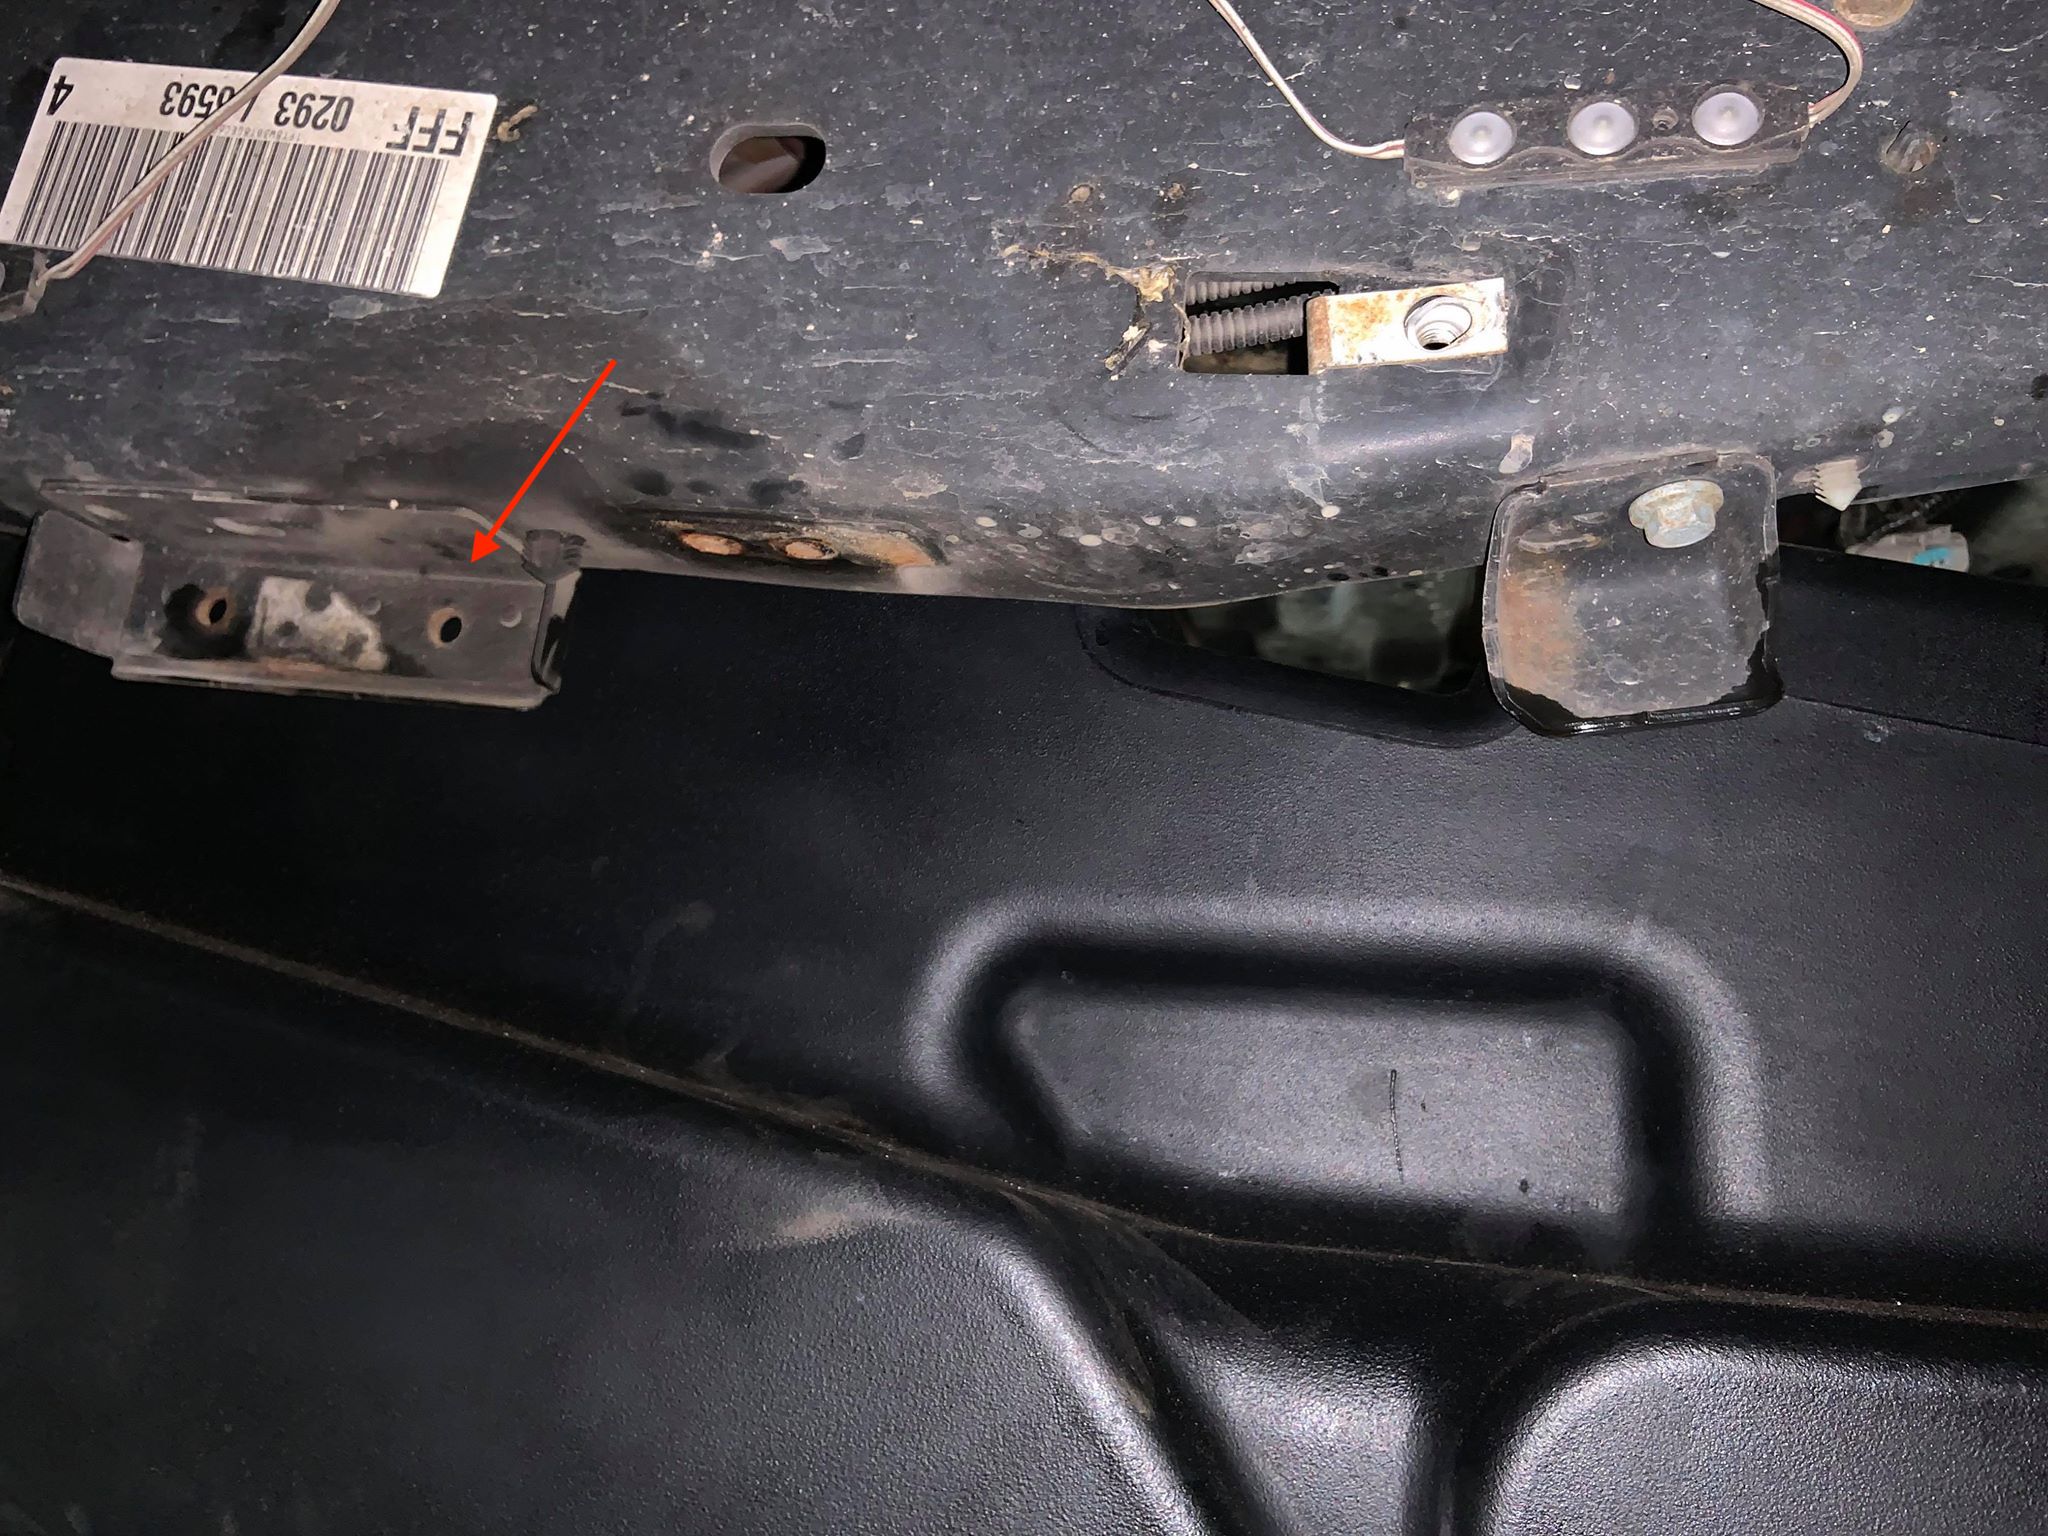
Remove the OEM skid plate if equipped. This will not be used again.
Remove the OEM bumper bracket. This will not be used again.
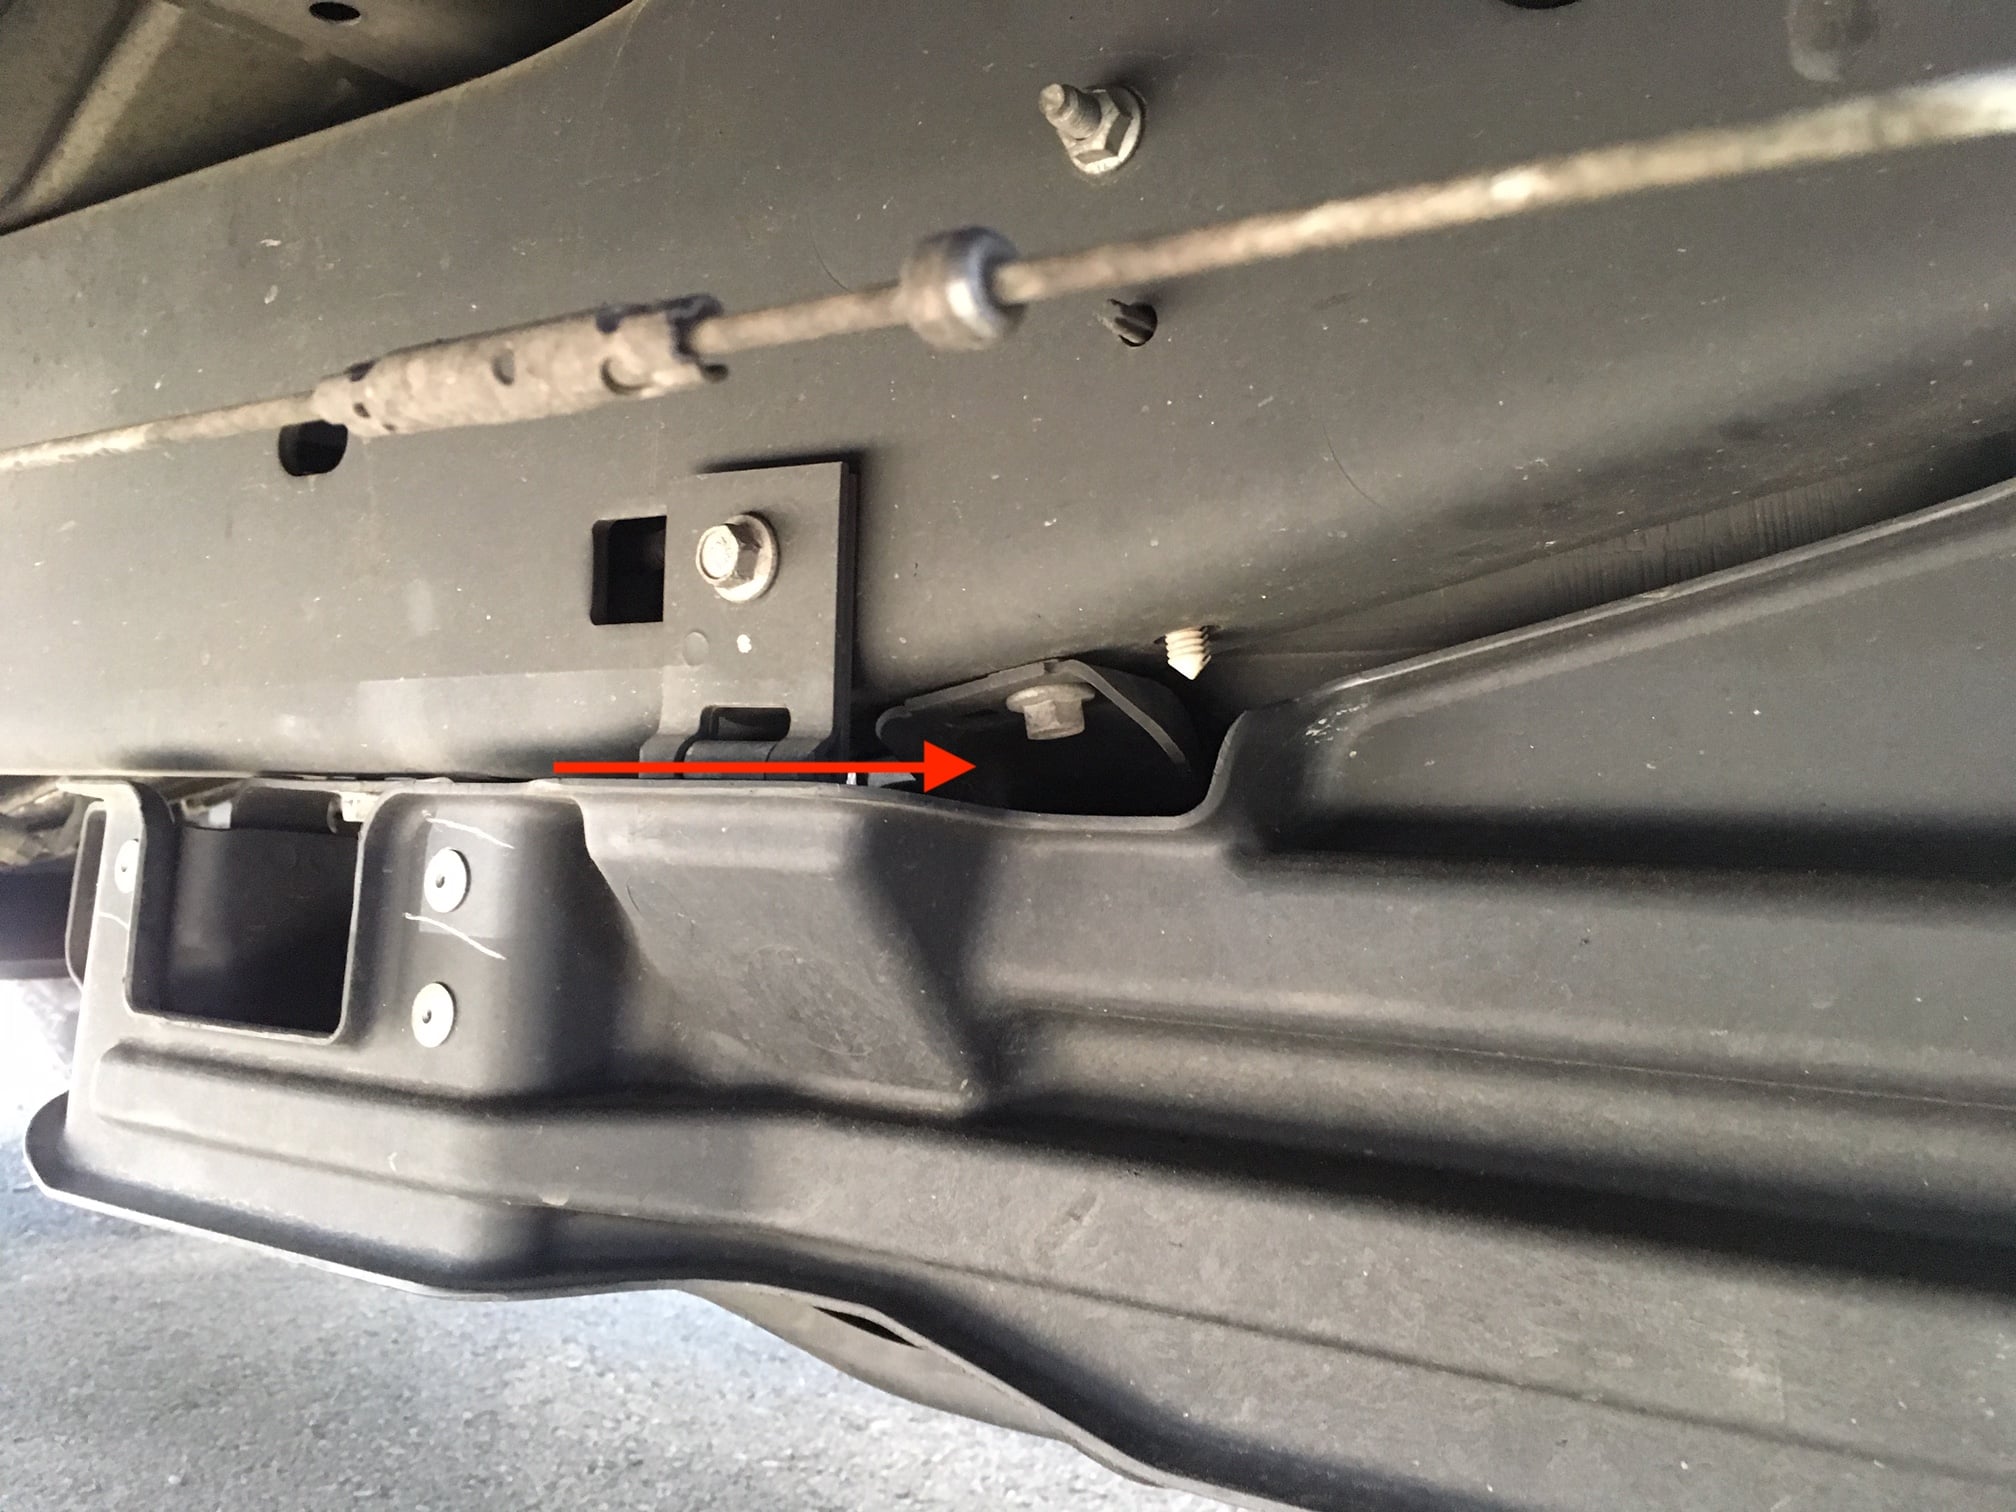
Remove this additional bumper bracket found on some 2016 year trucks.
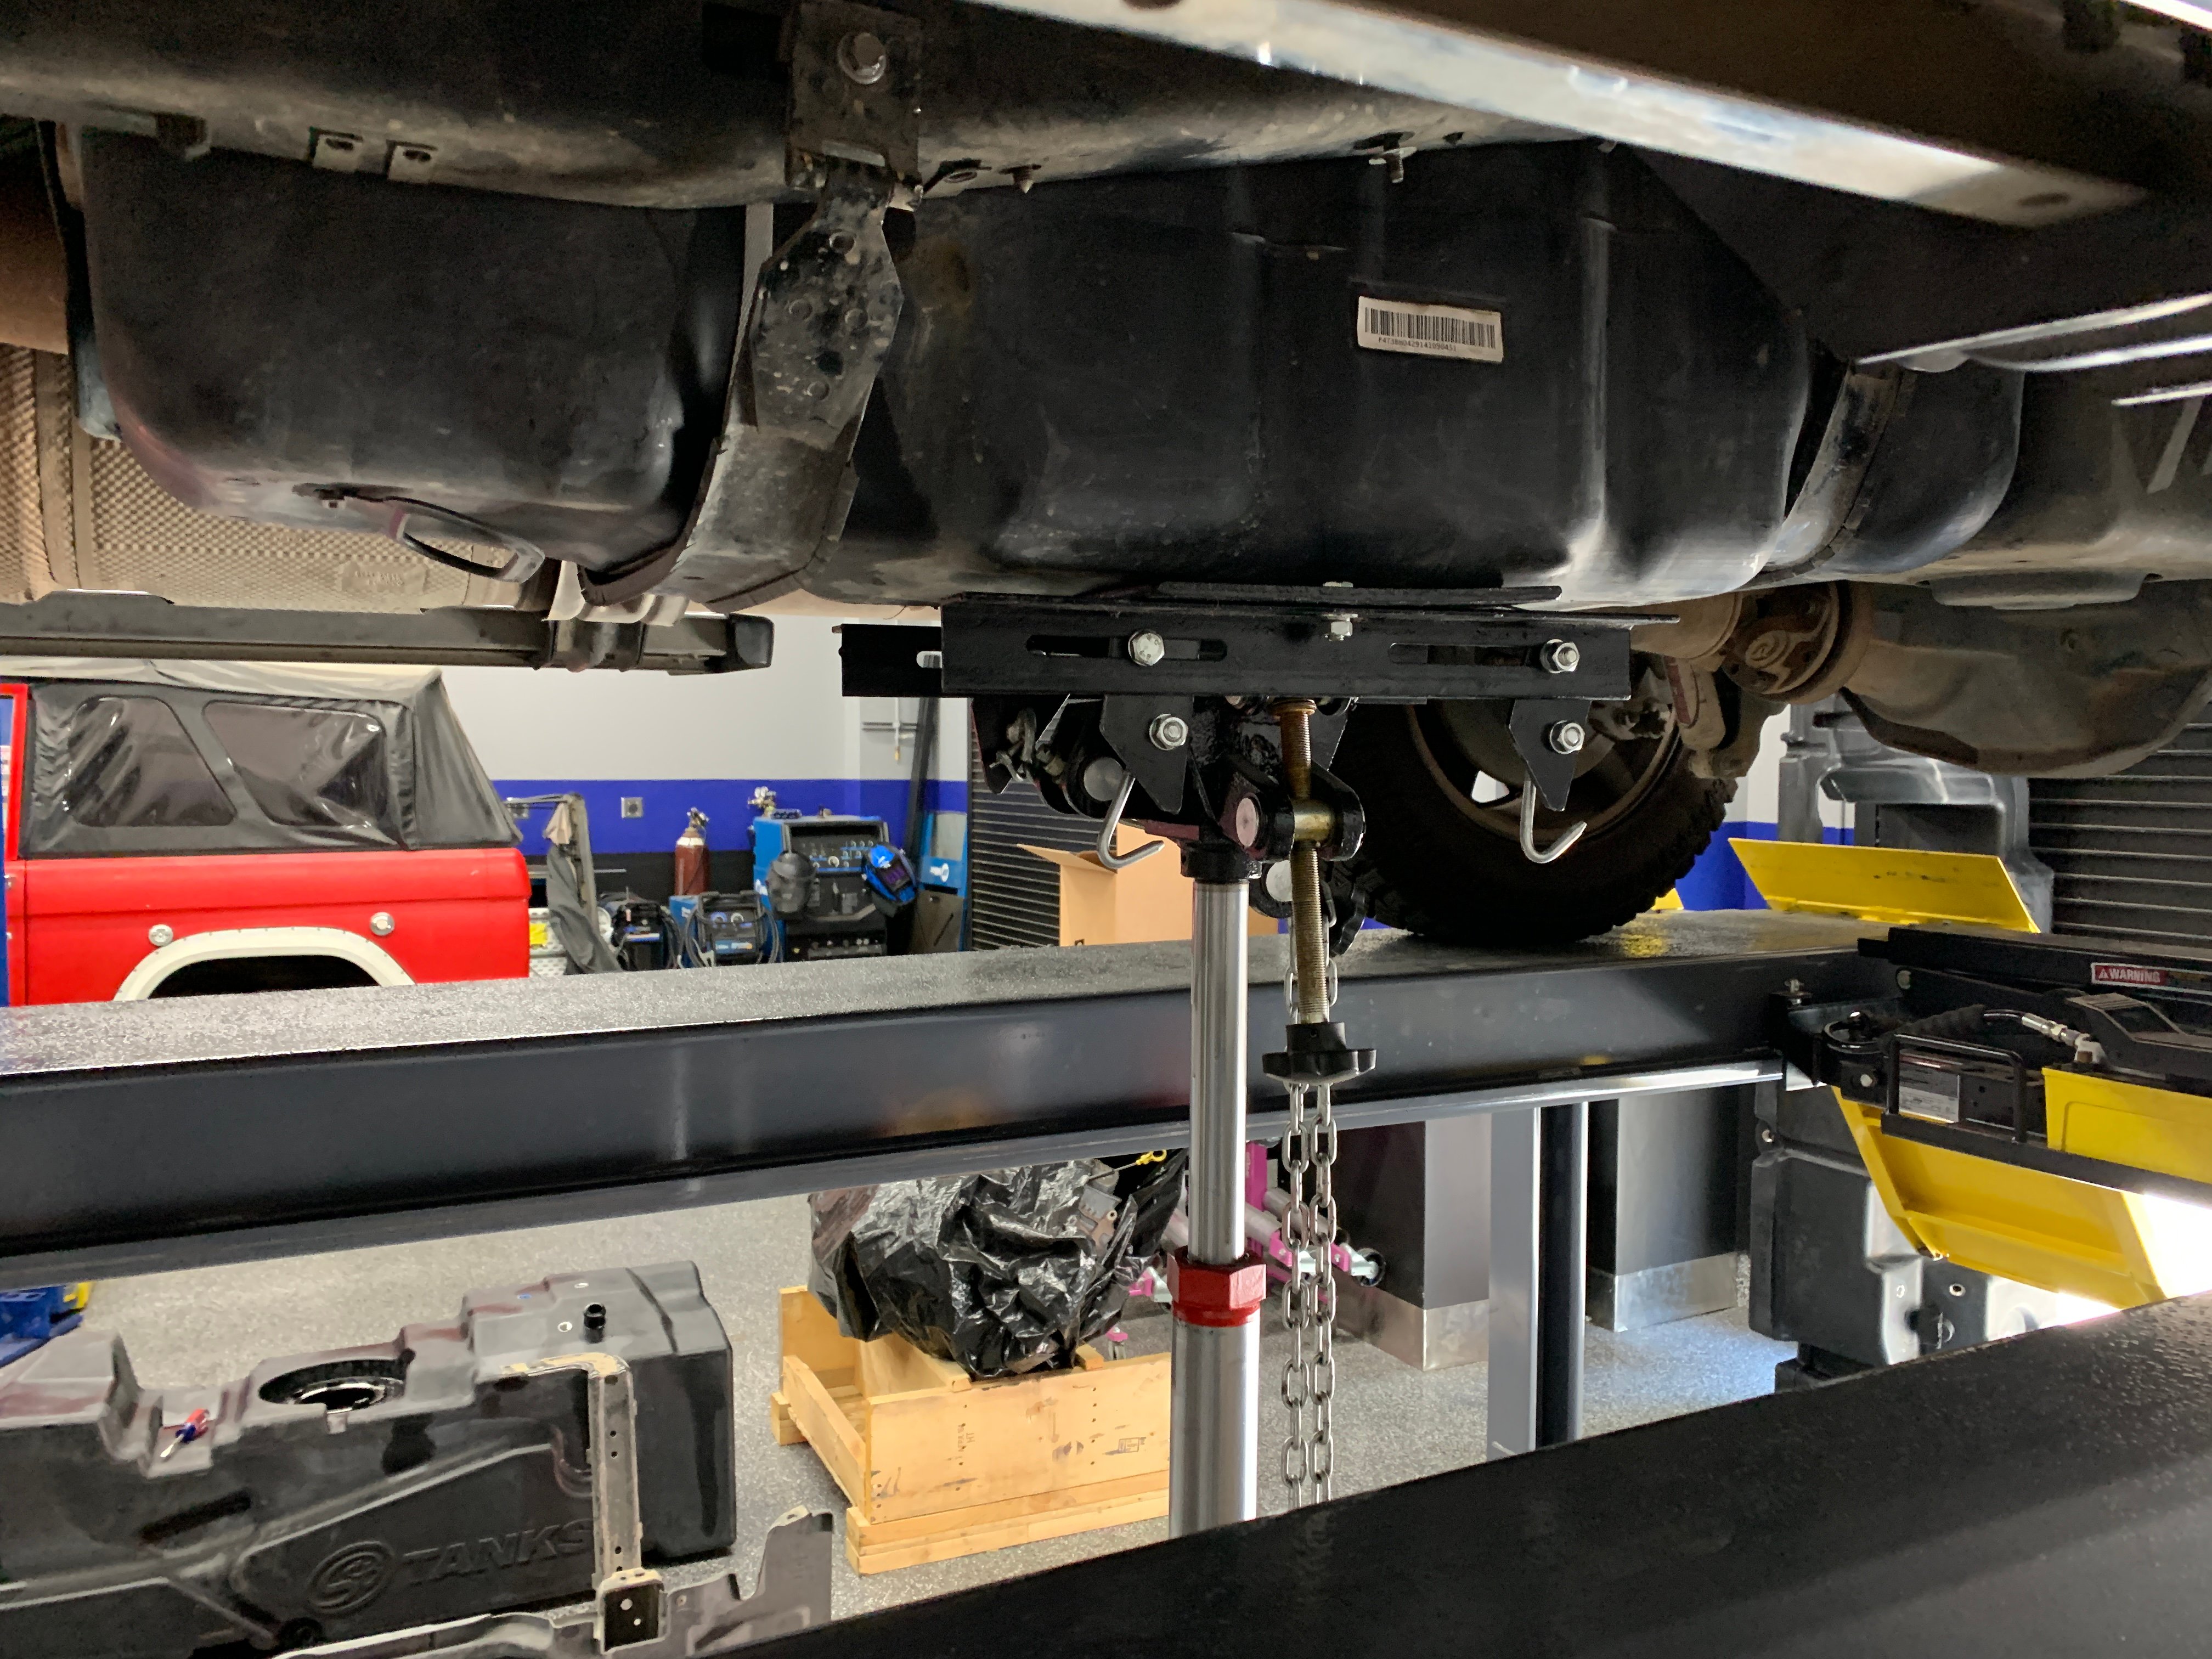
Center the hydraulic jack underneath the fuel tank and raise until the jack contacts the tank. Caution: Support the tank properly as remaining fuel can slosh and cause the tank to shift.
- Lift Install: Hydraulic Jack
- Floor Install: Floor jack with added support to properly hold tank
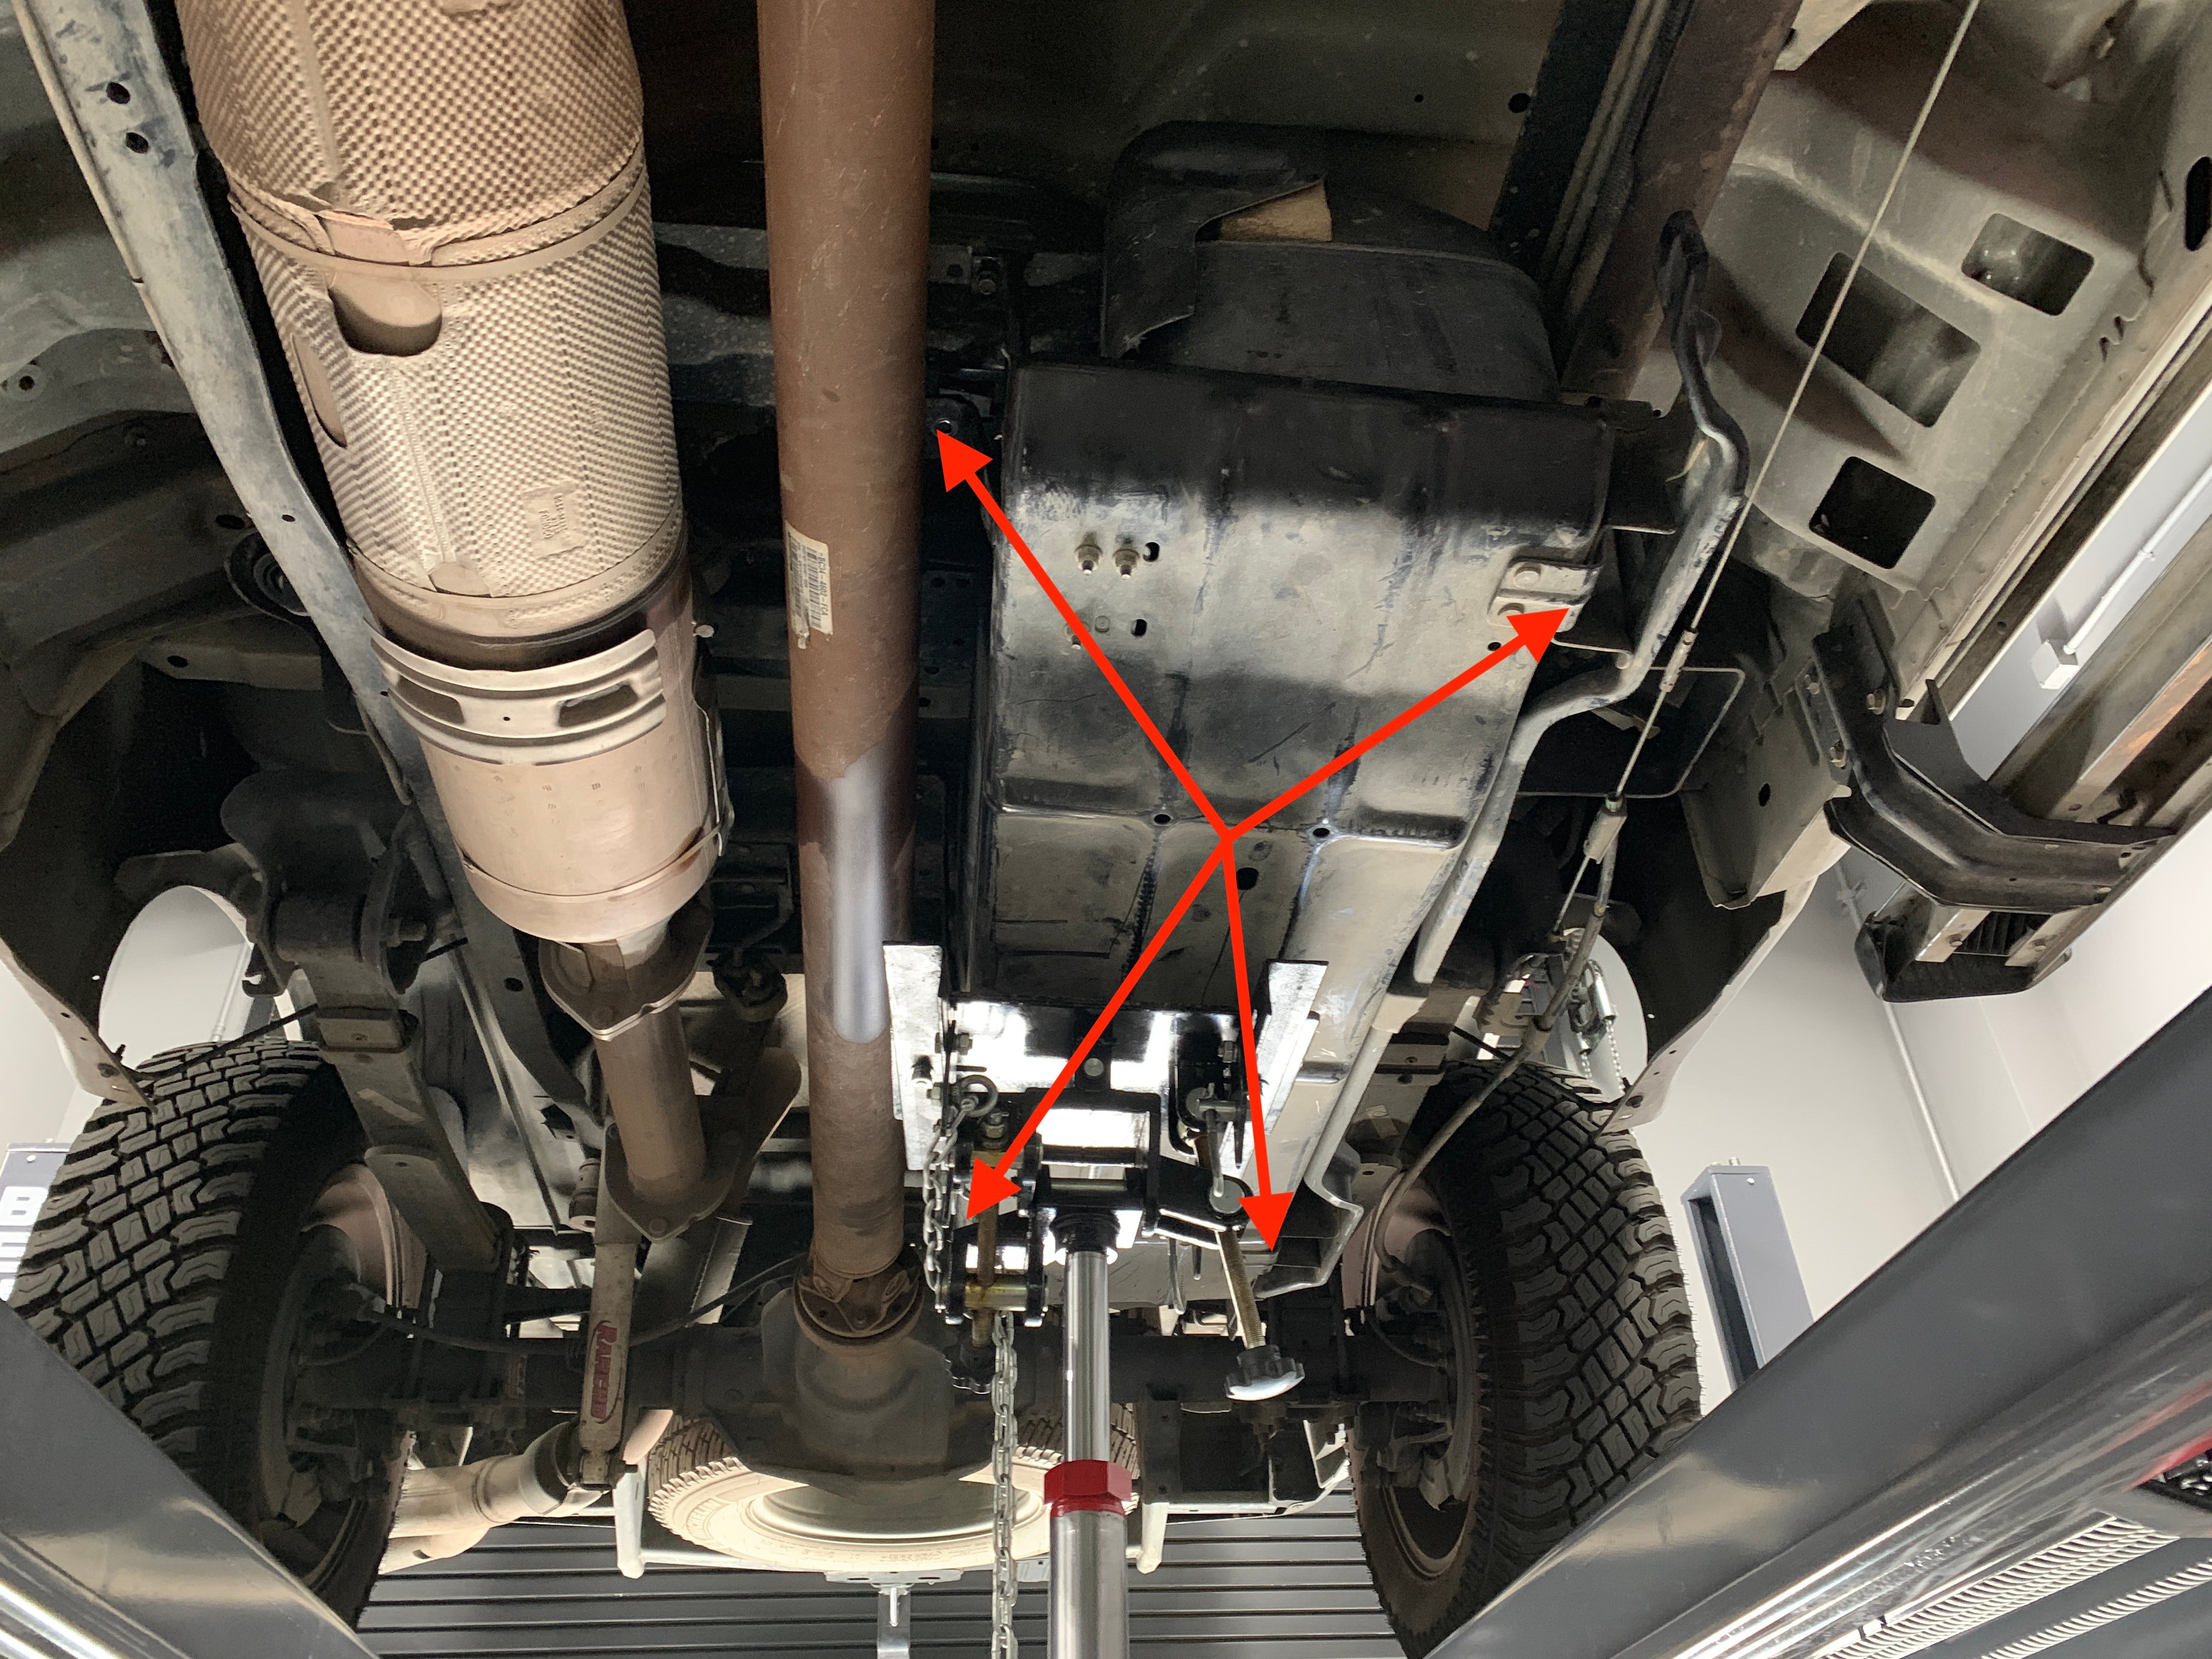
Remove the 4 bolts that secure the fuel tank straps.
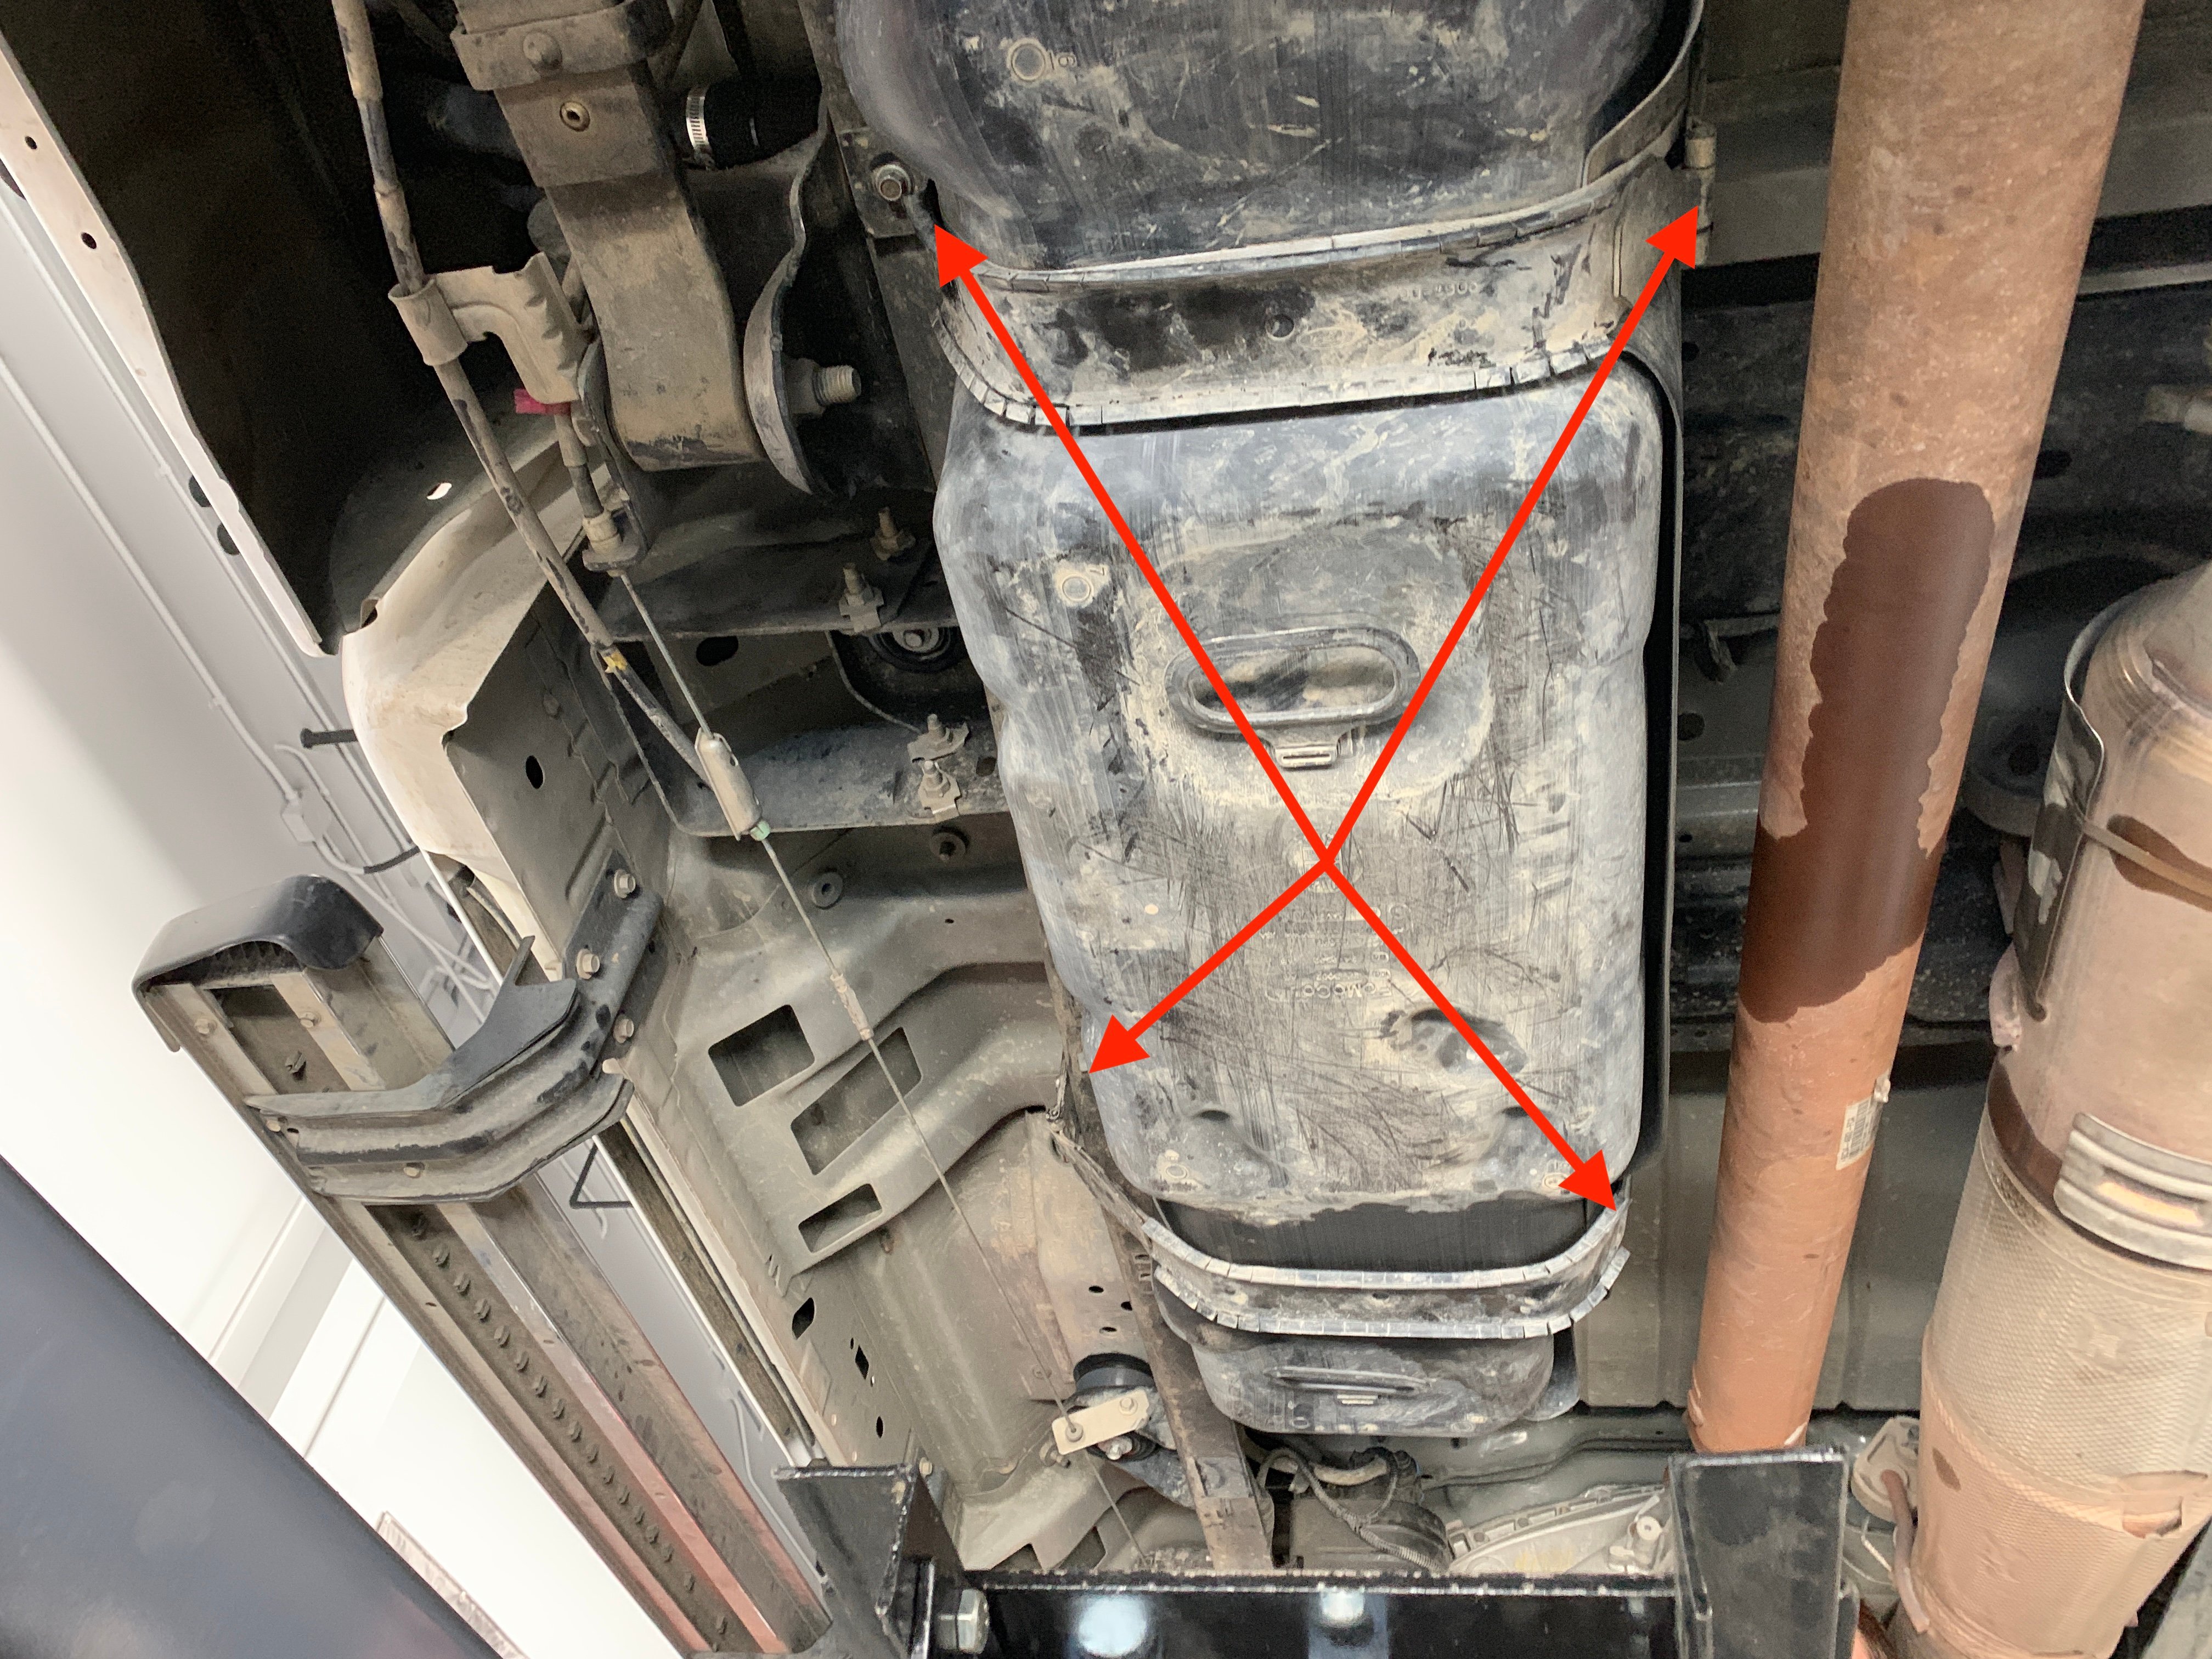
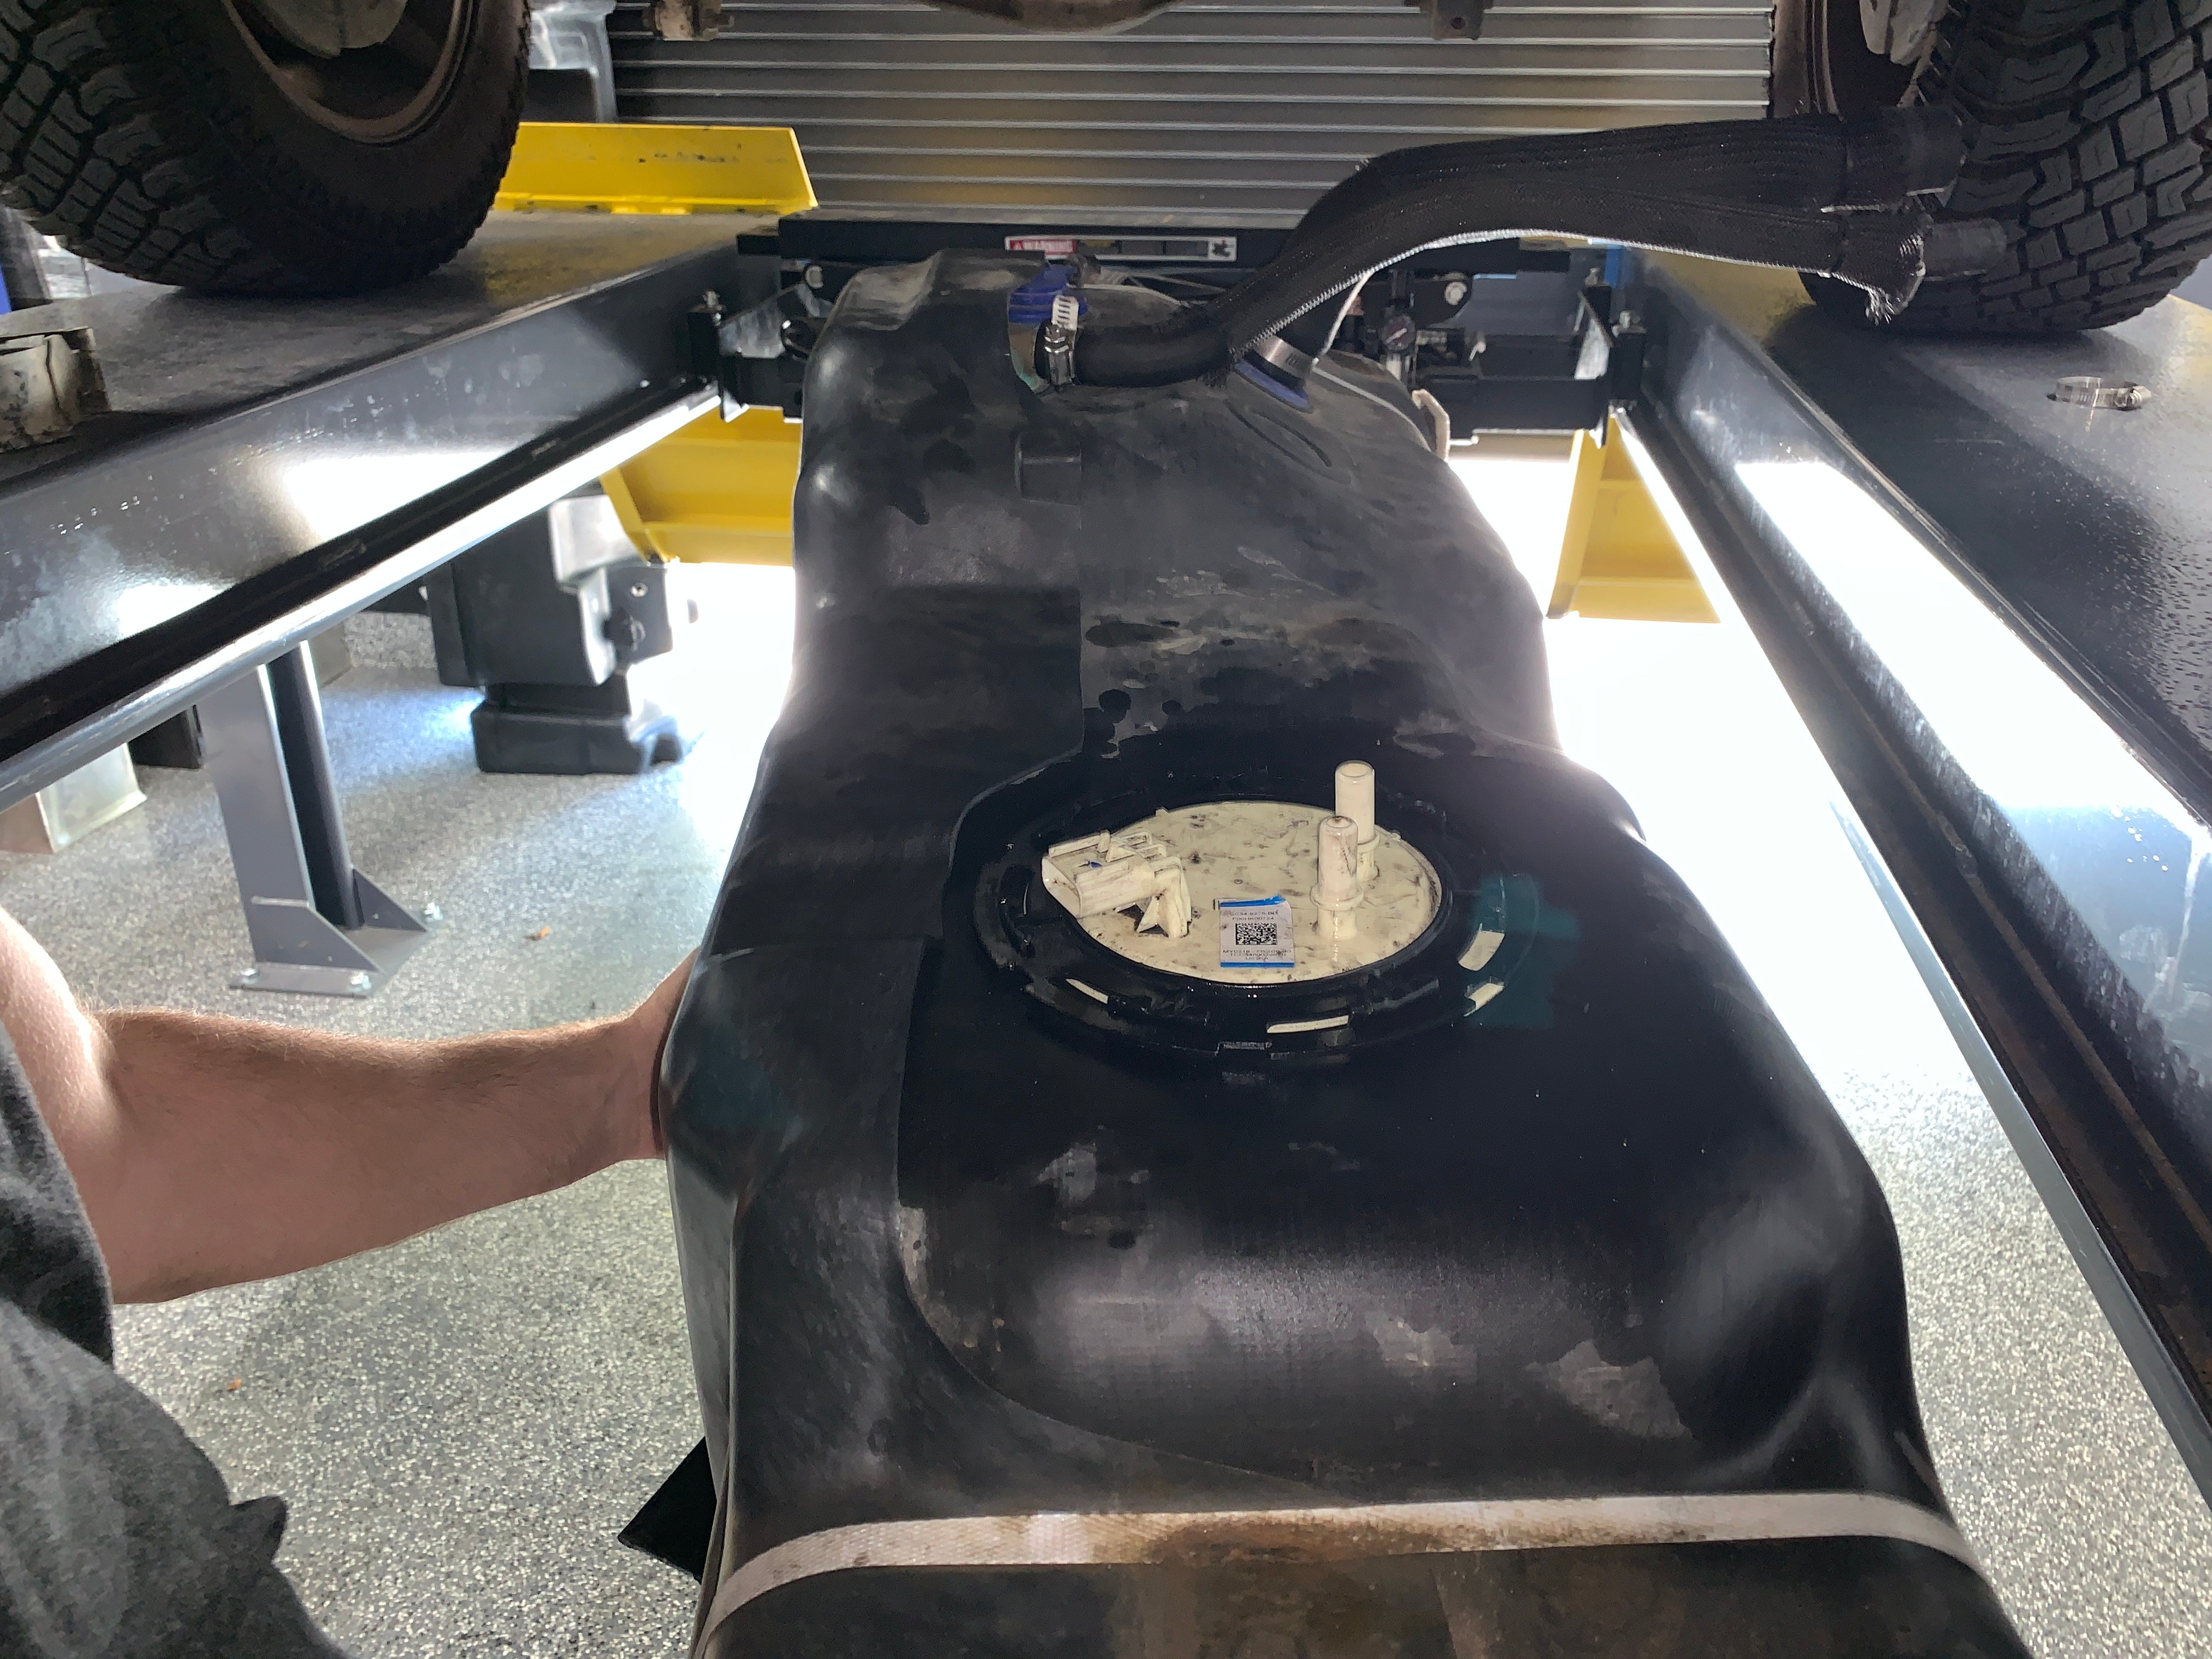
Lower the tank approximately 6" or until you can reach the electrical connector, feed line, and return line on the fuel sending unit.
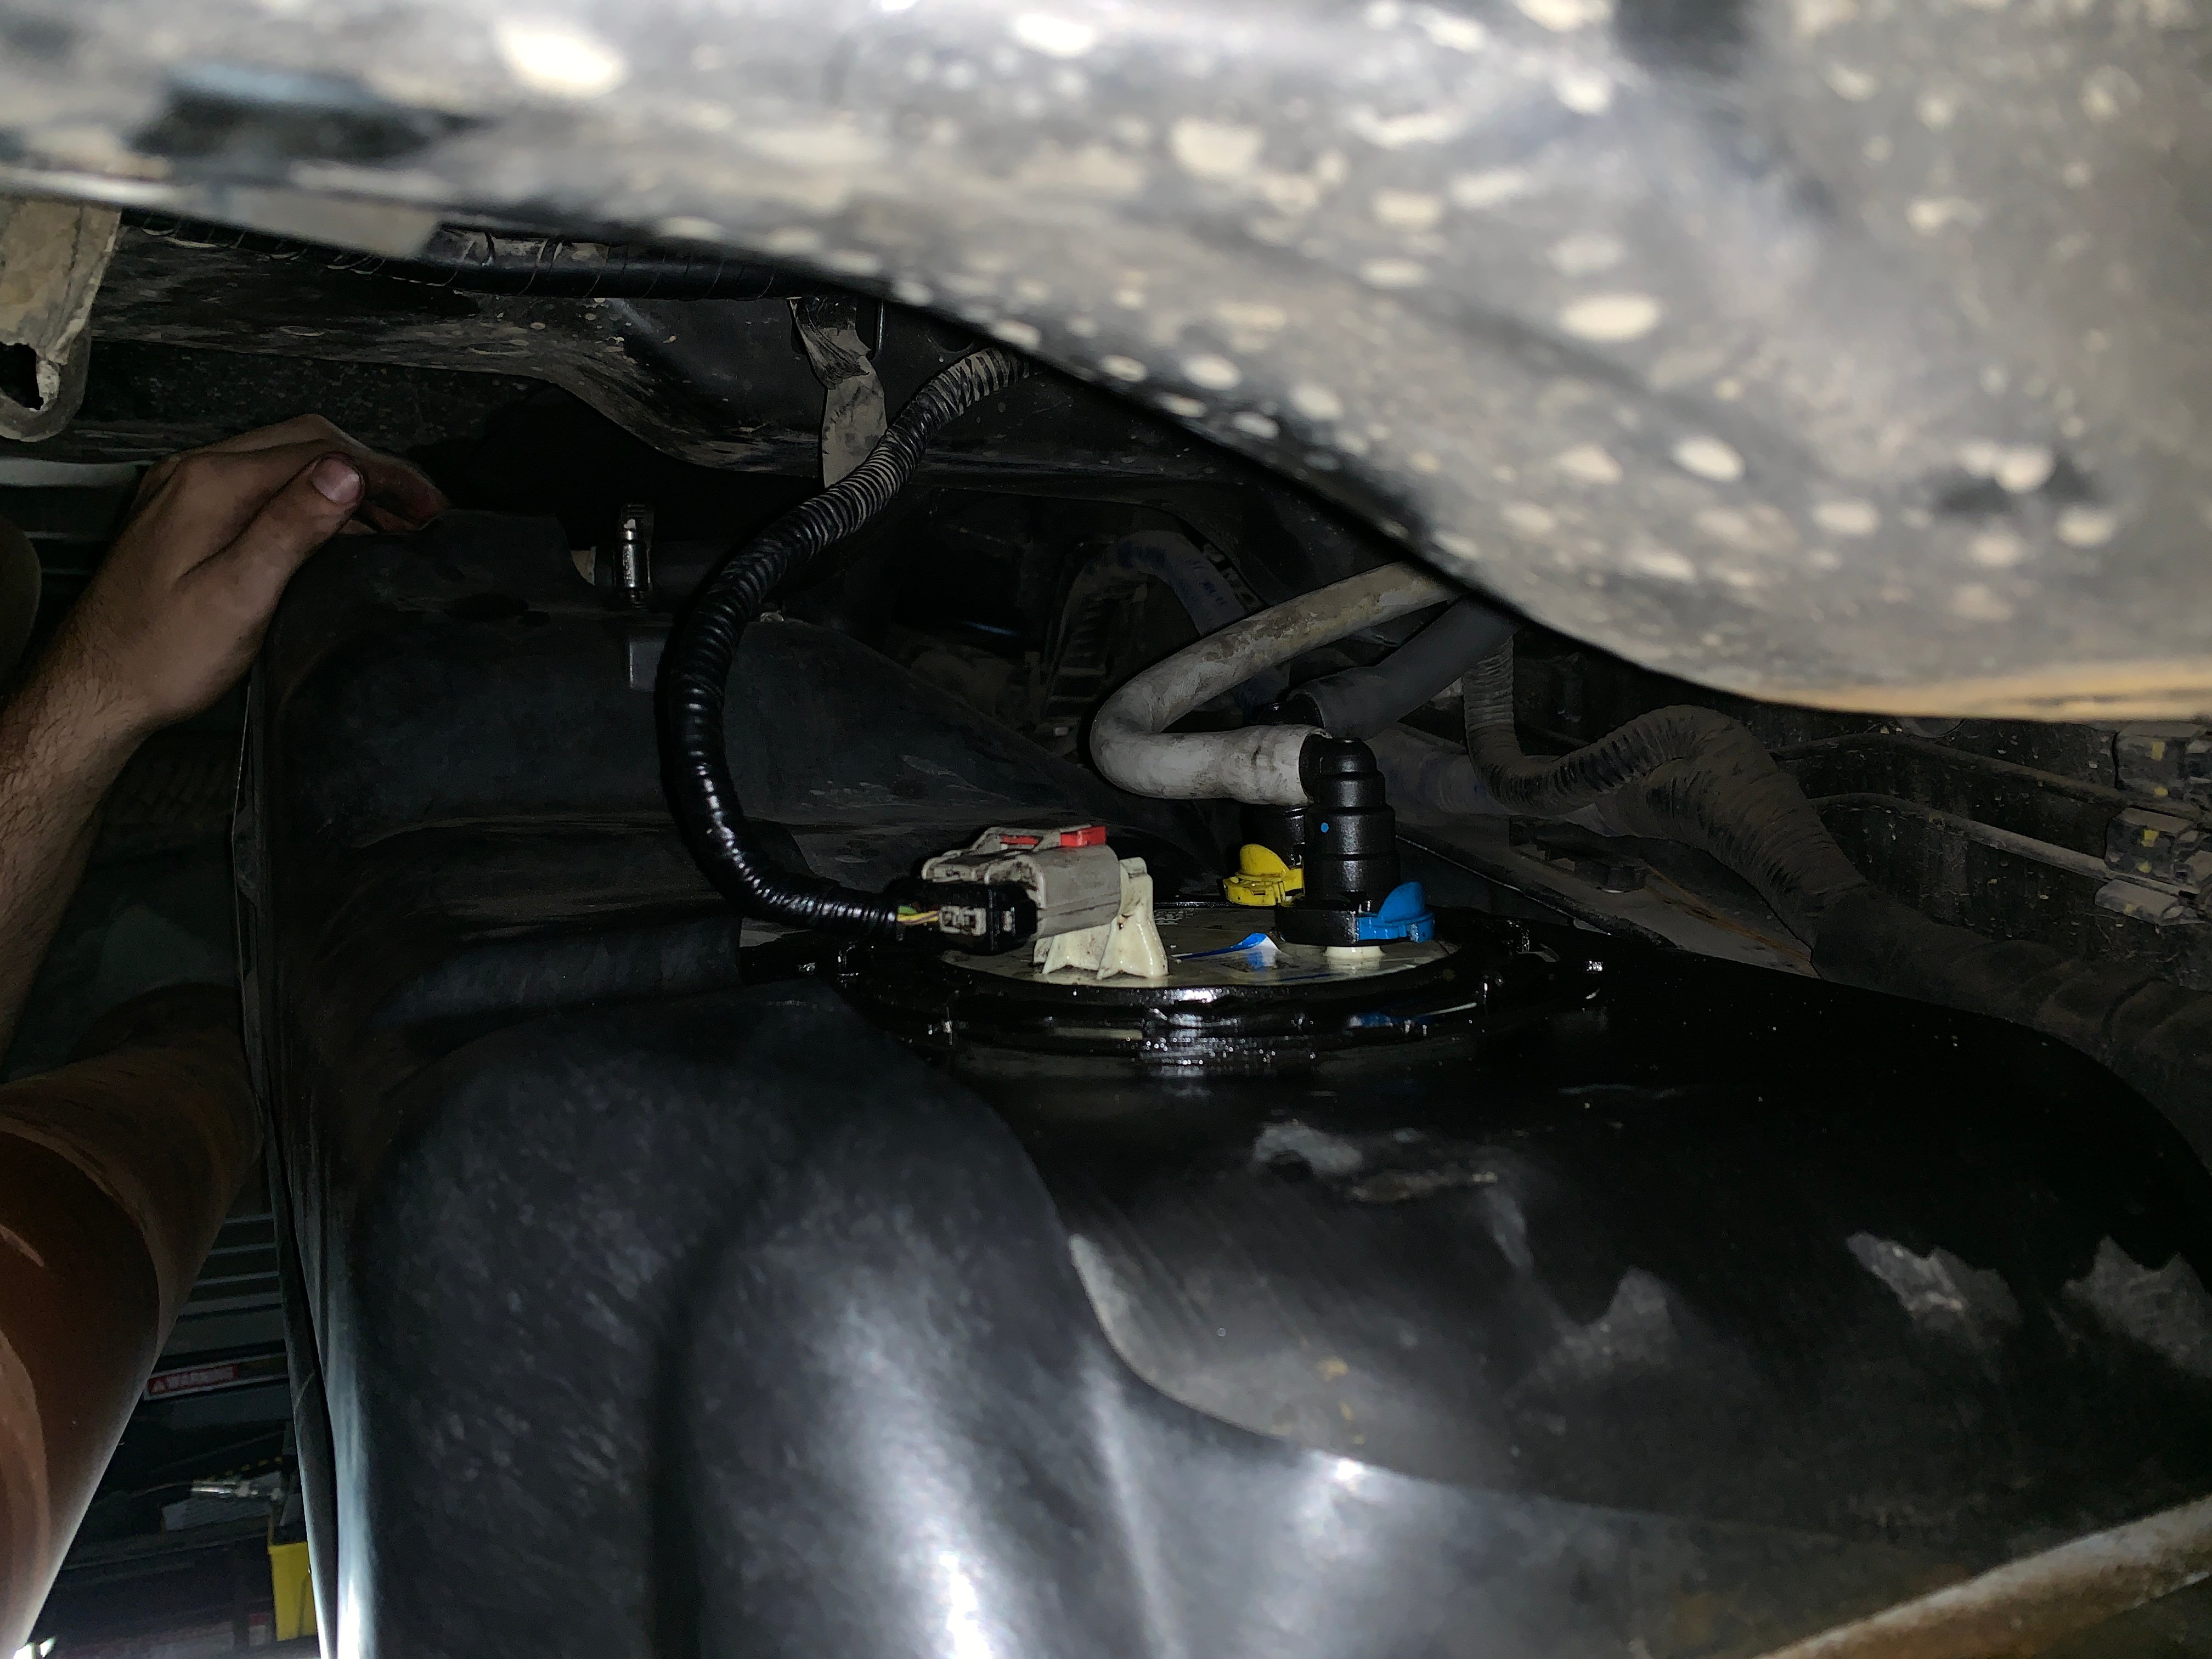
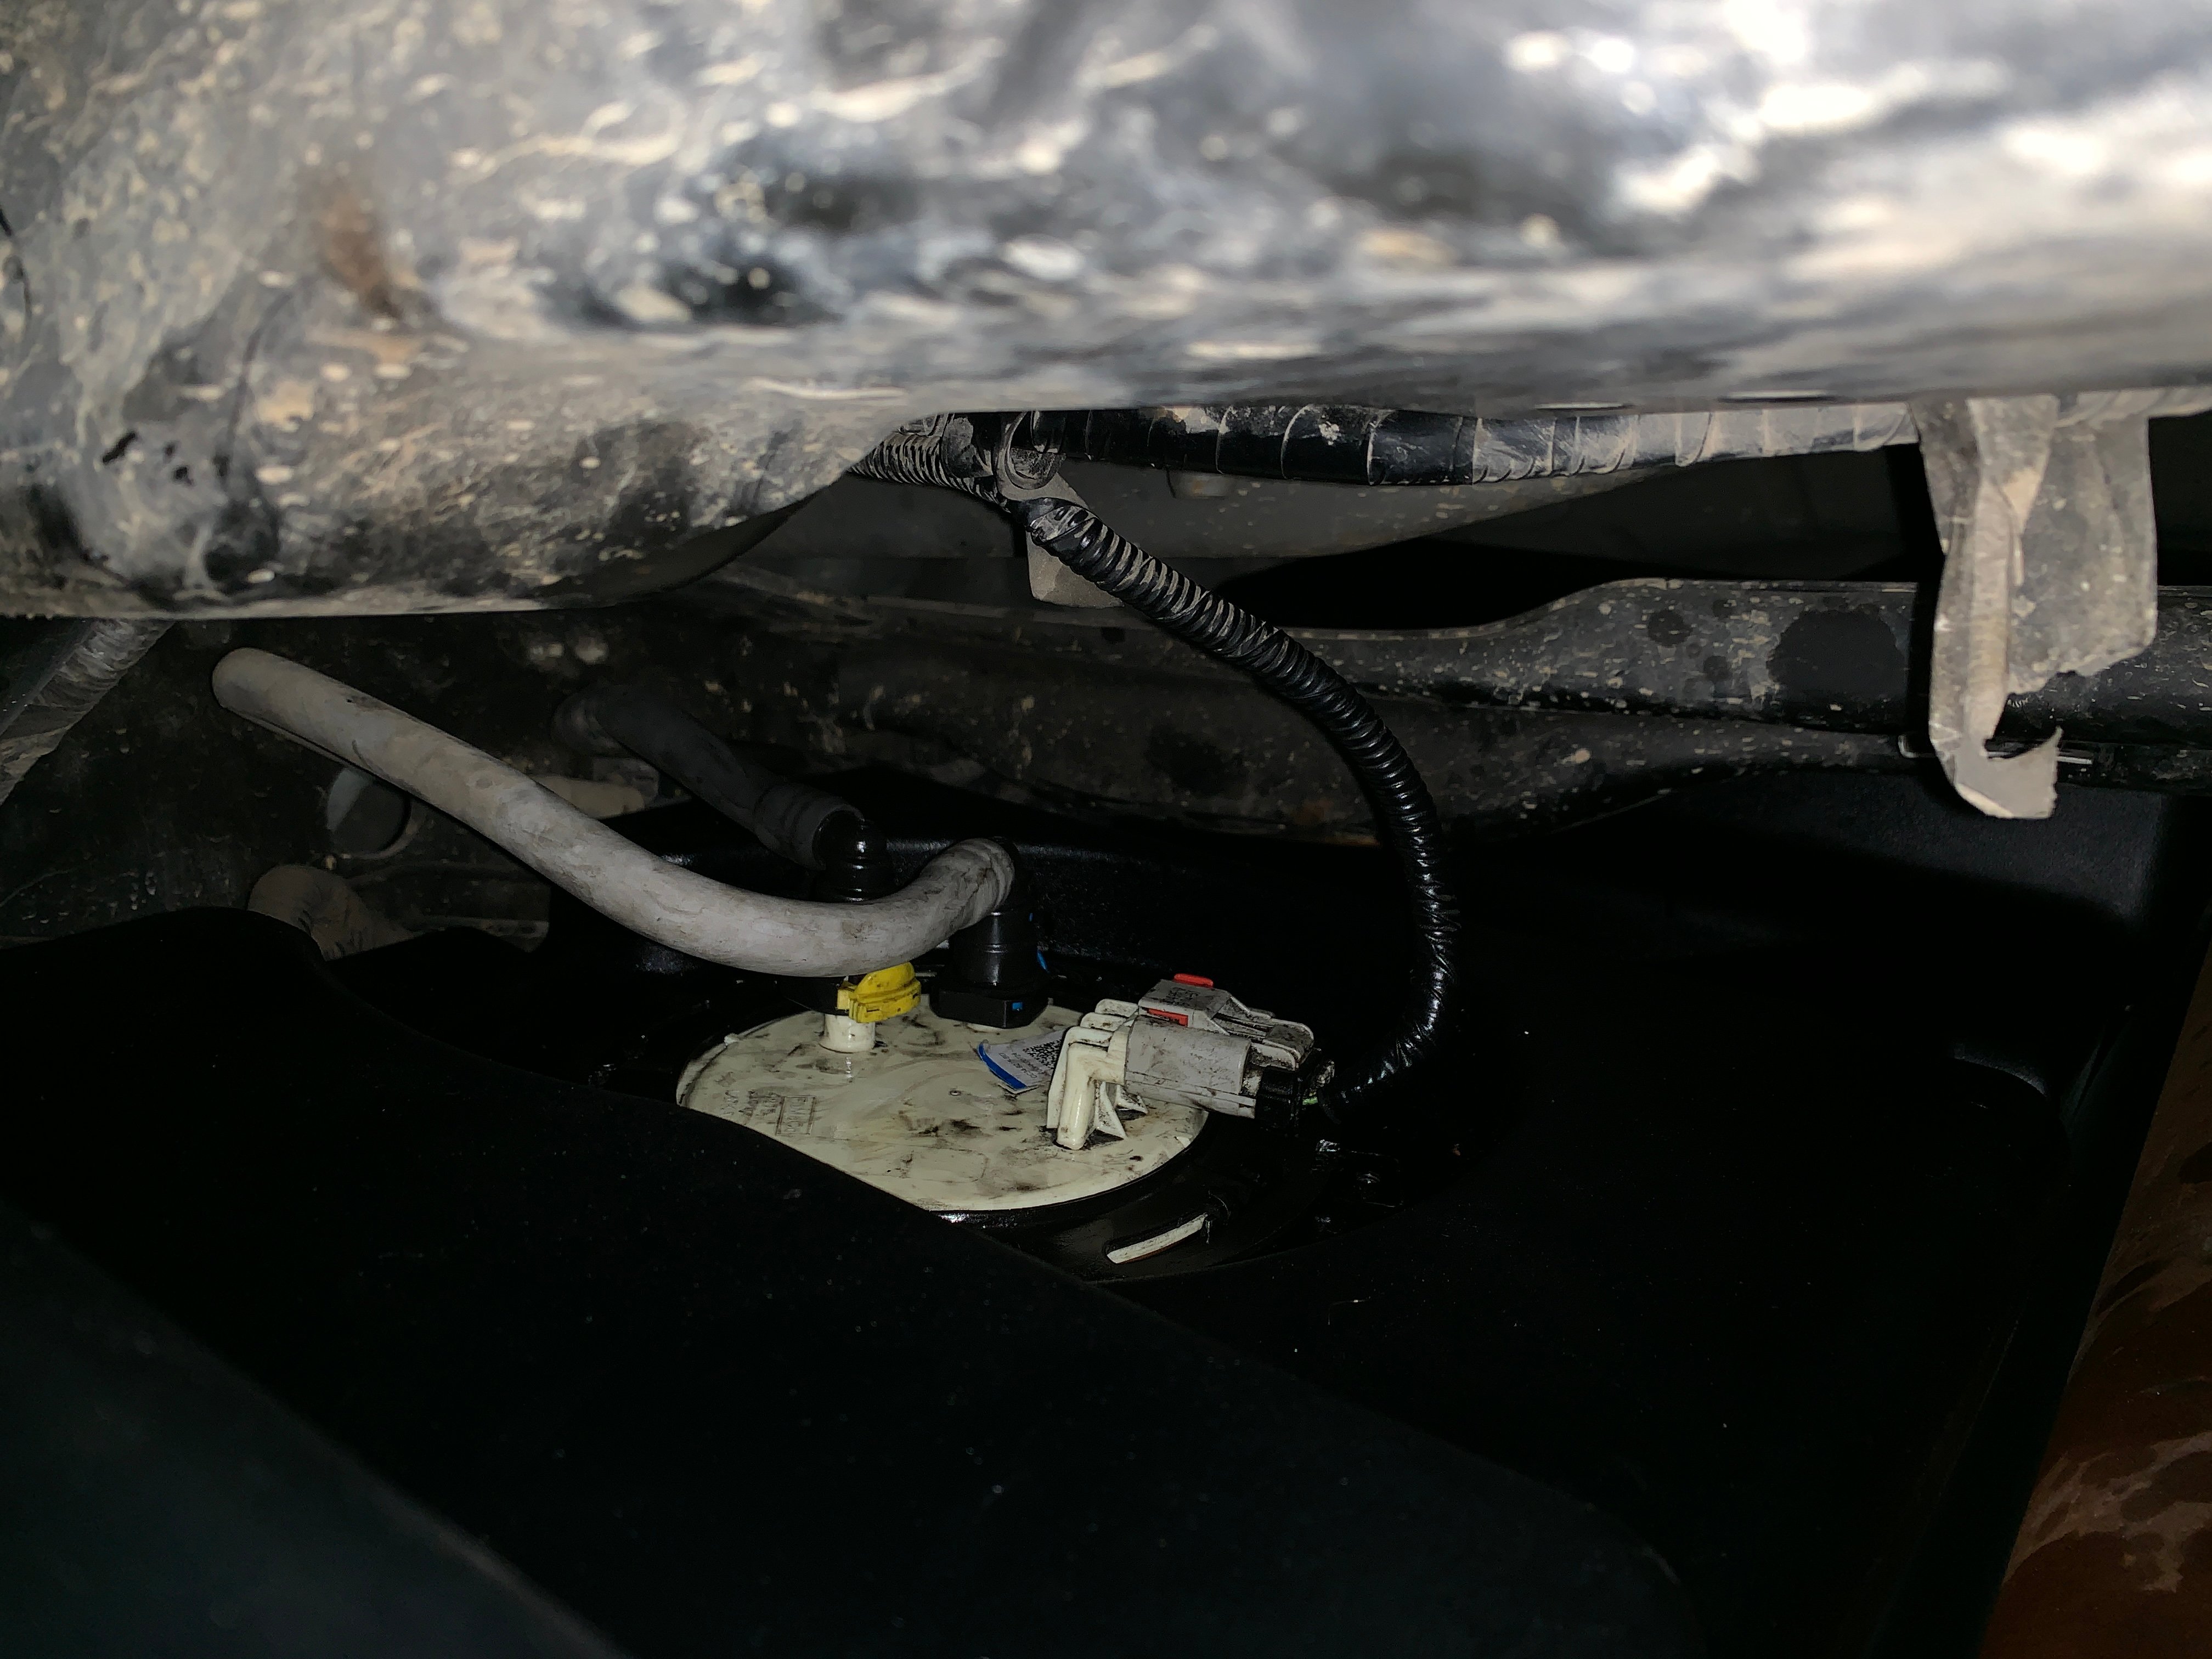
Disconnect the electrical connector. Slide out the red tab with a pick or flathead screwdriver. Depress the tab on the electrical connector and pull out.
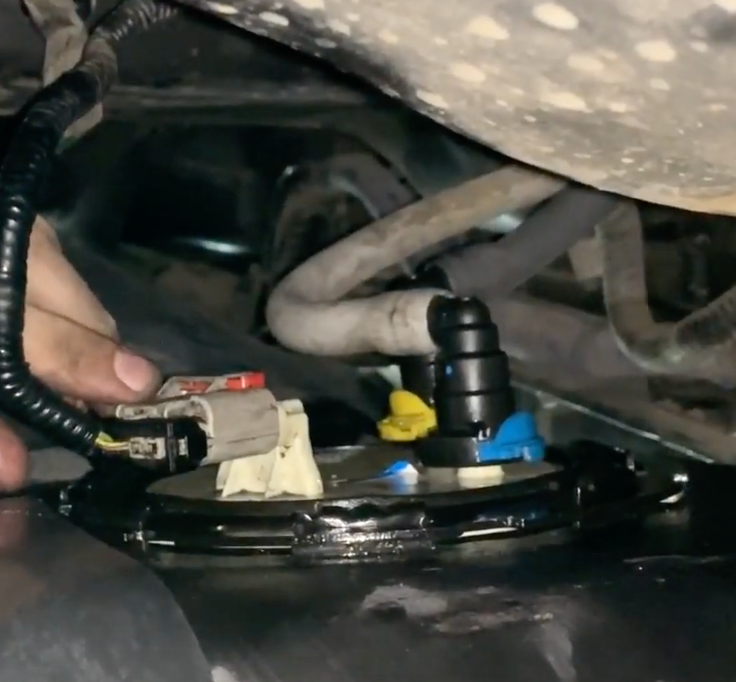
Disconnect the fuel feed & return lines. The base of each connector has a lock. Pull the lock away from the center of the connector, depress the yellow or blue tab, press down and then pull up on the connector. Be patient with this step as these connectors are fragile and can break.
Be sure the fill and vent hoses are detached and lower the tank down and out of the from the vehicle.
Carefully check the inside of your S&B Tank to make sure there is no foreign debris.
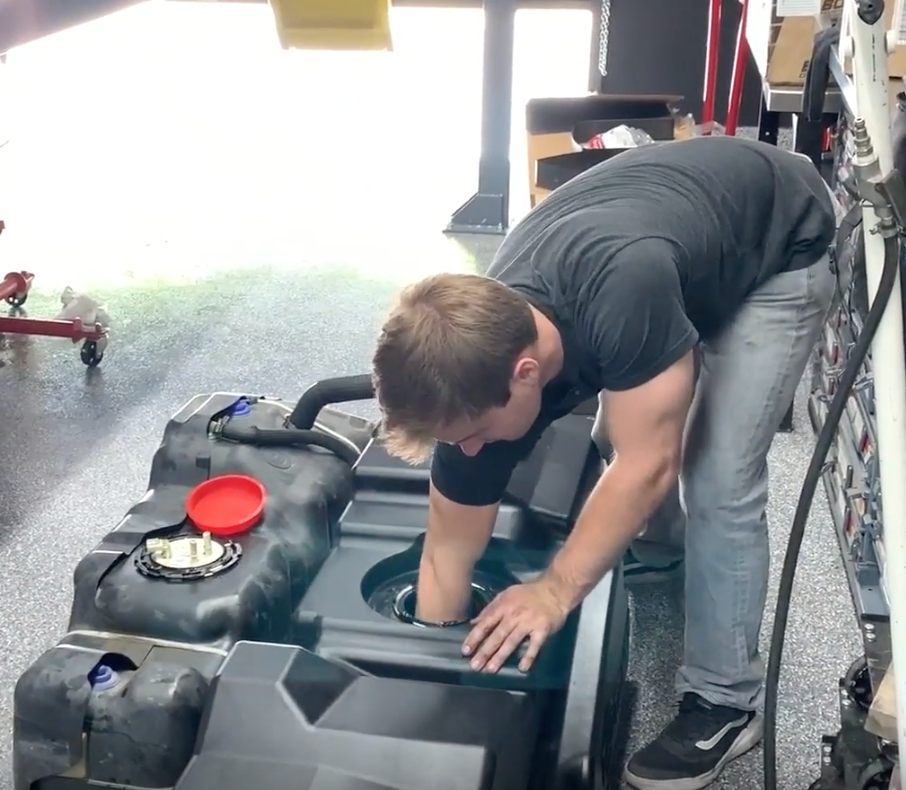
Remove the OEM sending unit from the OEM tank. Position the flathead screwdriver in a tab of the locking room and hammer counter clockwise. Remove the locking ring, pull the sending unit out, and pour the fuel from the sending unit bowl into the OEM tank.
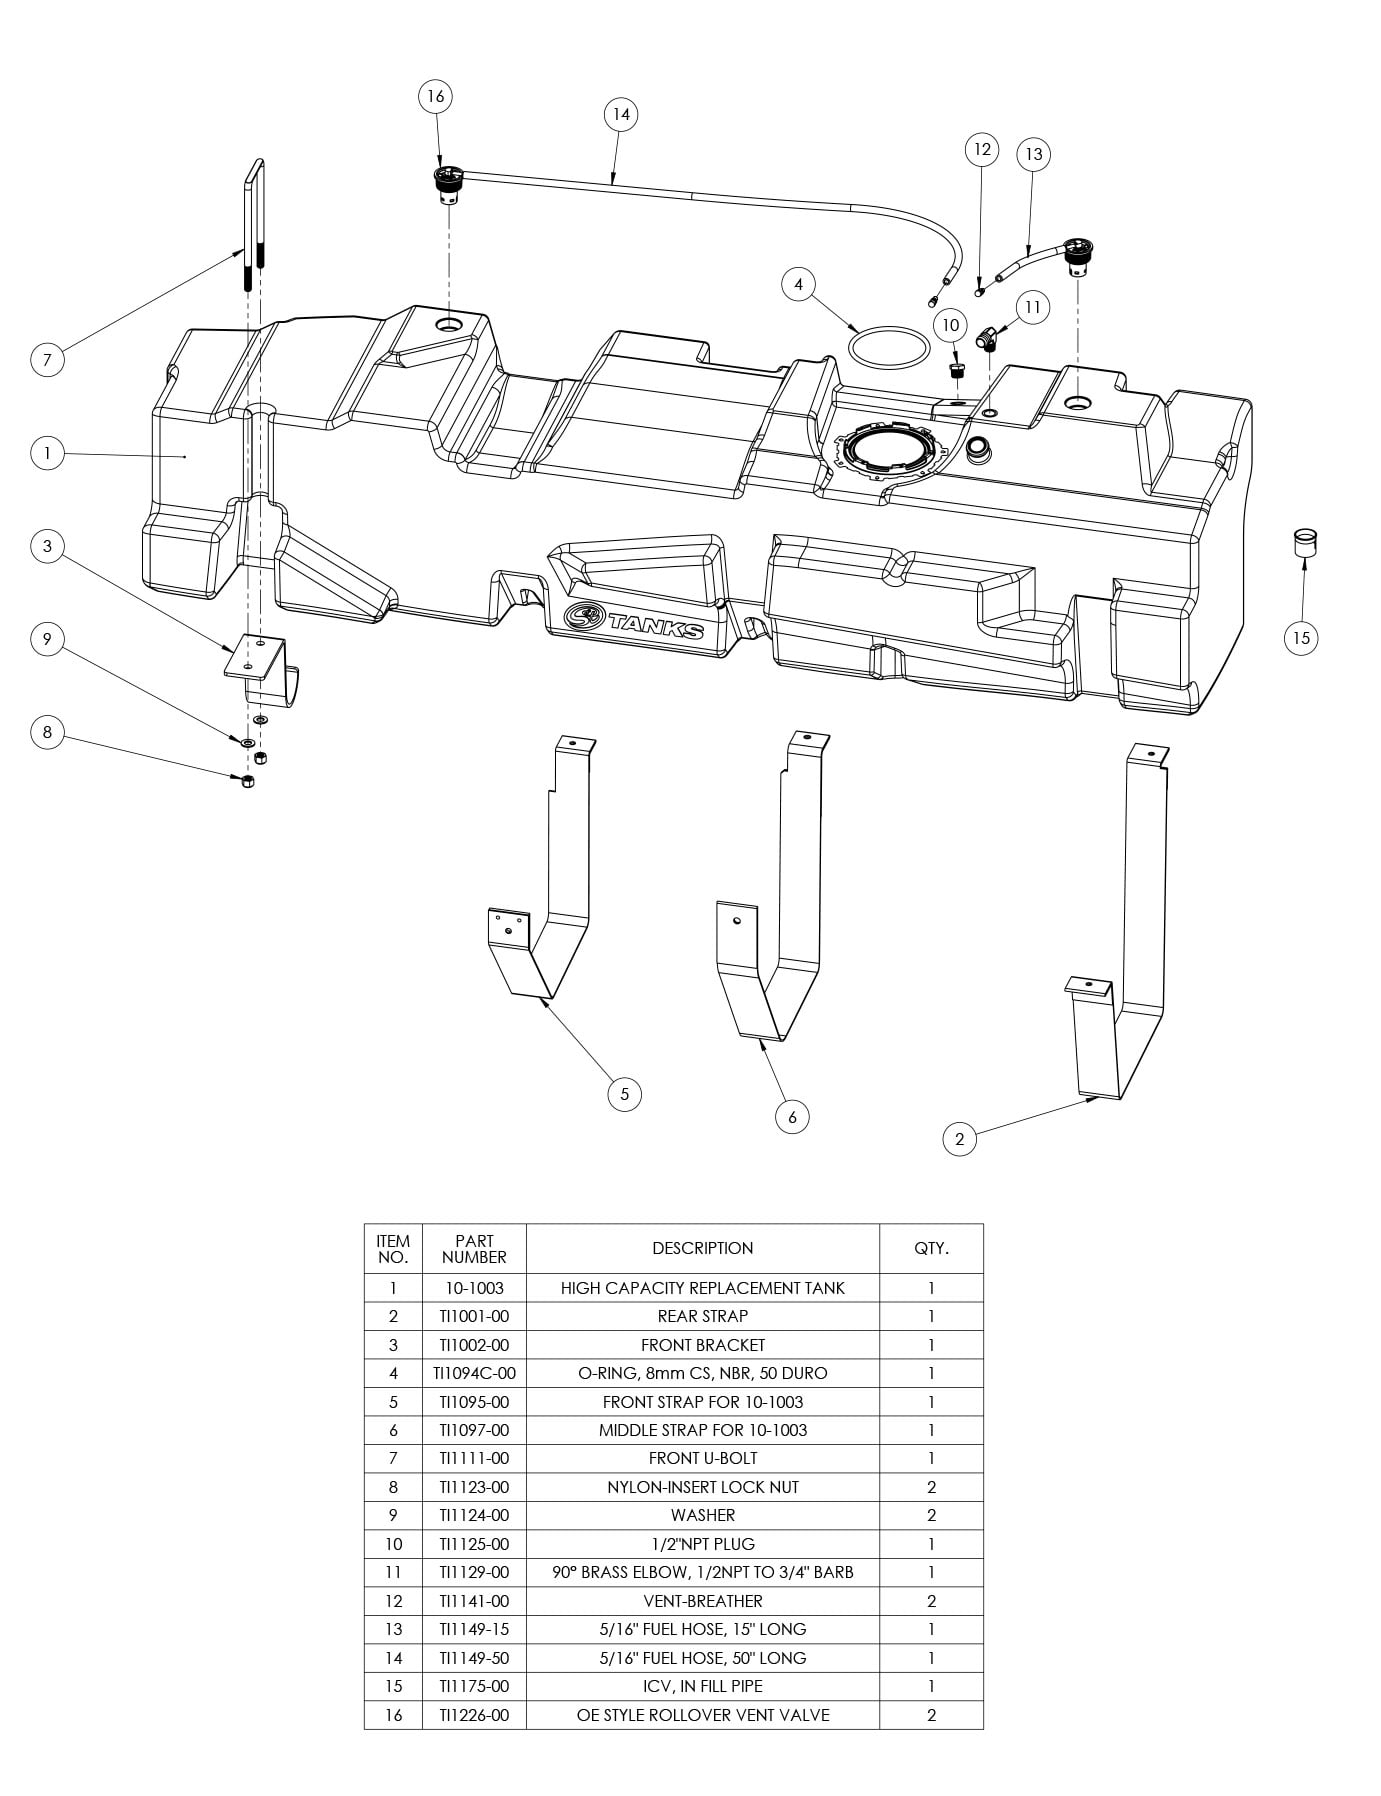
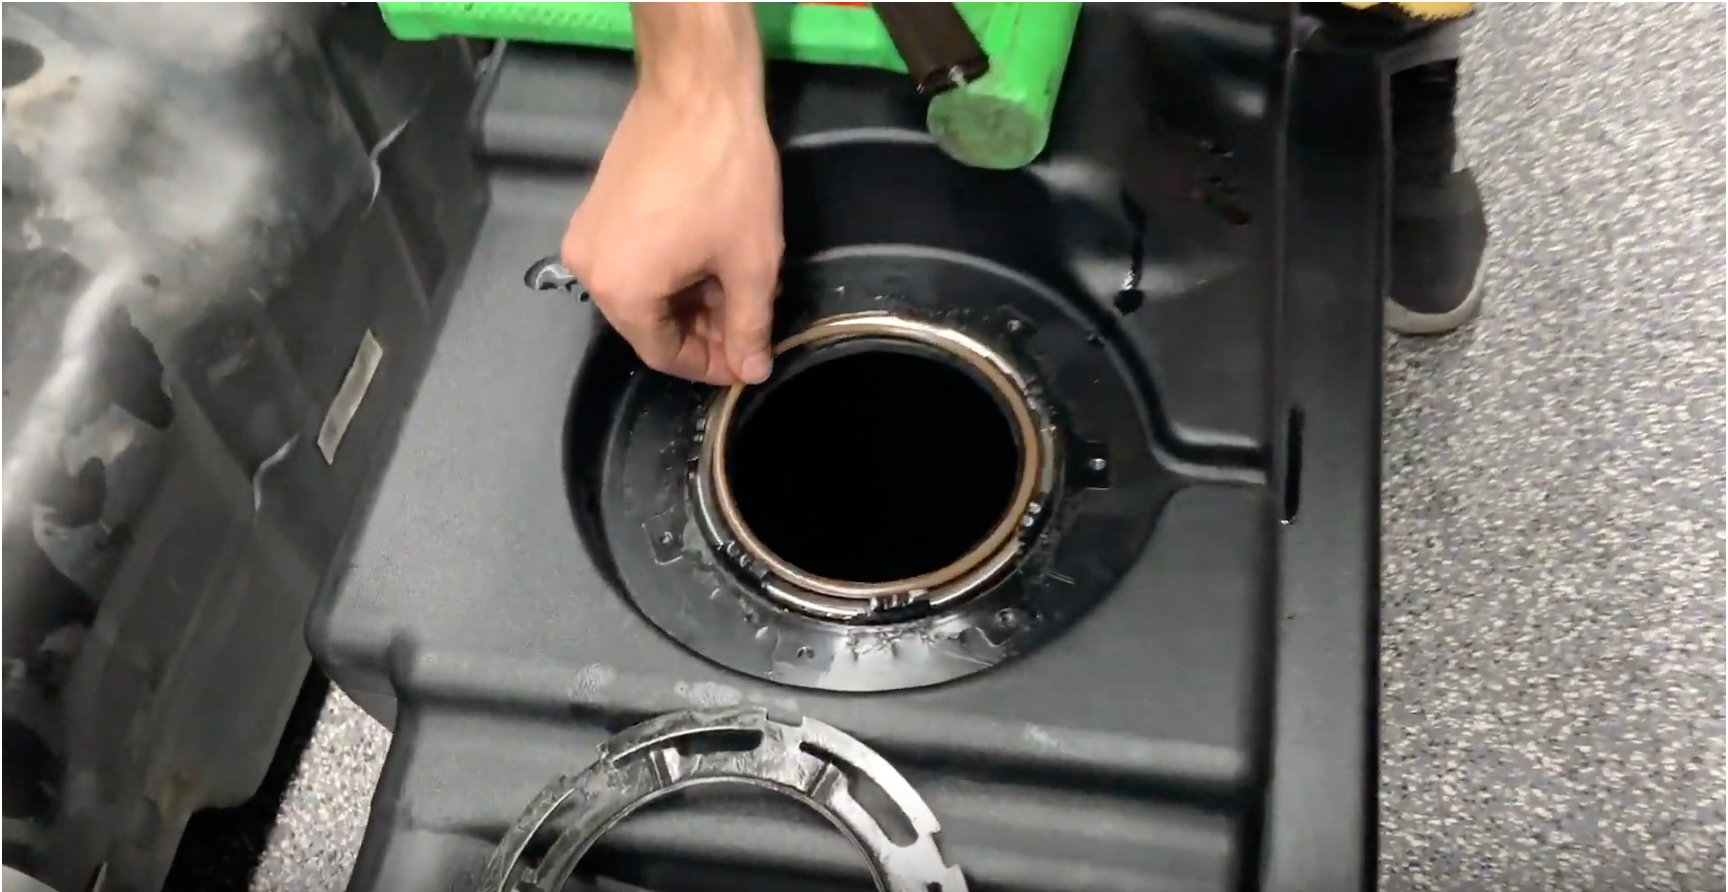
Place the included O-ring into the O-ring groove on the S&B Tank.
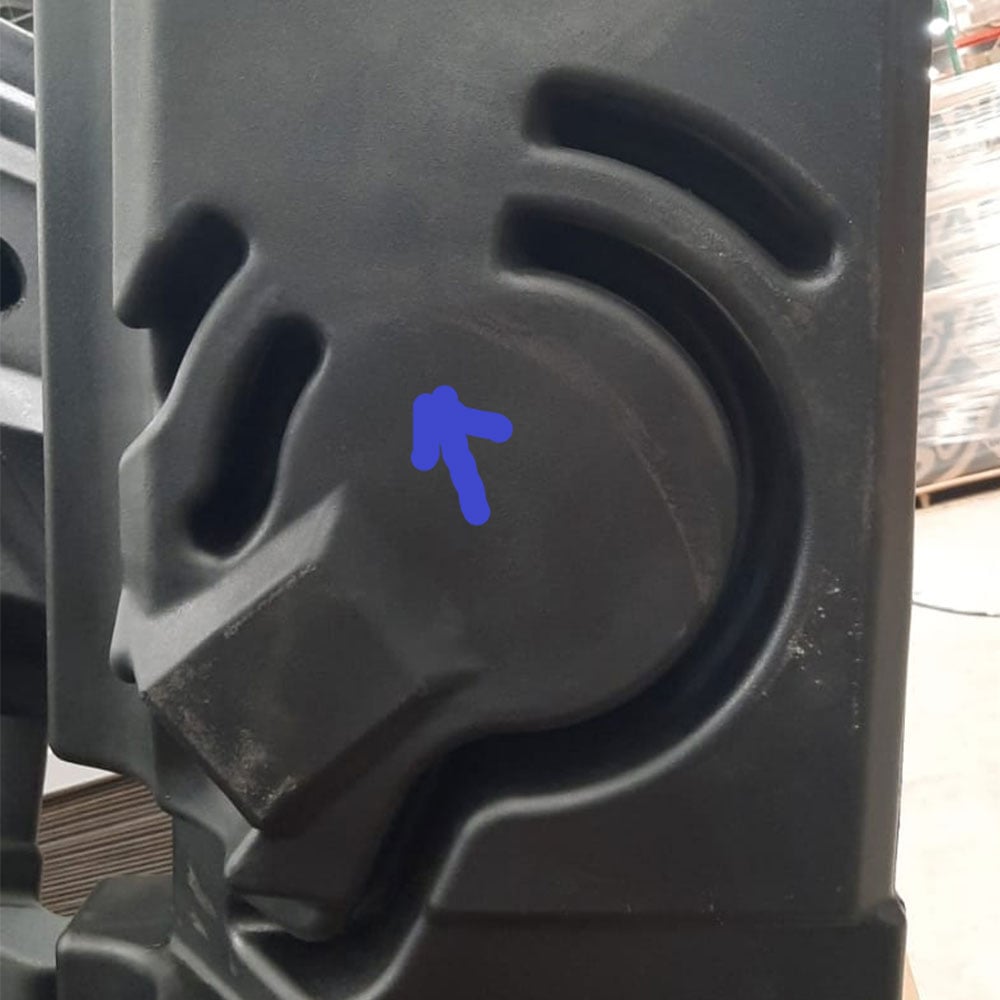
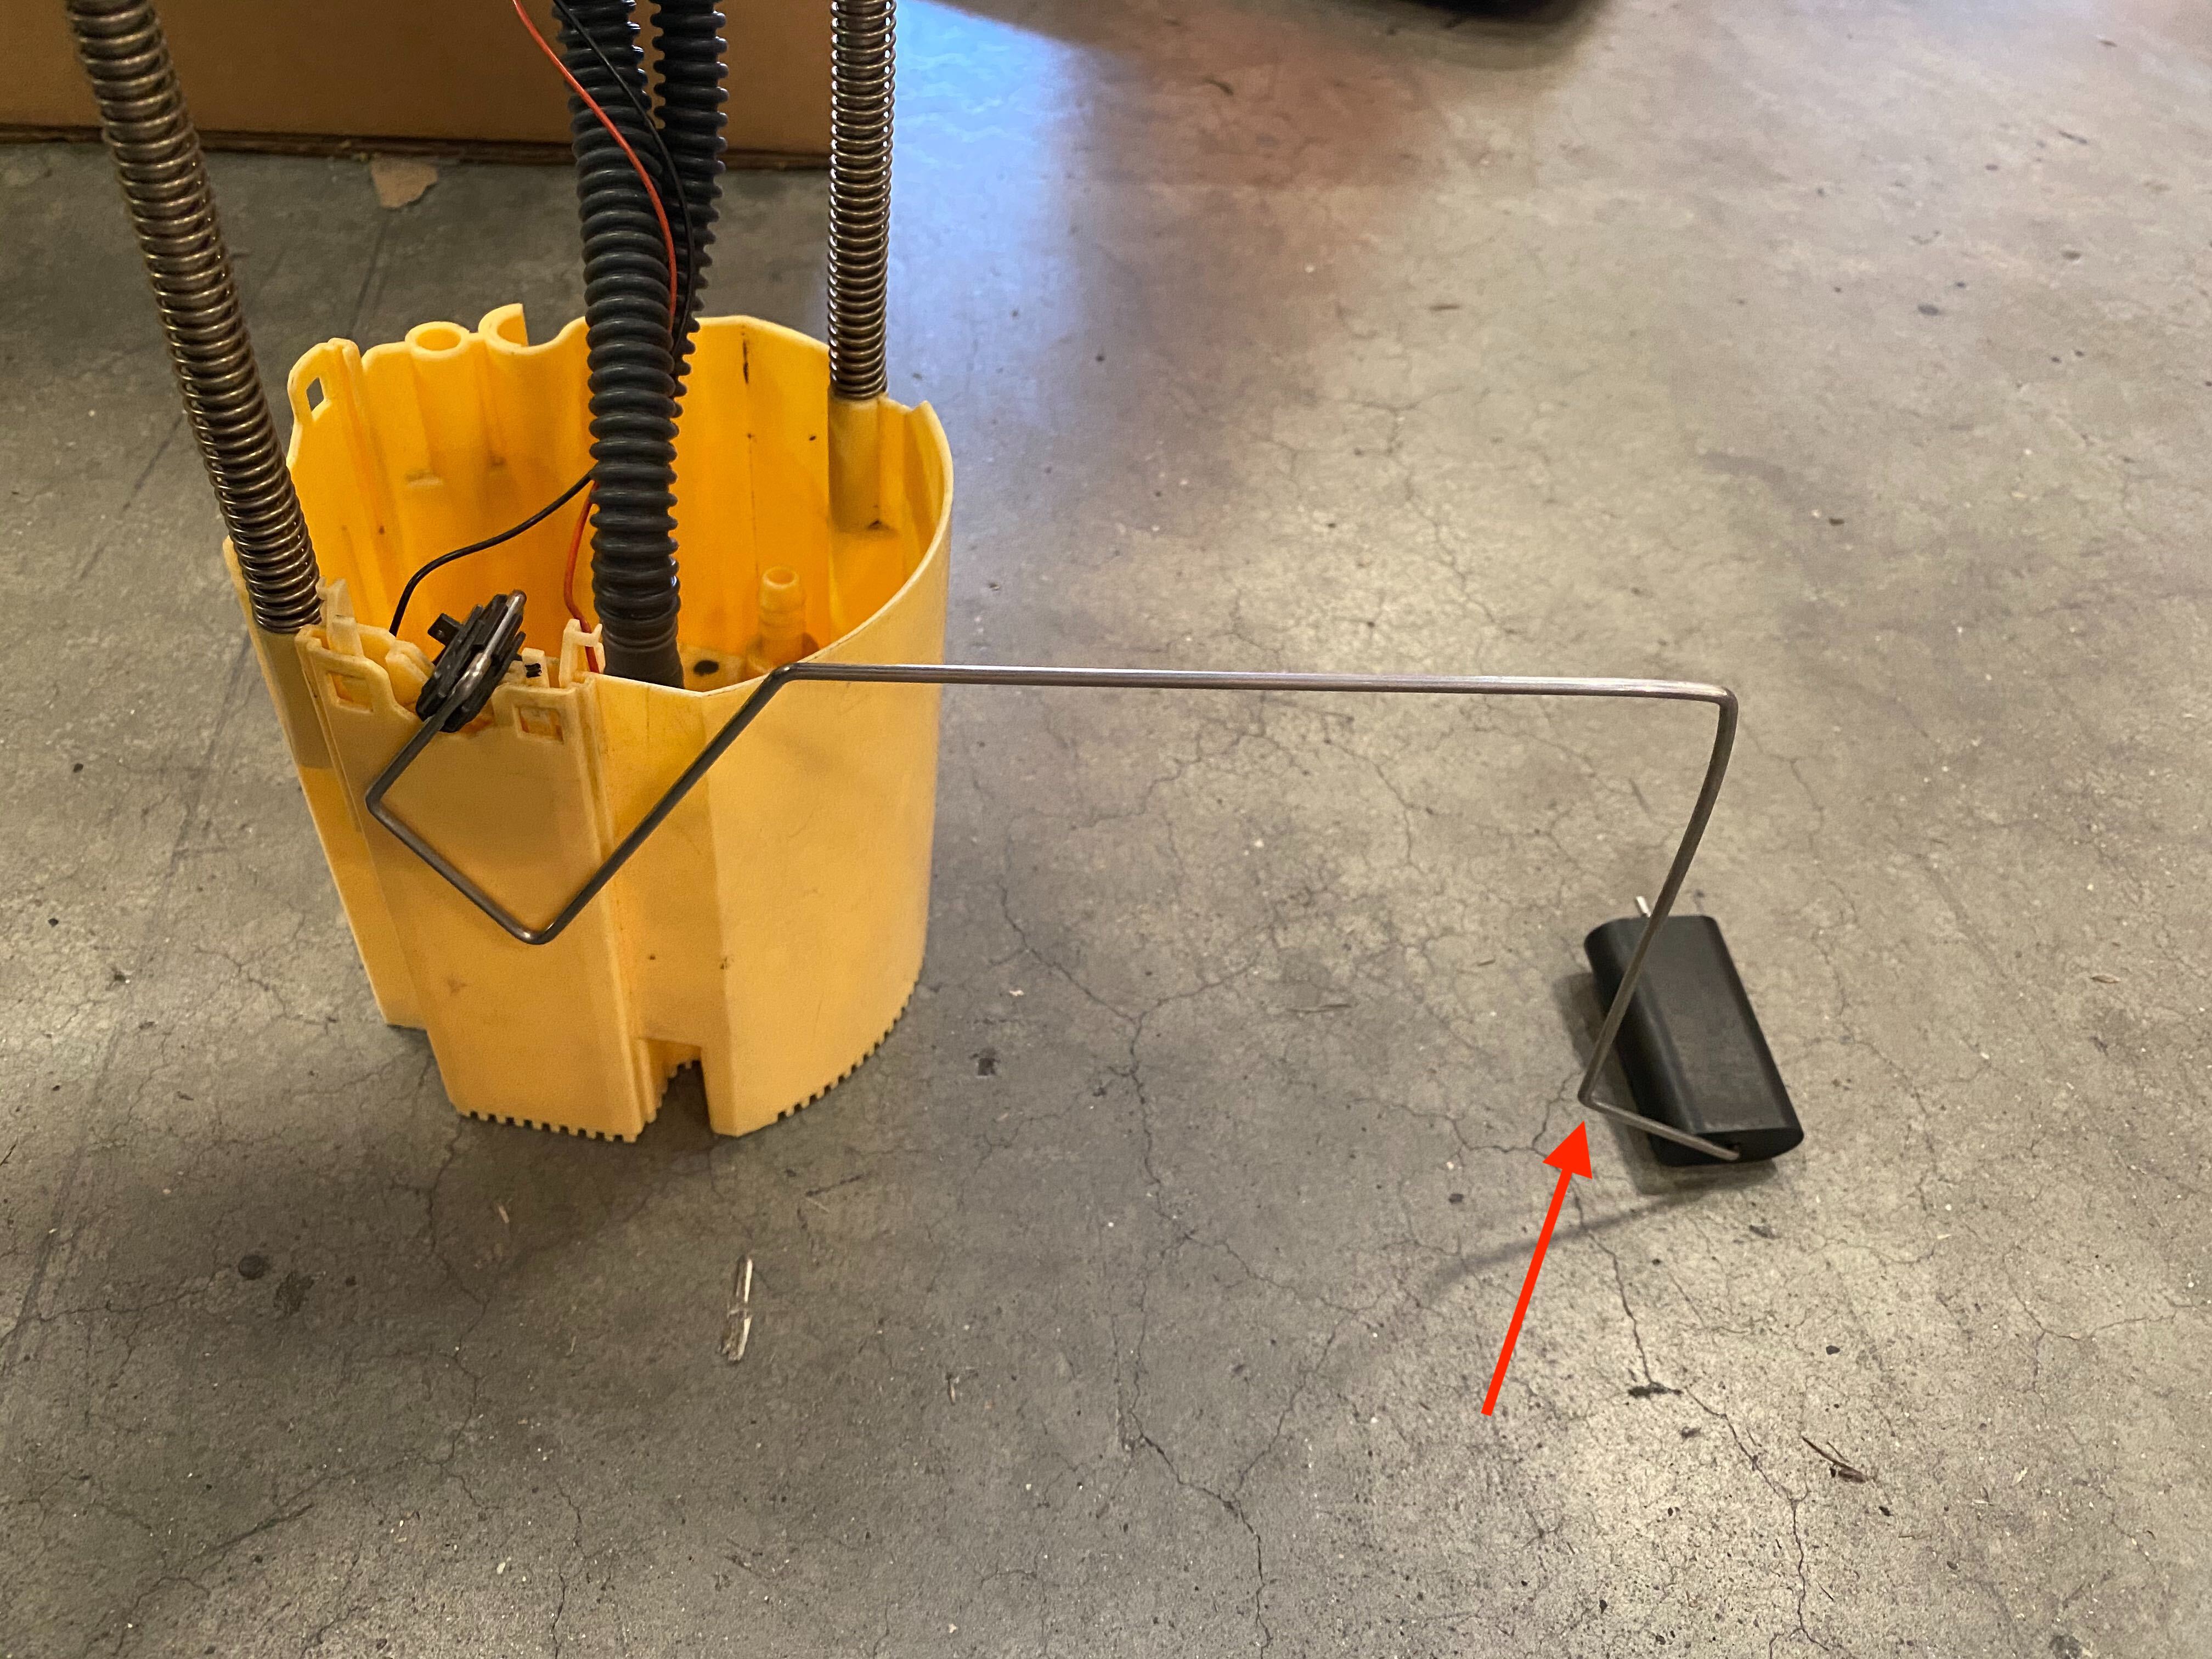
IMPORTANT: Before installing the sending unit. Check to make sure the float did not get bent during shipping. The black float should be touching the ground when the bucket is sitting on the ground. If the black float touches the ground before the yellow bucket, bend the end of float up(red arrow)
Put the OEM sending unit into the S&B Tank with the sending unit tab facing the arrow on the tank. With the OEM locking ring, lock down the OEM sending unit into the S&B Tank by hitting it clockwise.
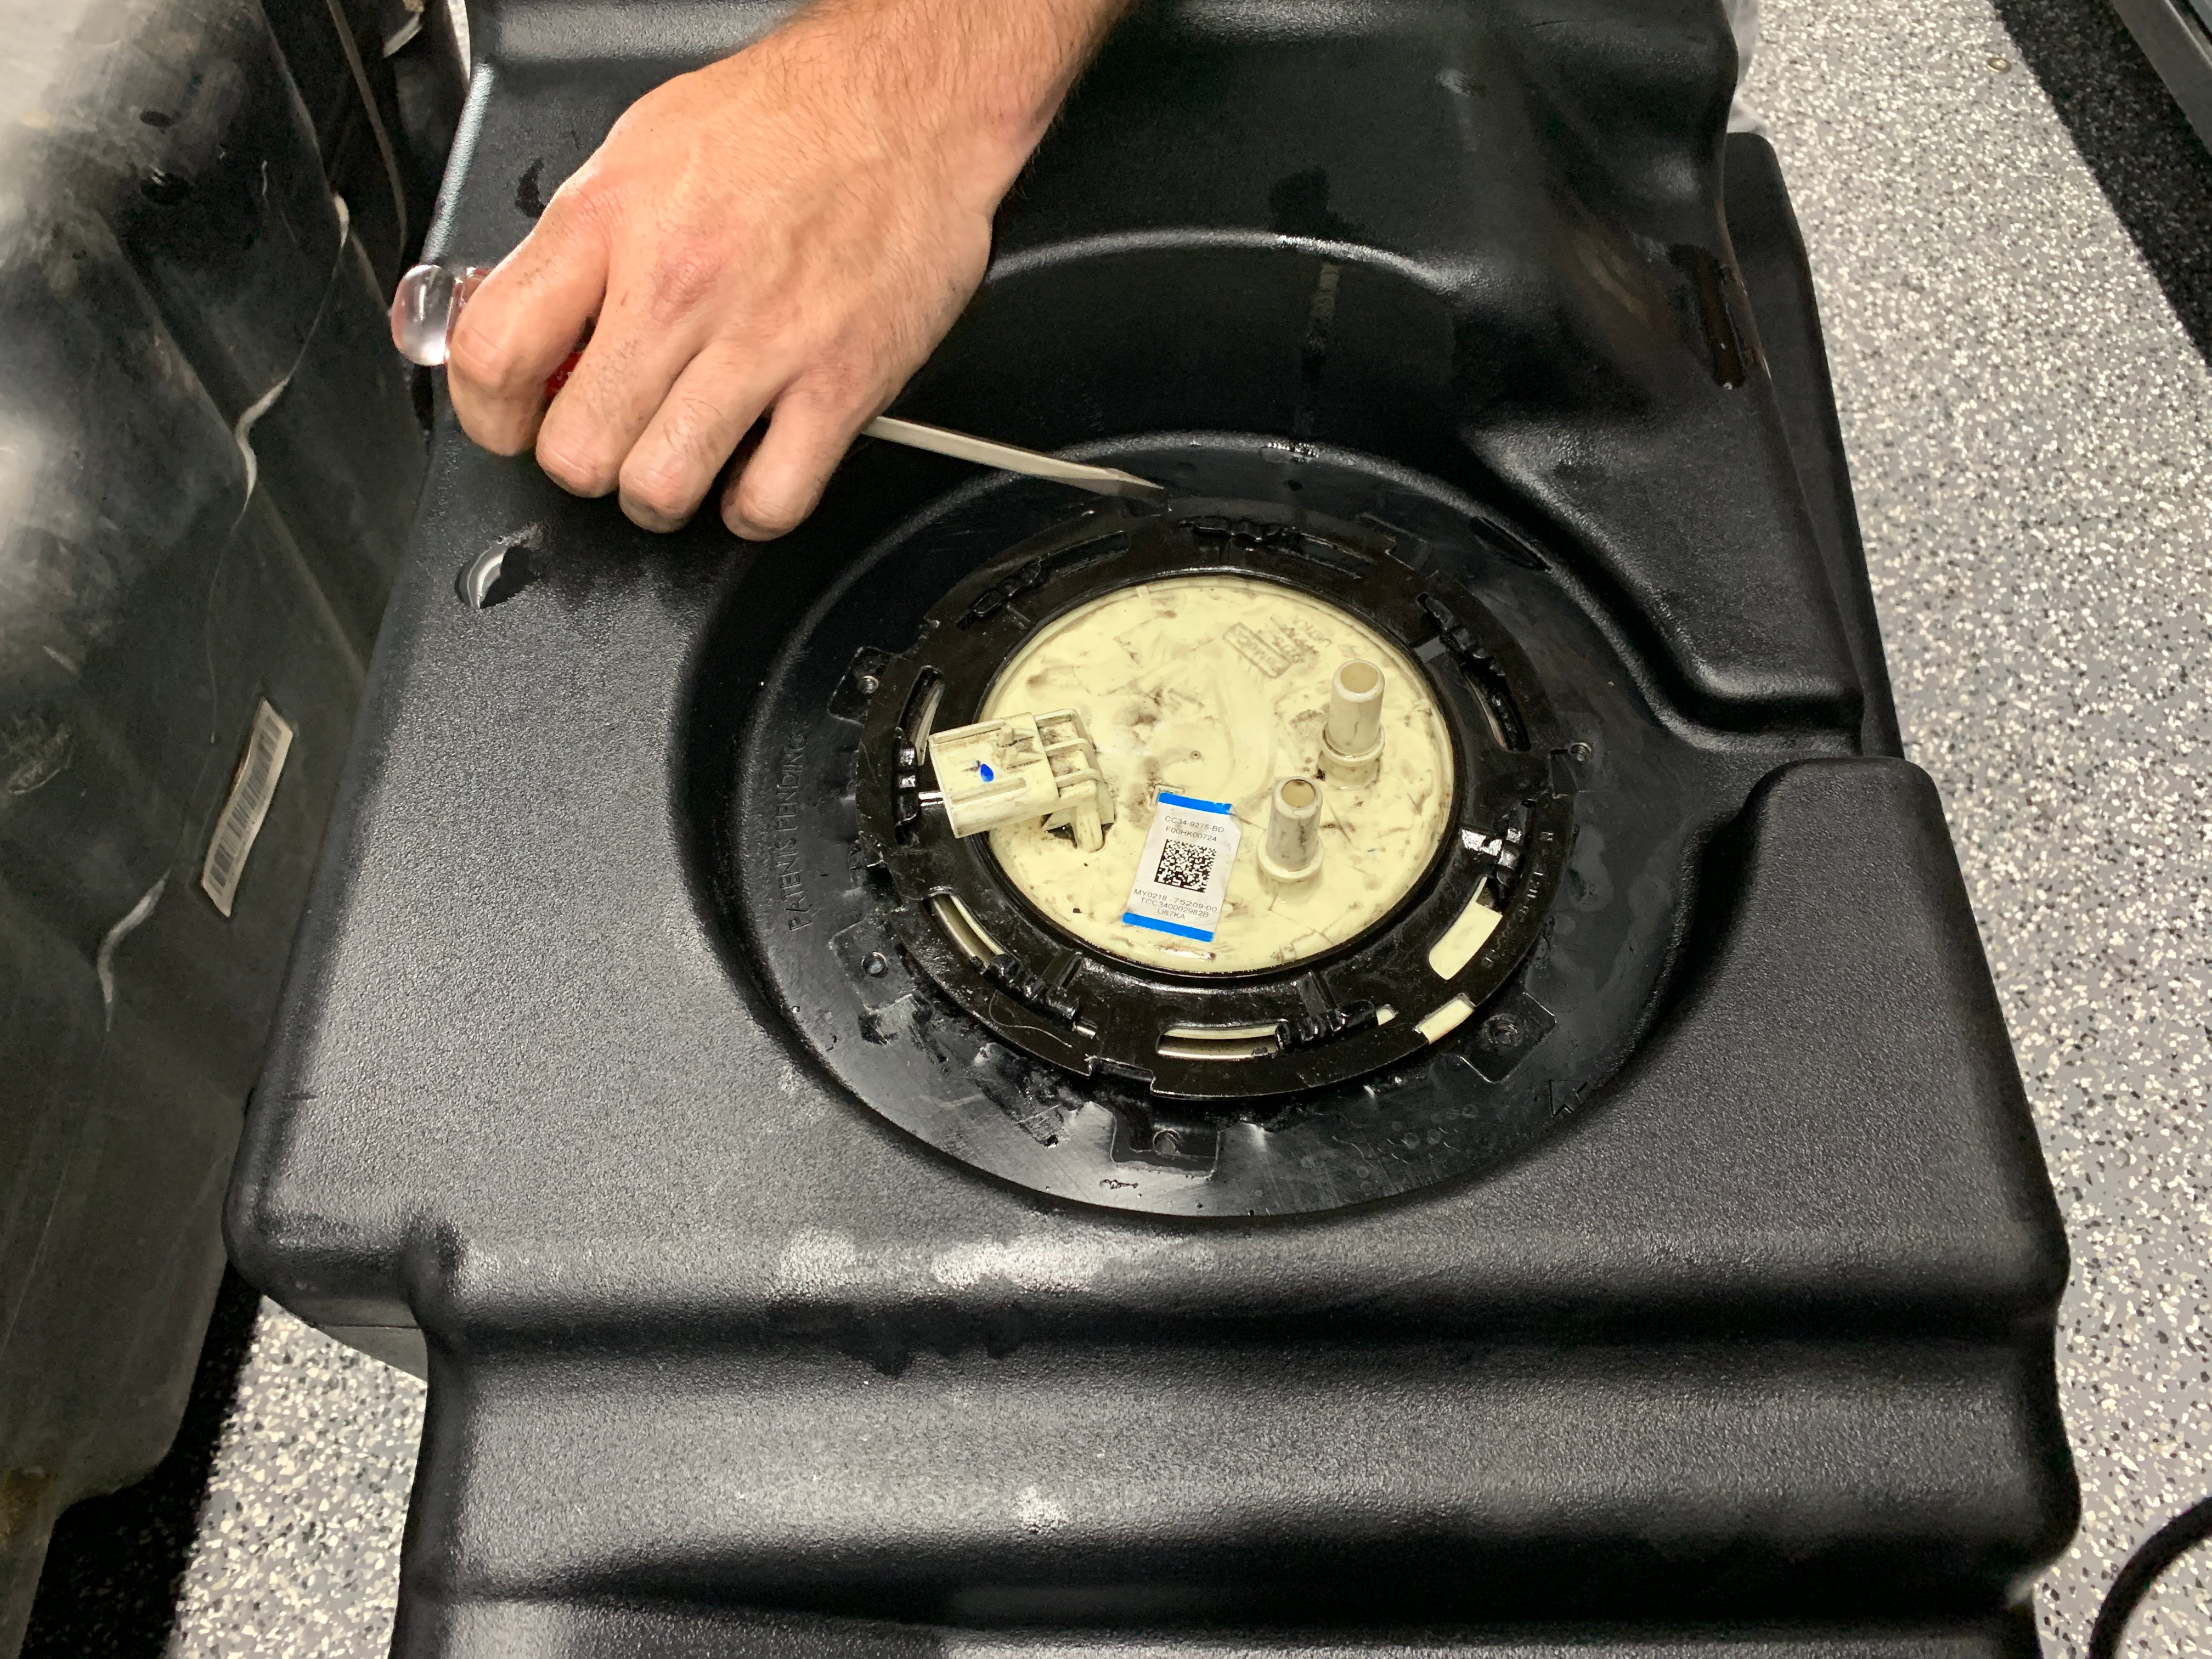
Ensure the locking ring is fully rotated until the rib on the OEM locking ring is PAST the indentation on the S&B receiving ring.

Transfer the OEM vent and fill hose to the S&B Tank and install them in the same orientation as they were installed on the OEM tank. If your S&B Tank is equipped with a long hose on the roll over vent, use the attached zip ties to attach the hose to the fill neck line. If not, don't worry about it.
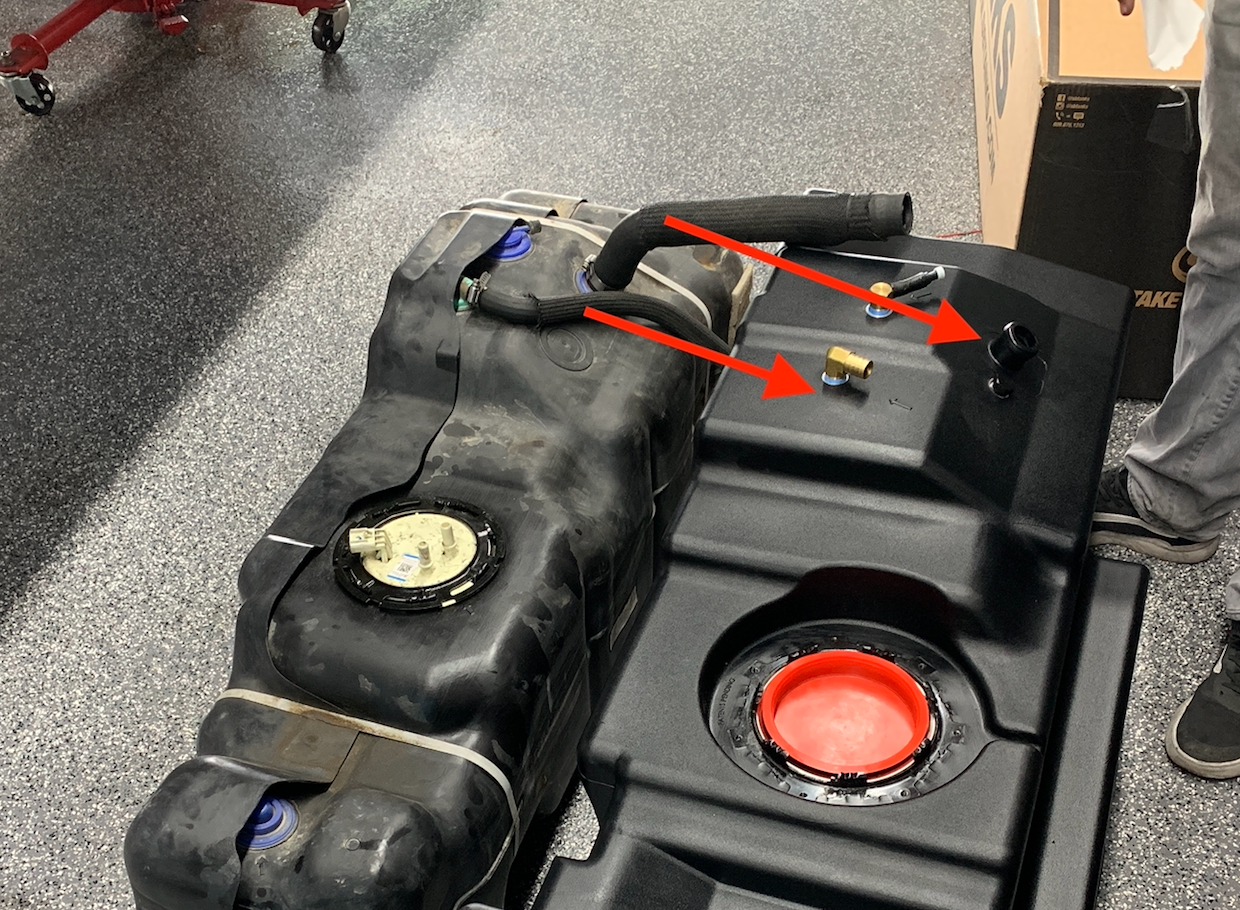
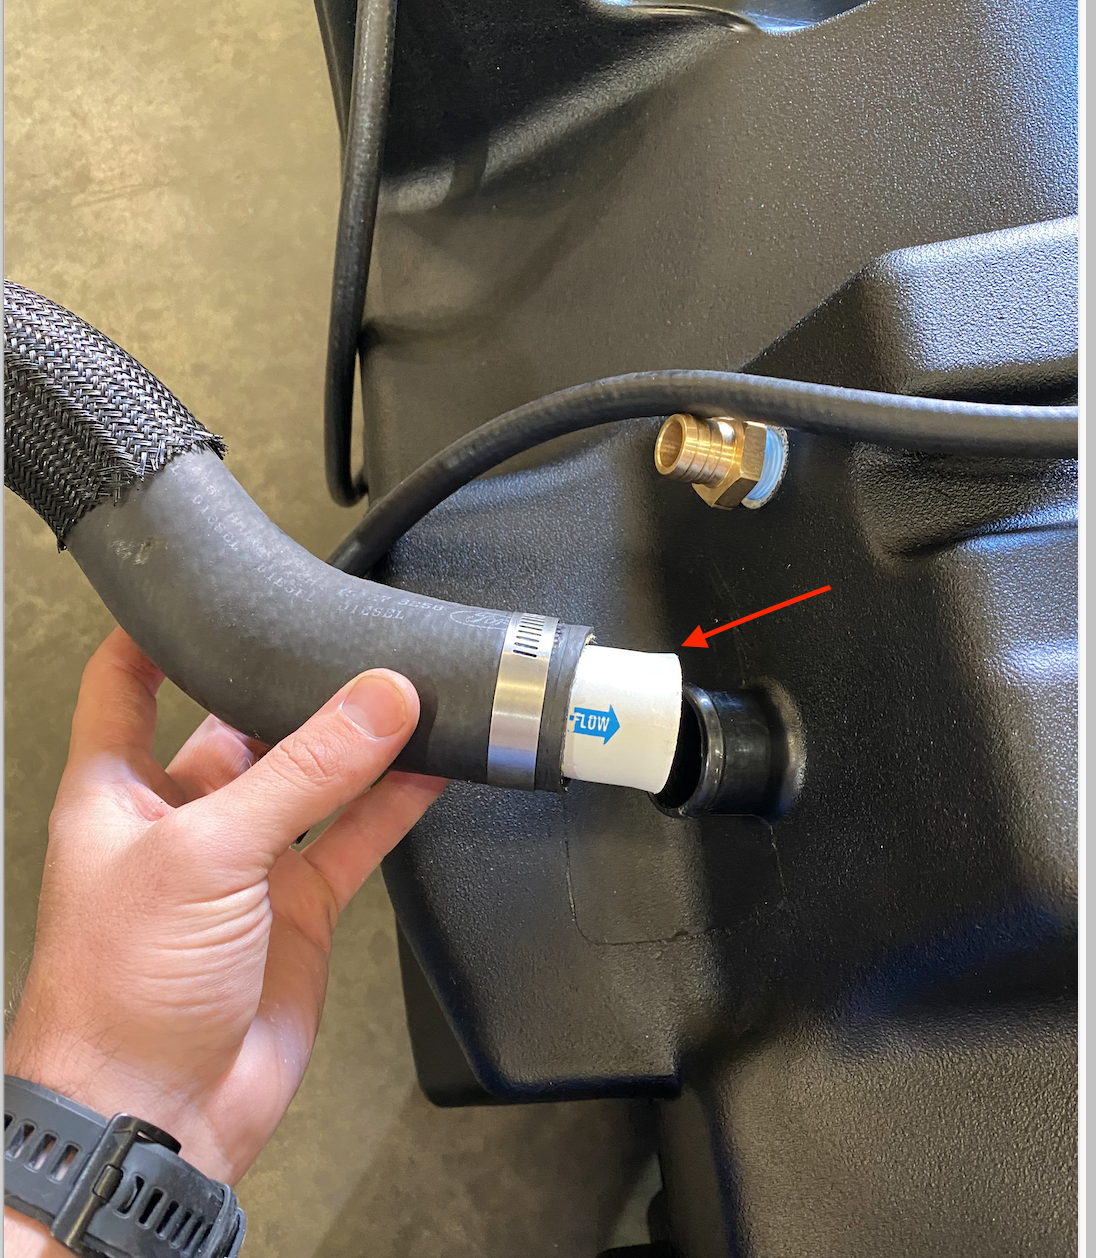
Before installing the filler hose onto the S&B Tank. Place the white check valve into the bottom of the filler hose with the blue arrow pointing into the tank.
This step is important to ensure your o'ring is seated properly.
- Block off openings with electrical tape
-Apply air pressure through the fill tube, spray soapy water around o'ring area and look/listen for leaks
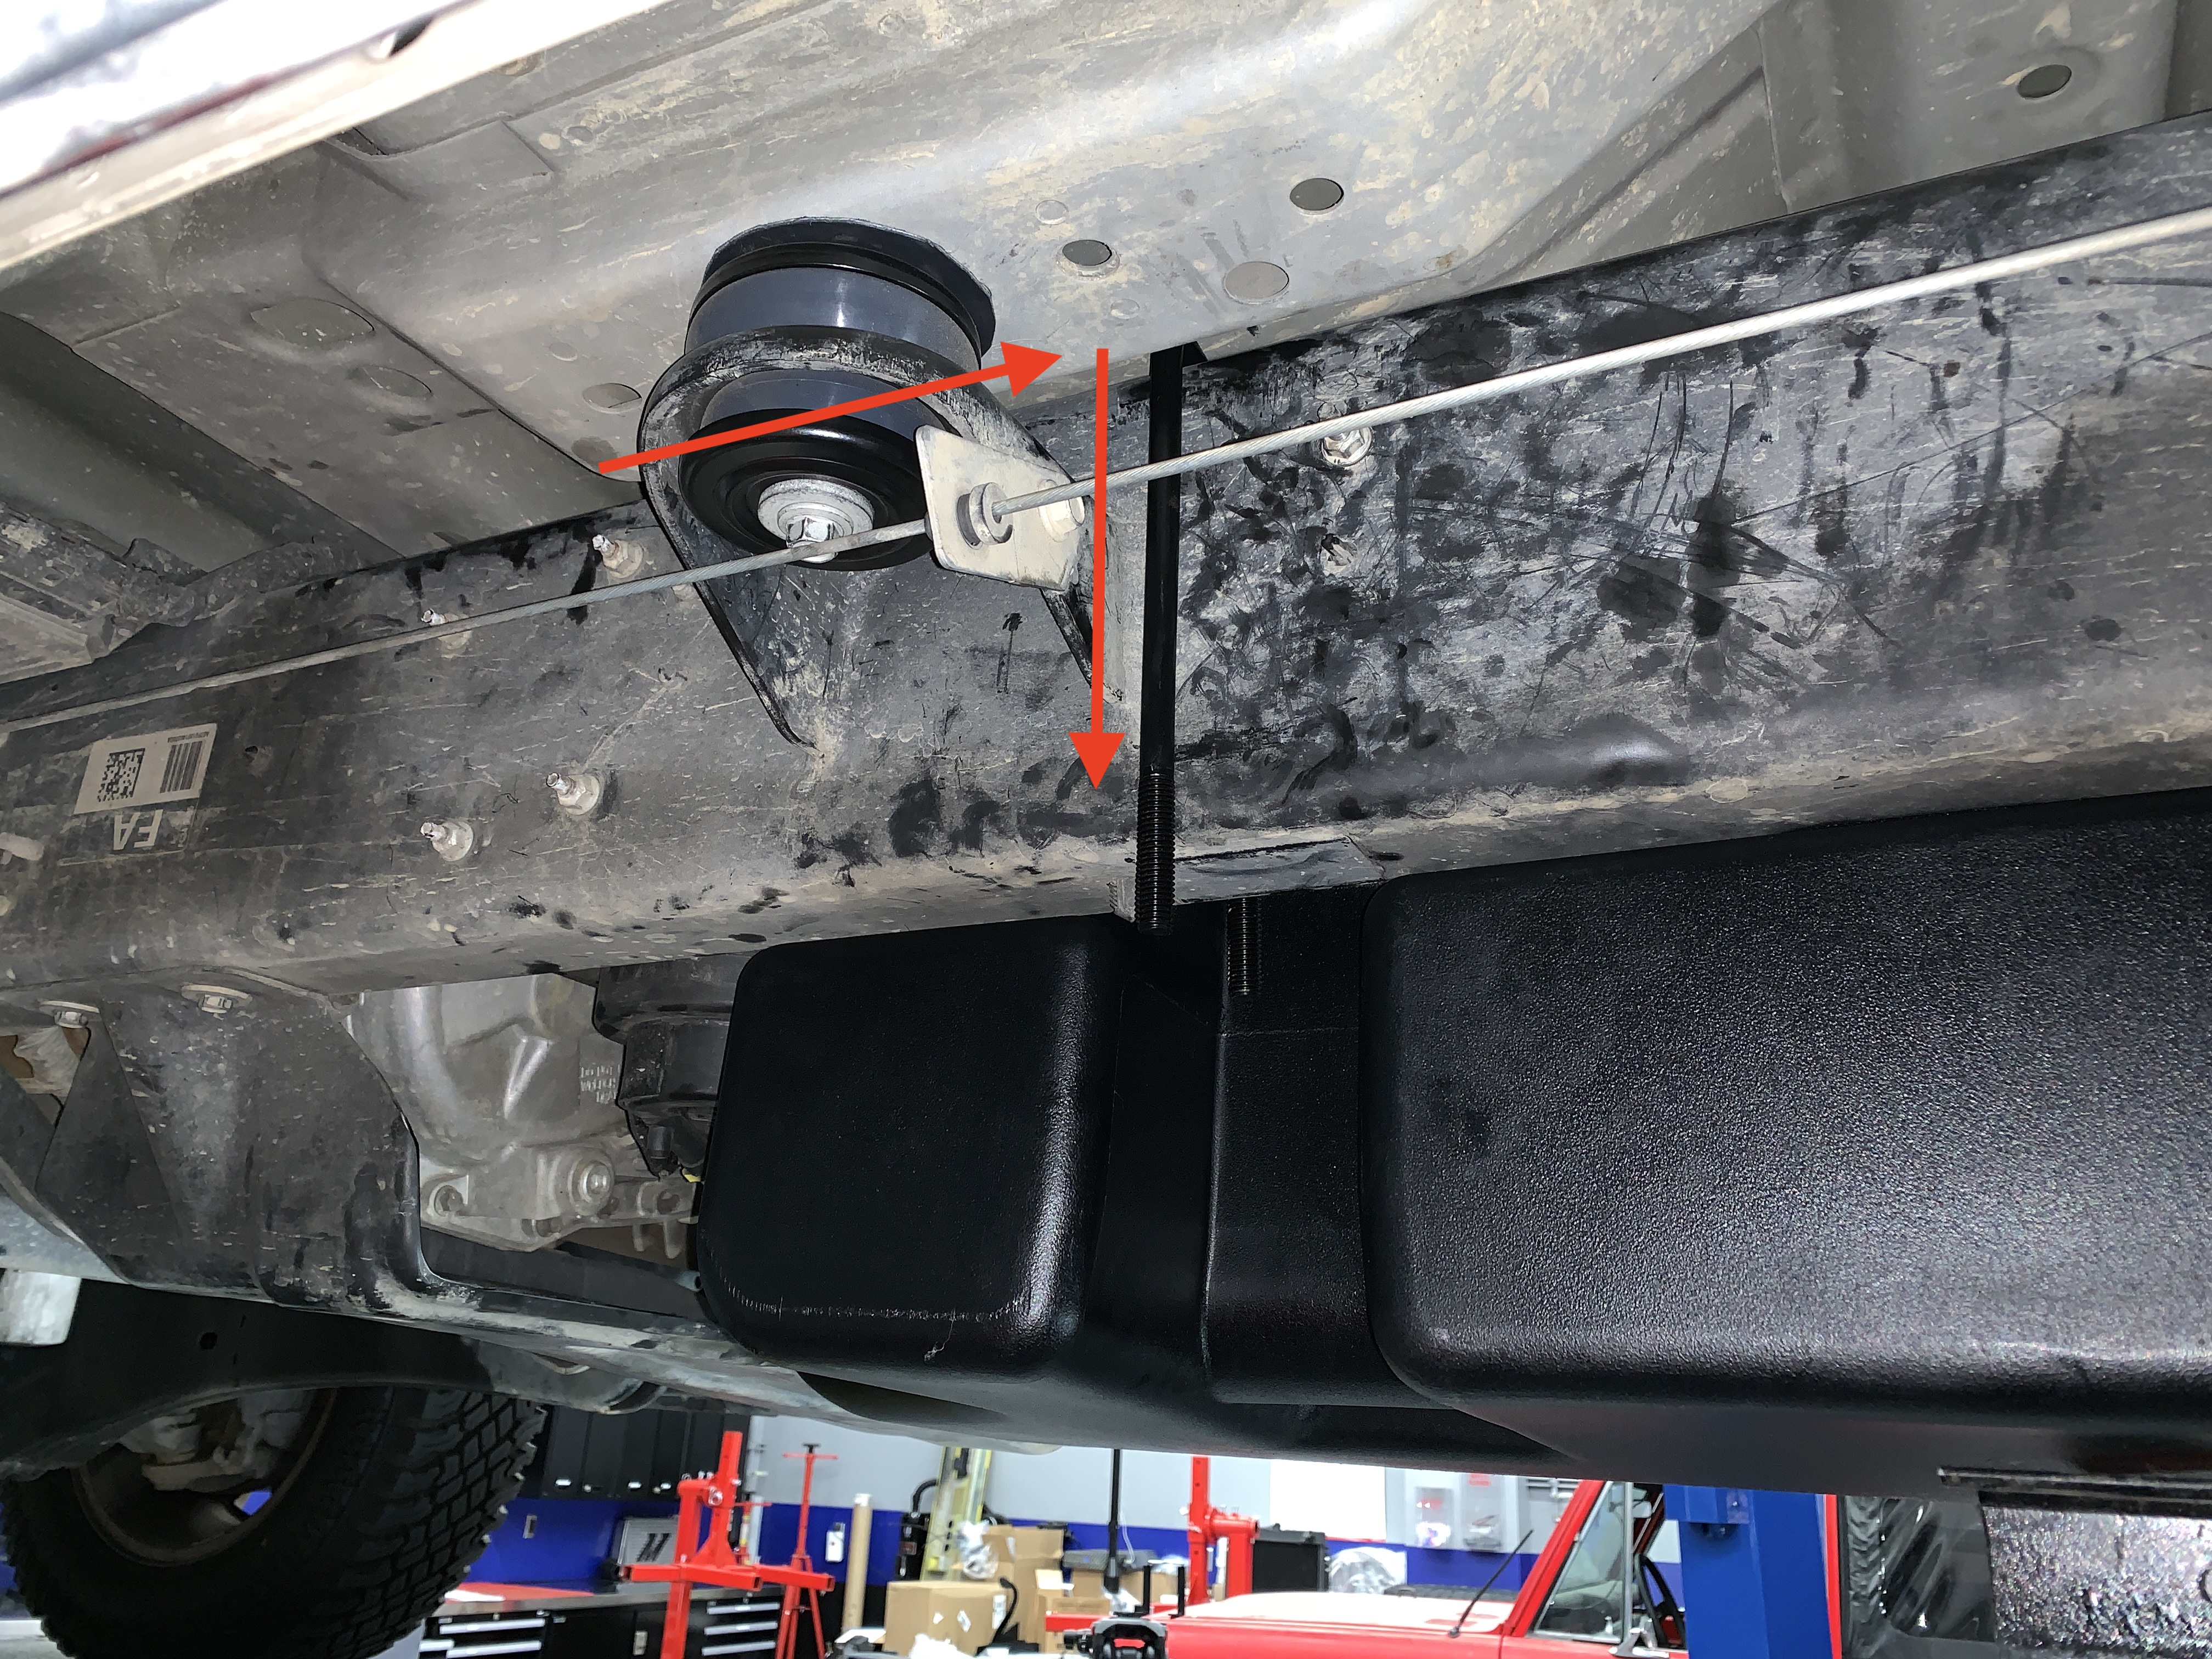
Prior to installing the S&B Tank, fish the U Bolt over the frame frail. Start with the u bolt in front of the body mount and positioned horizontally. Slide it backwards and rotate it 90 degrees downwards.
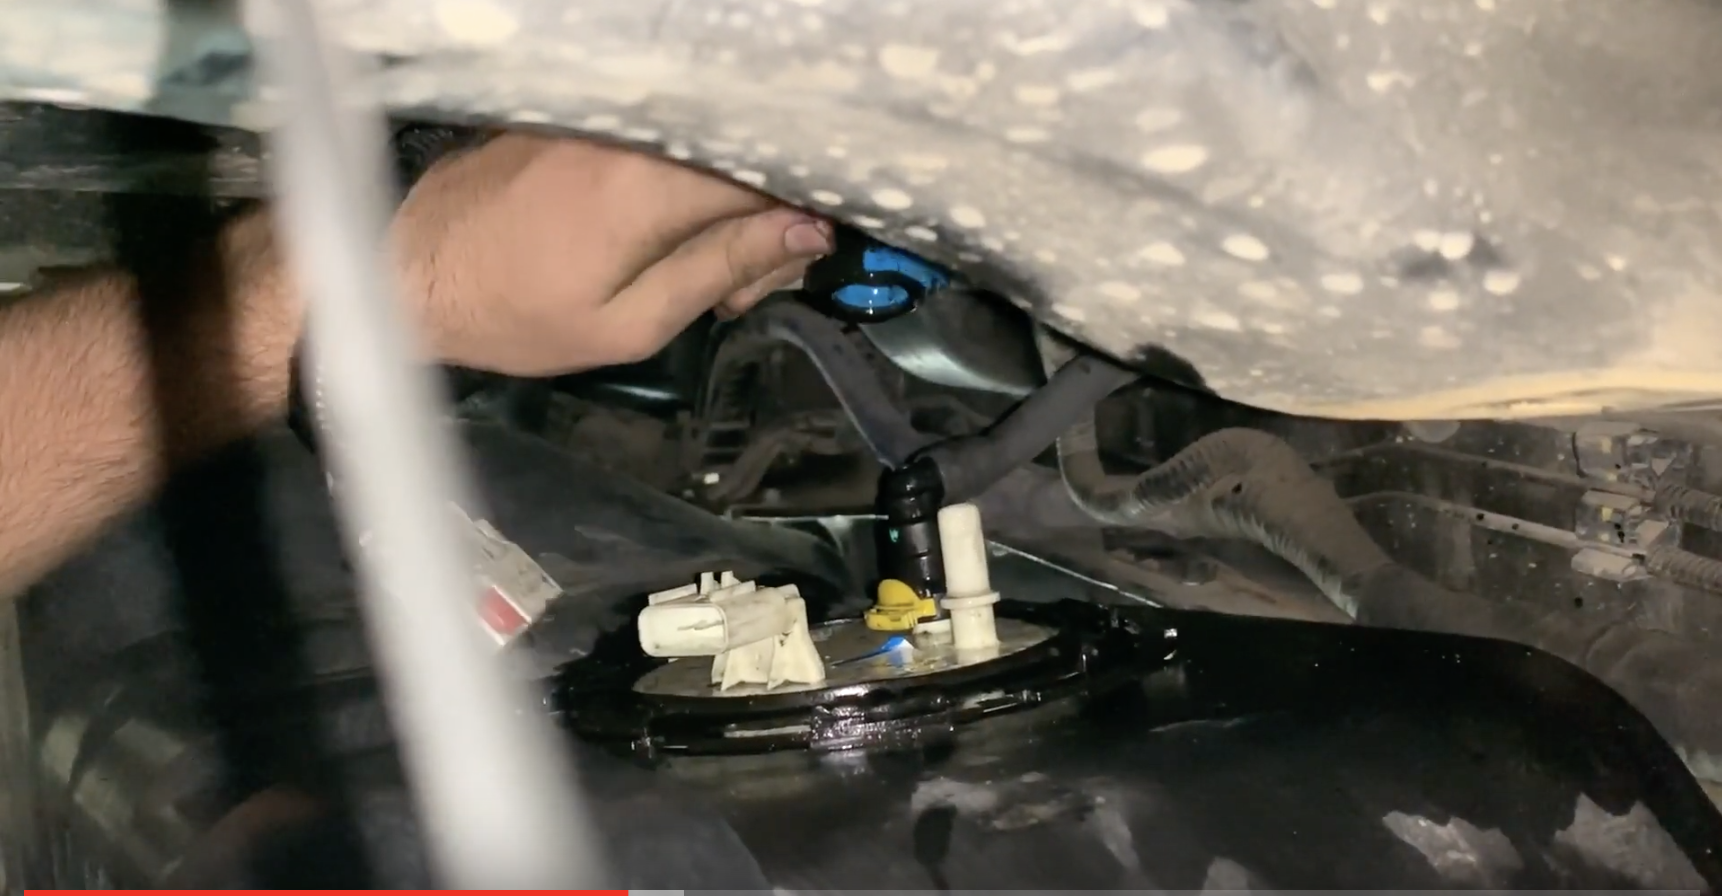
Center the S&B Tank on the jack and raise it until it is 6" from being in place. Reconnect the fuel sending unit electrical connector, blue return line fitting, and yellow feed line fitting. Make sure to push the locking tabs inwards on fuel line connectors.
Make sure the fuel line connectors are pushed all the way down. Sometimes the connector will click before it is fully seated. In this picture the blue connector is fully seated while the yellow is not. If your truck has a consistent long crank after installing your fuel tank, the yellow connector probably isn't fully seated.

Make sure the fill and vent hose are over the frame and raise the tank into place. The easiest way to do this is lifting the front portion of the tank first. Use the transfer case cross member to support the front lip of the tank.
Using the OEM fuel tank strap bolts, start installing the straps(30 lb-ft). The S&B straps line up with the OEM straps and utilize the same cage nuts.
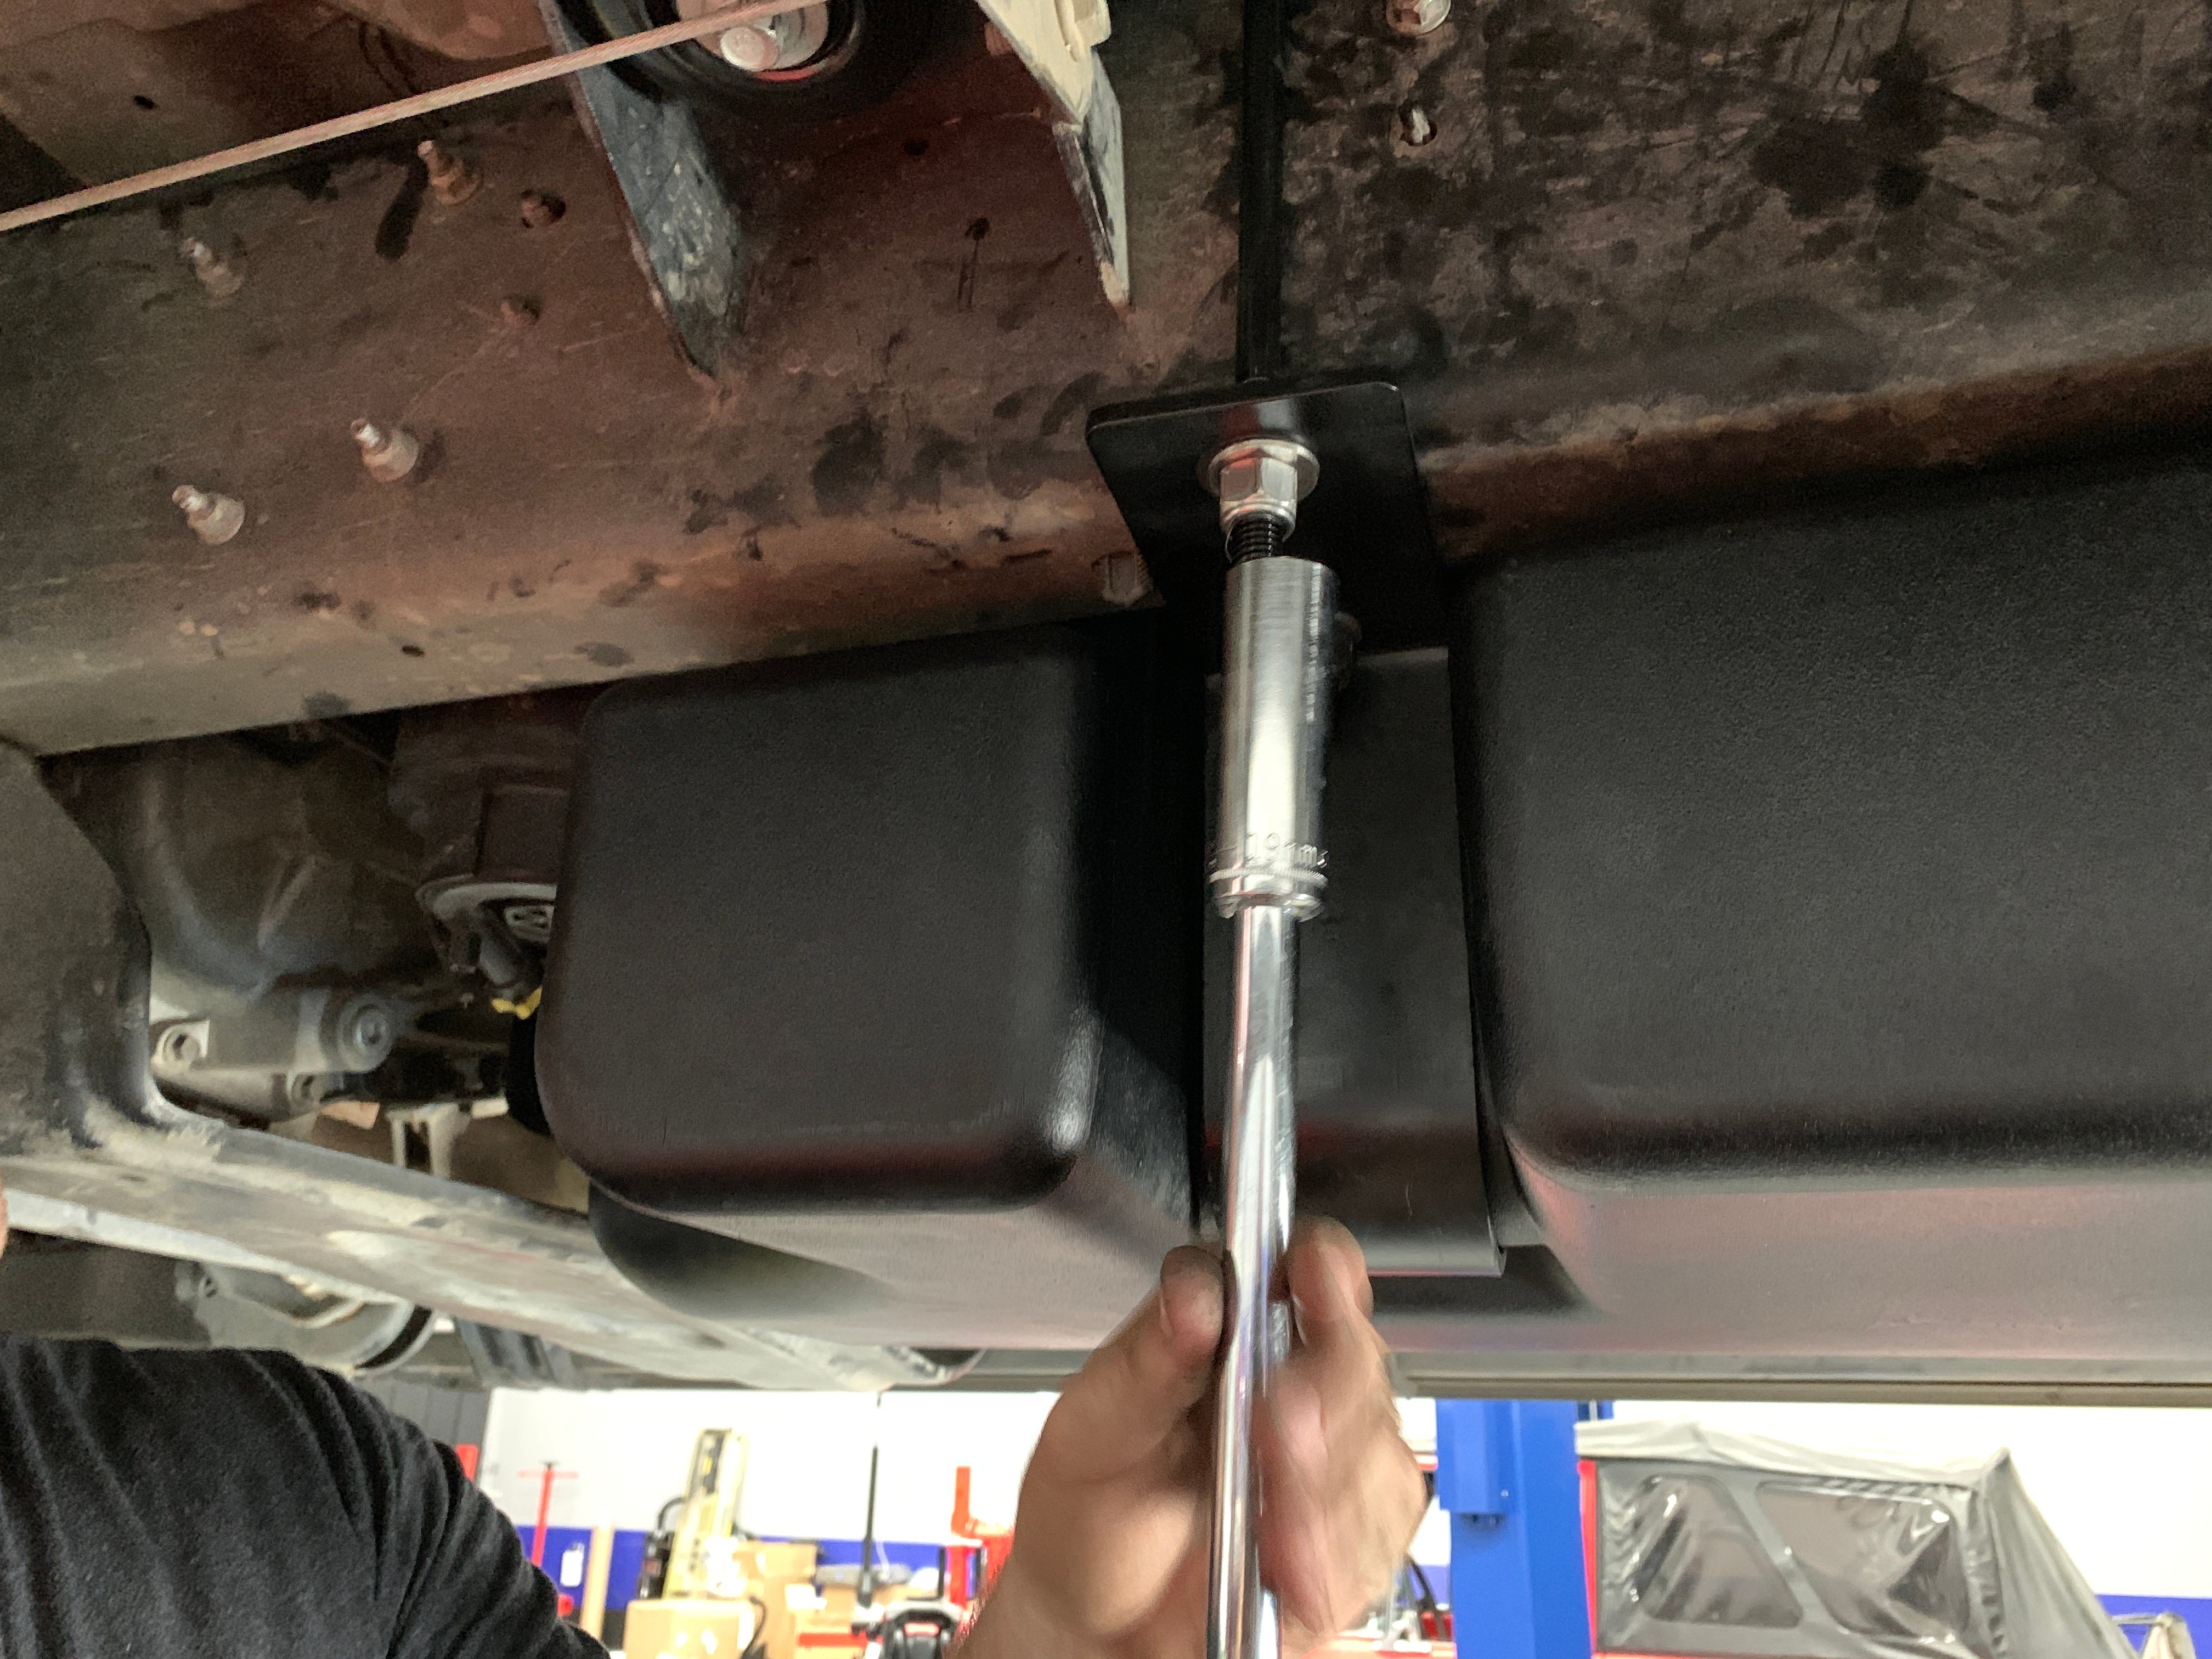
After you have installed the straps, install the front support bracket into the indentation on the tank. Place the washers over the threads and start the nylon lock nuts by hand. Tighten them evenly with a socket.
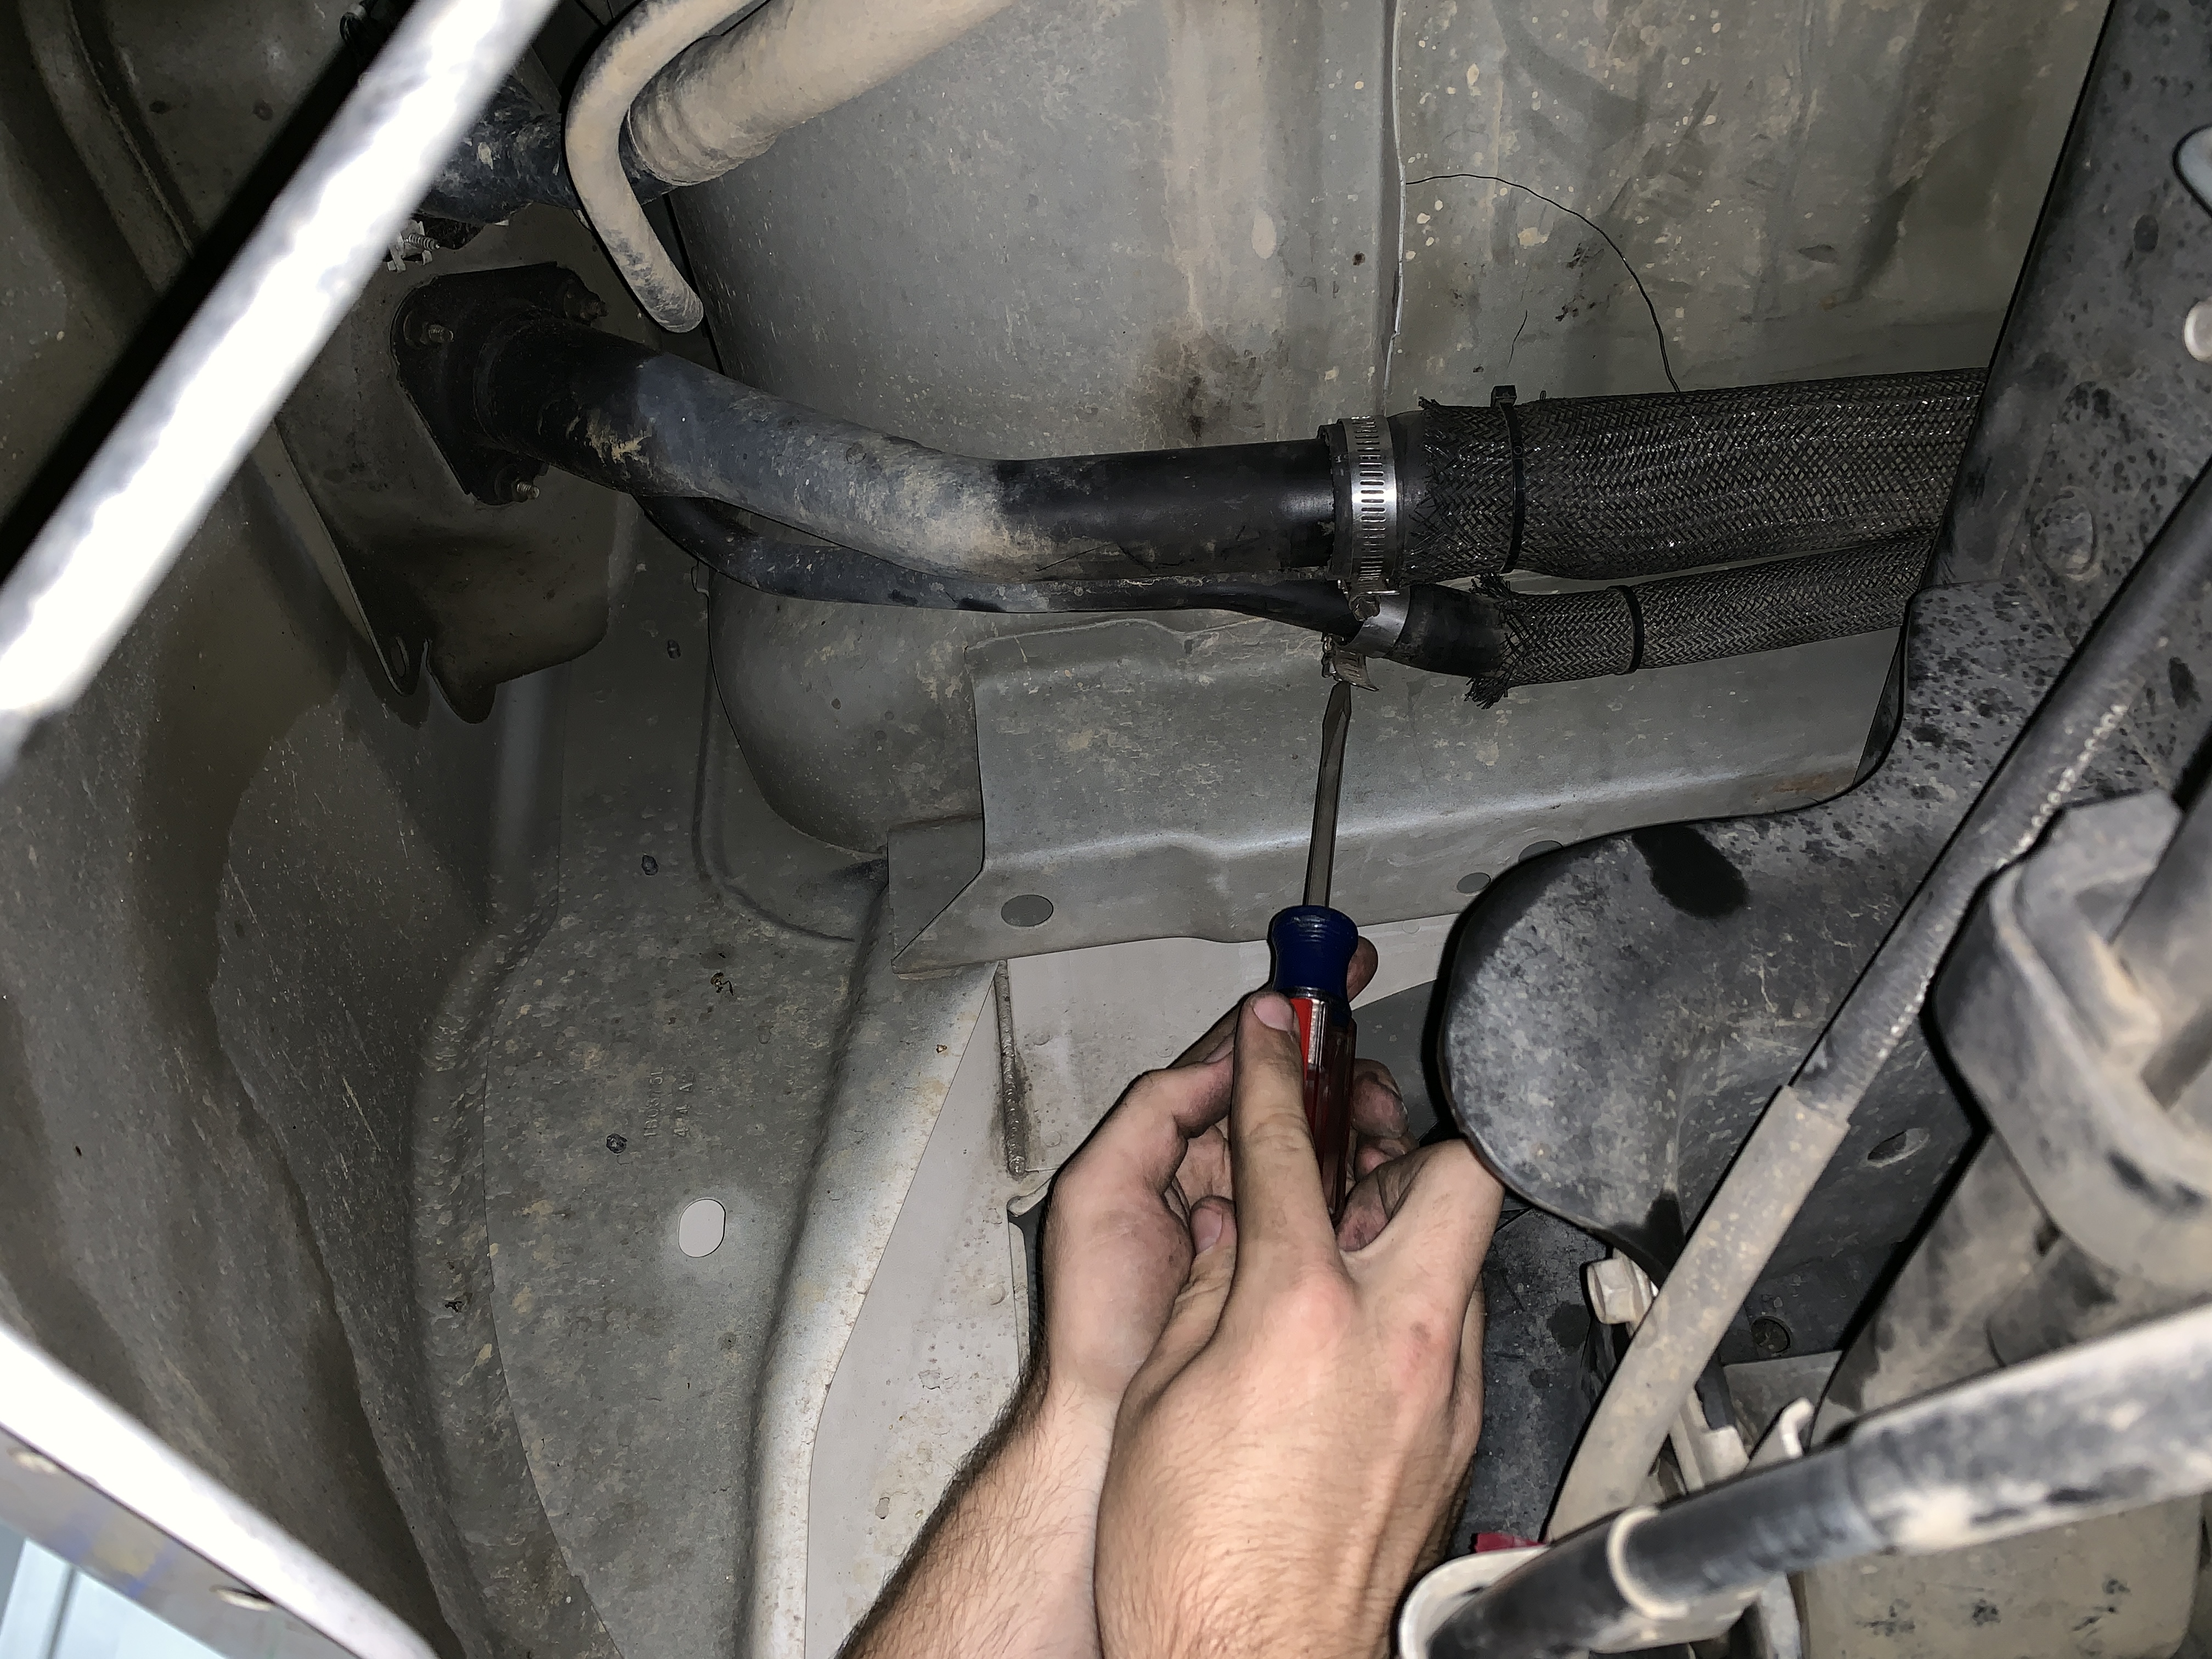
Reconnect the fuel fill and vent hoses. Slide hoses back onto metal tubes and tighten hose clamps.
Check to make sure the tank is not interfering with anything on the truck, all connectors are properly locked down, and bolts and nuts are properly tightened. Enjoy your S&B Tank. If you have any questions call us (909)-675-1313.