STEP 1
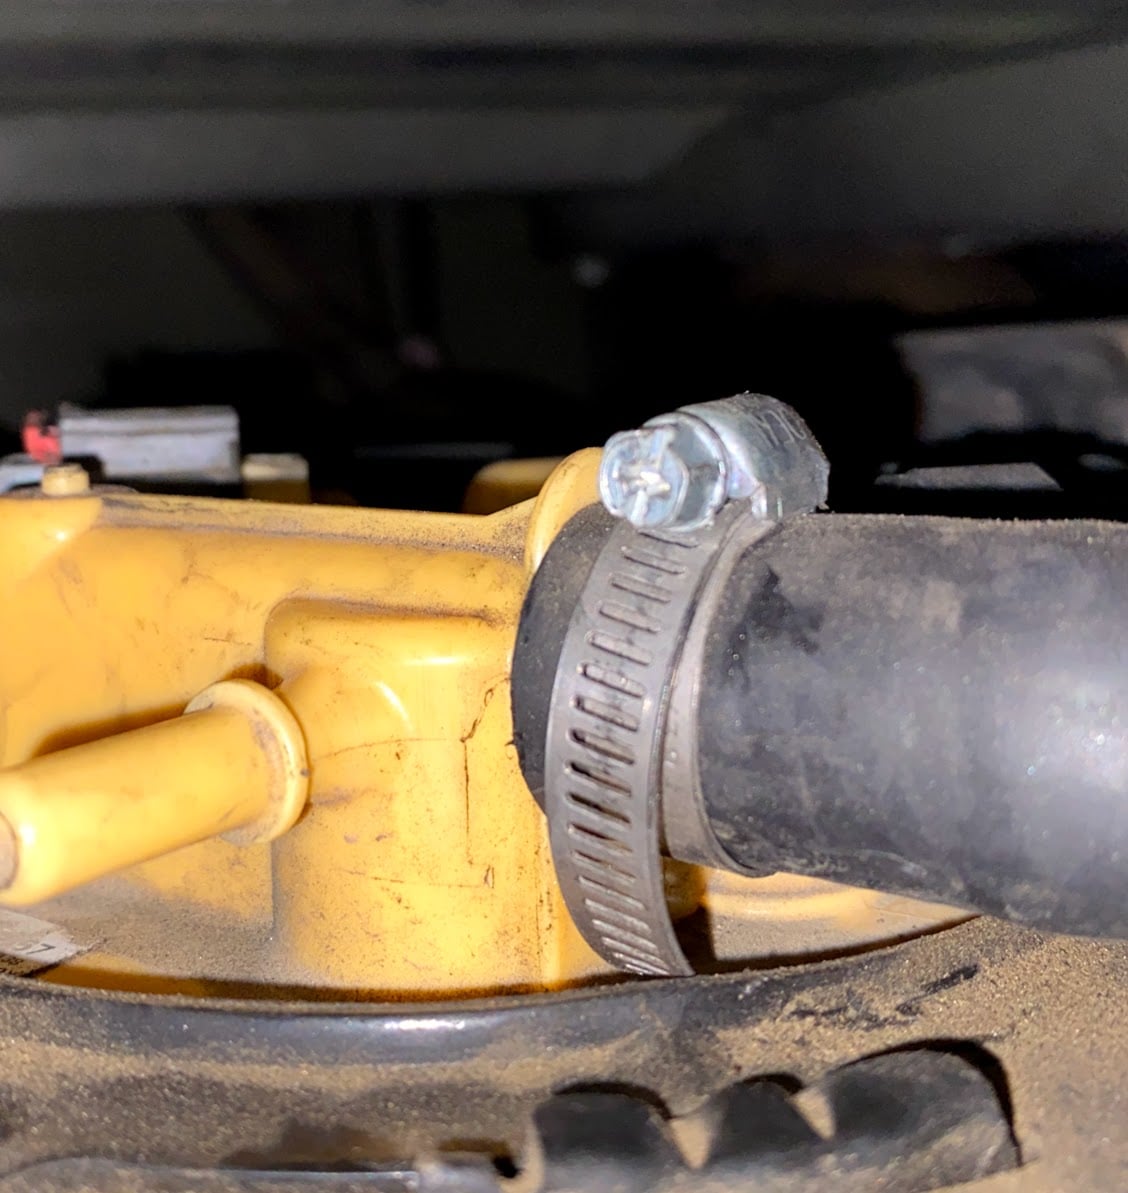
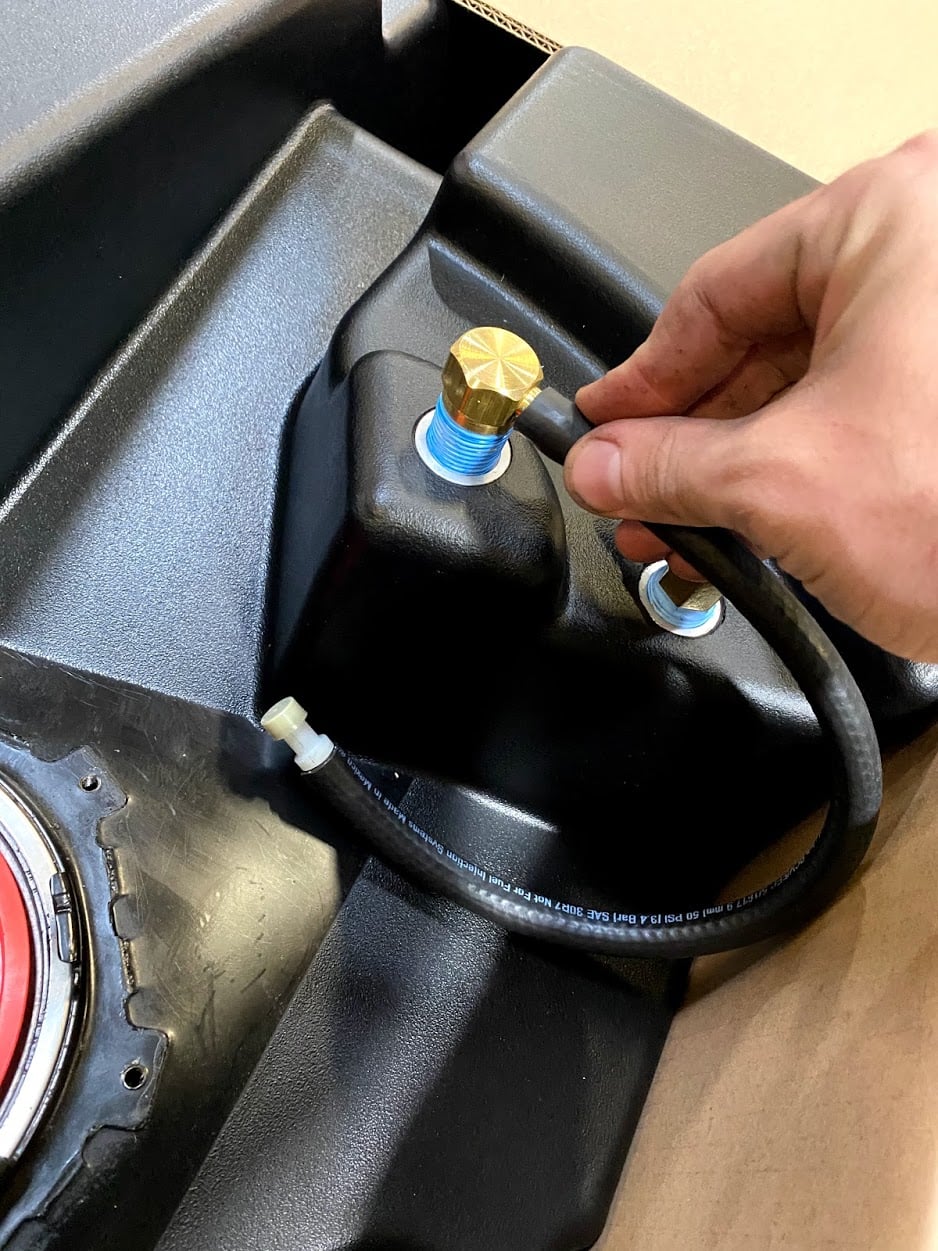
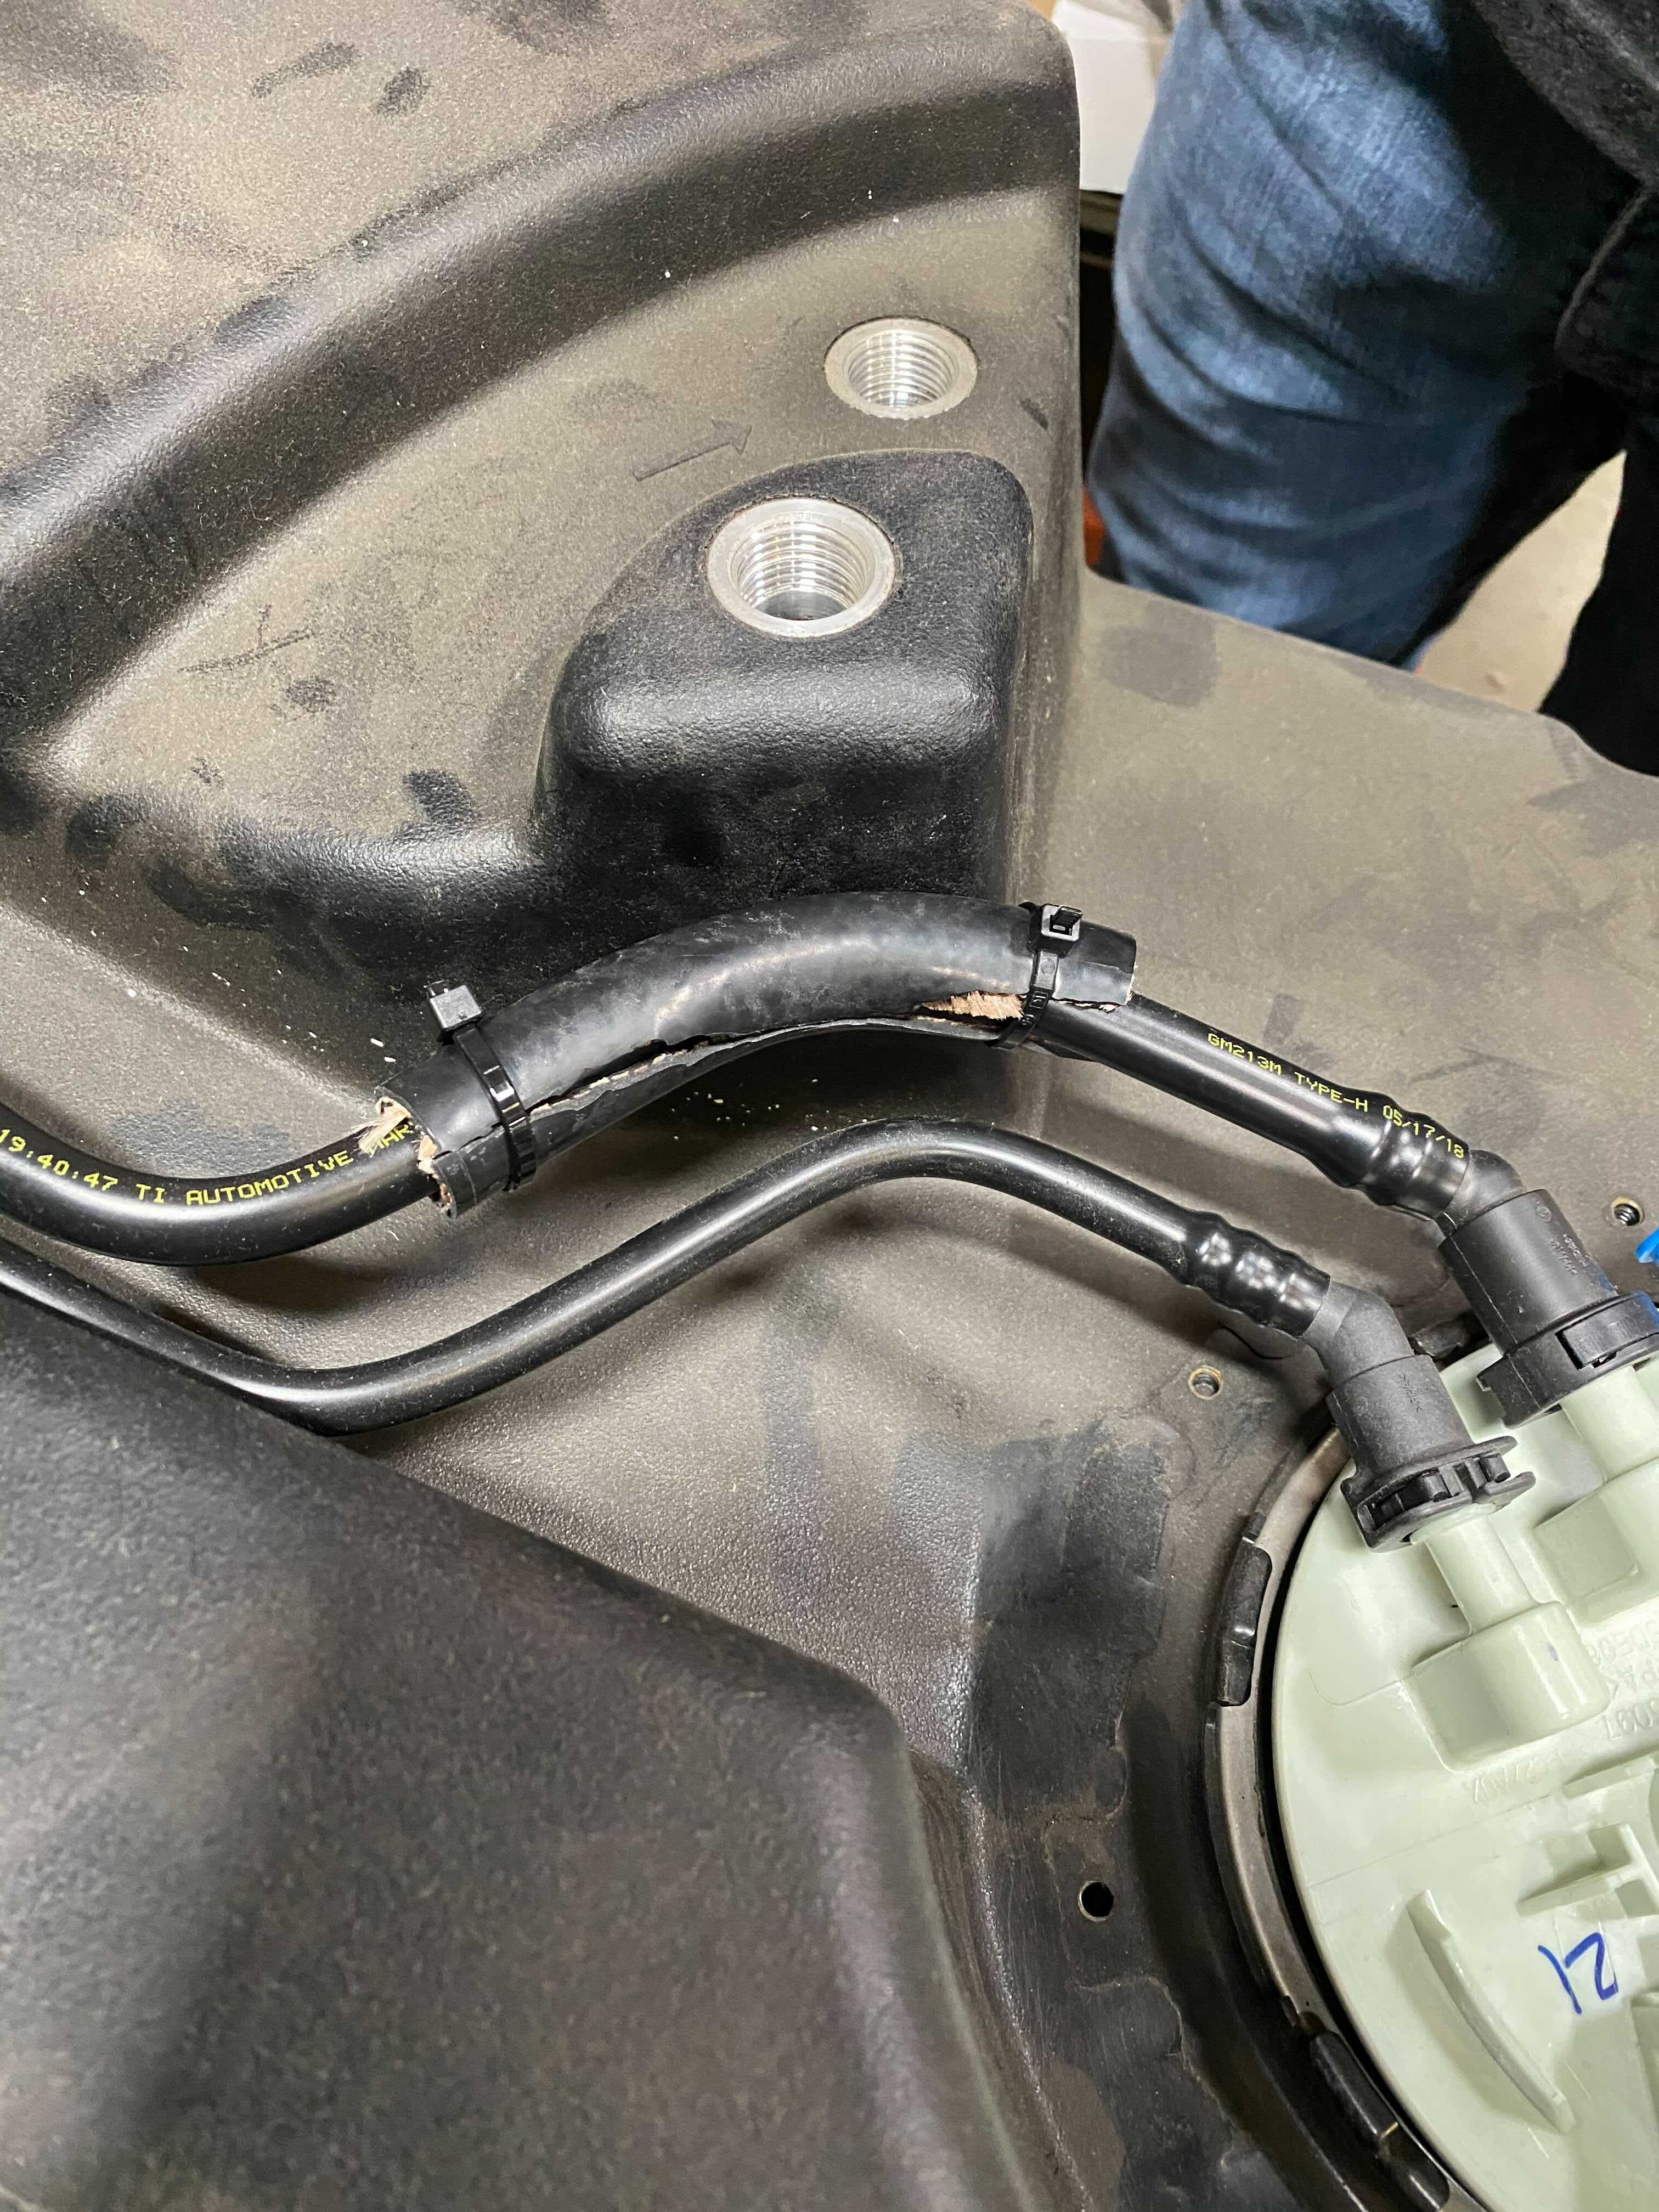
Loosen the hose clamps and remove the fill and vent lines
Loosen the hose clamps and remove the fill and vent lines
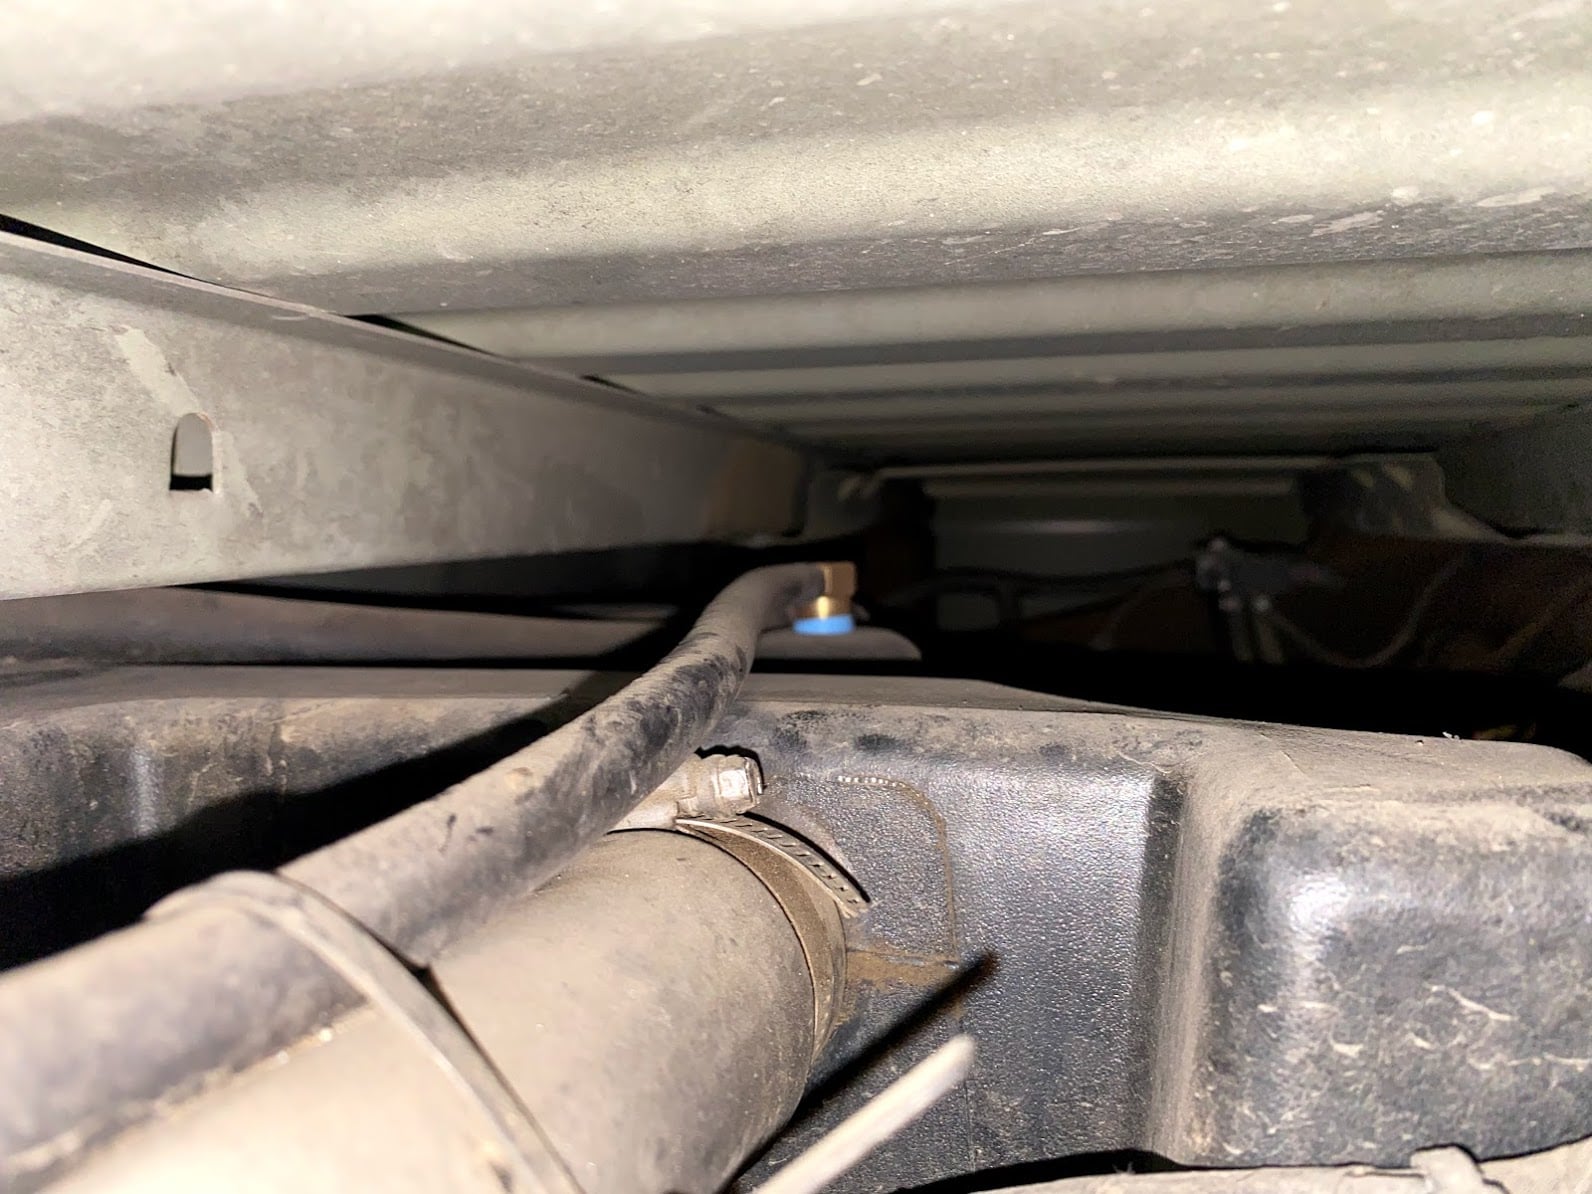
Loosen the hose clamps and remove the fill and vent lines
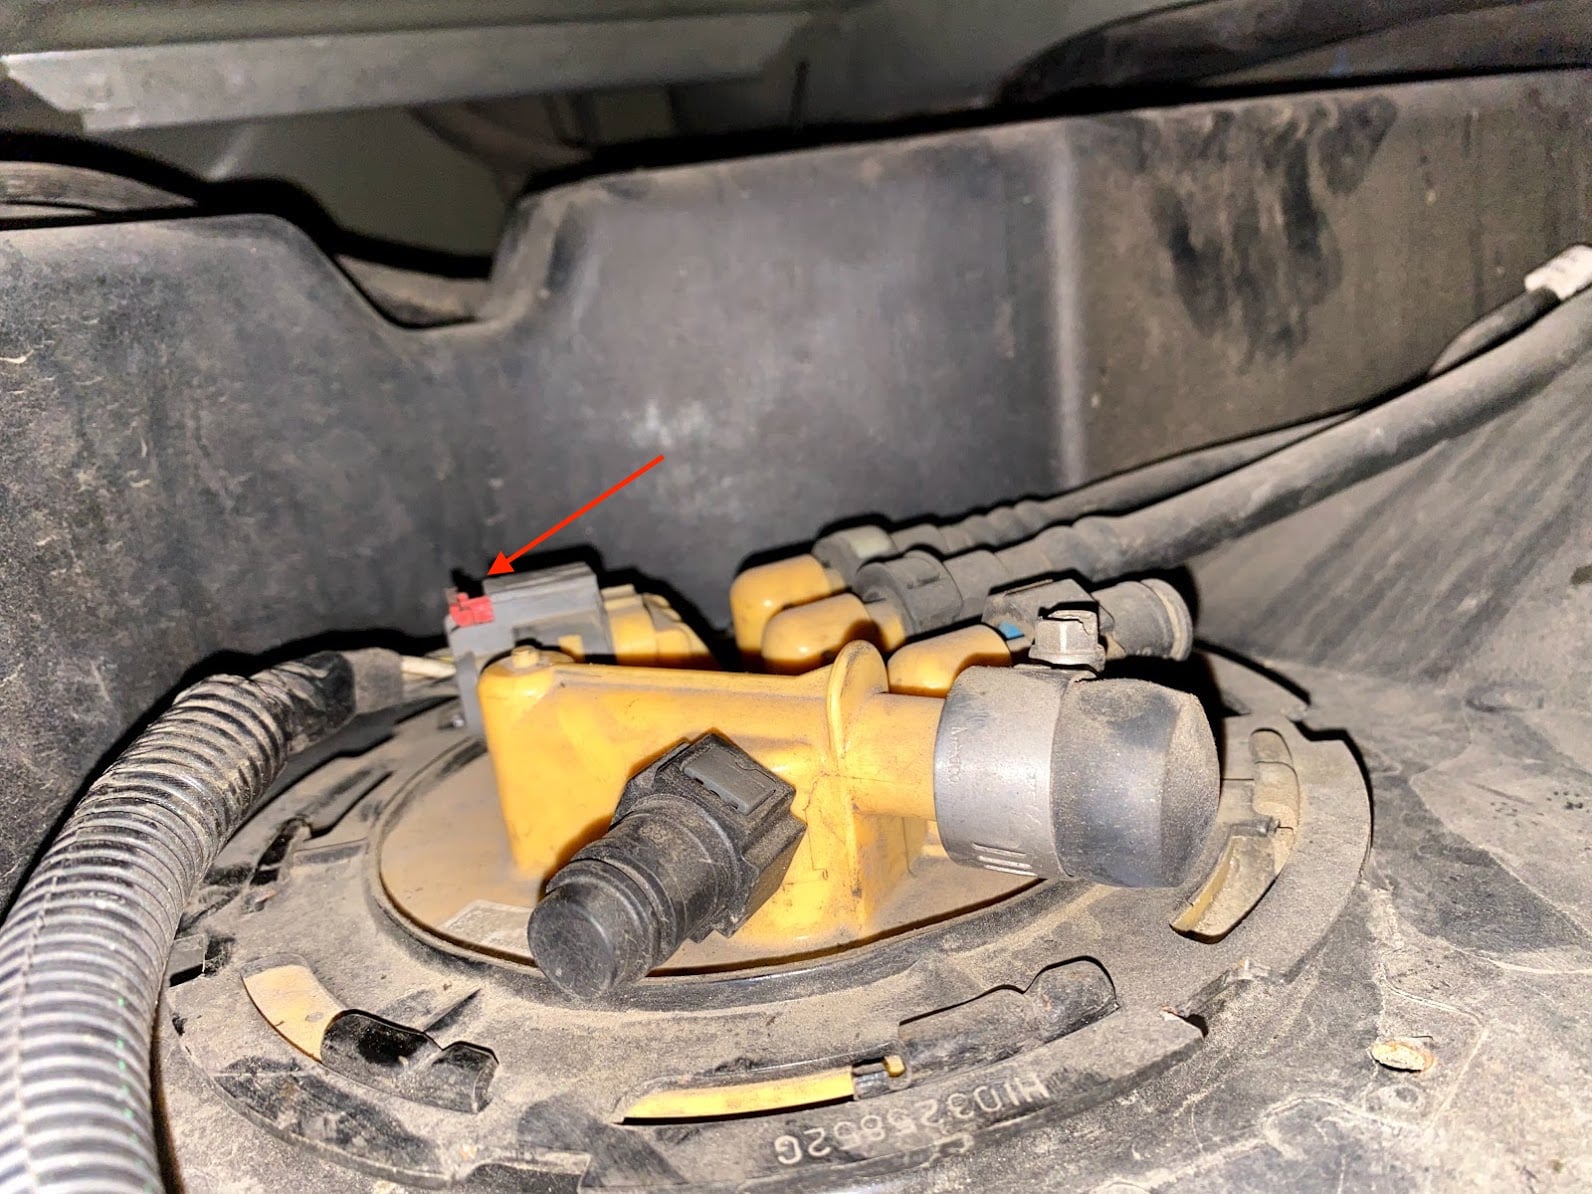
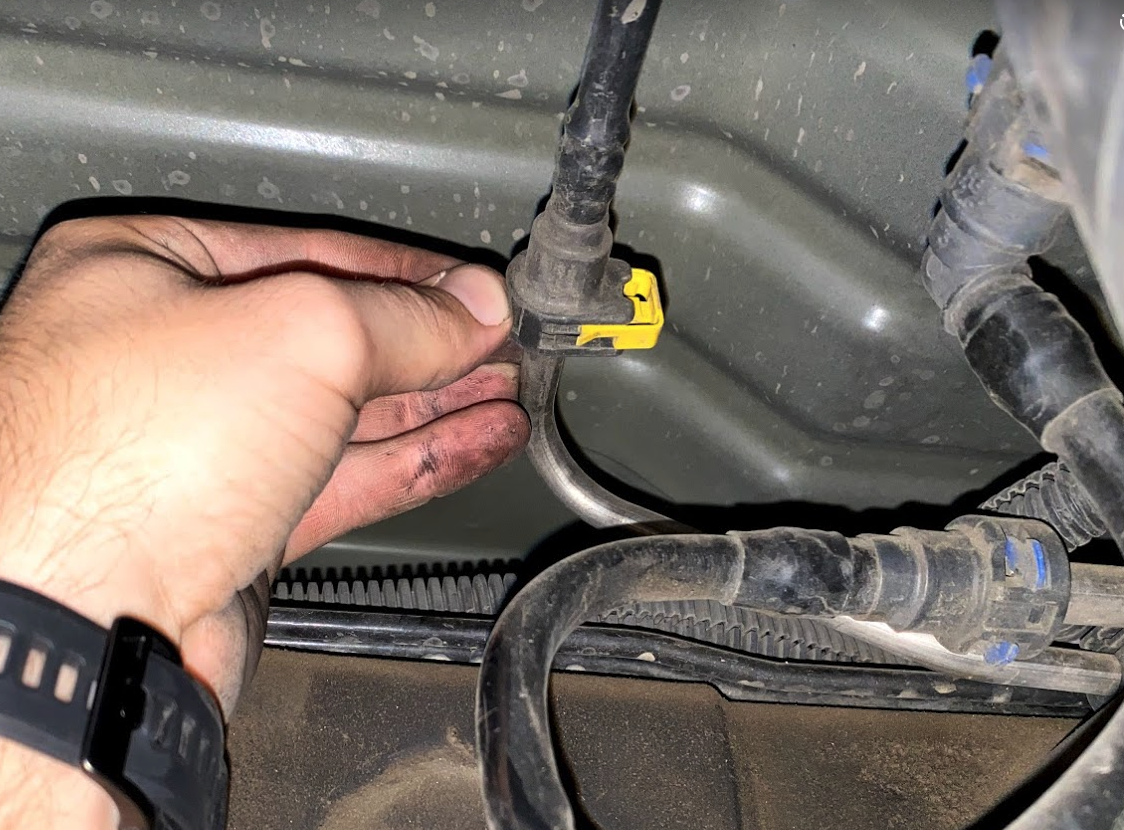
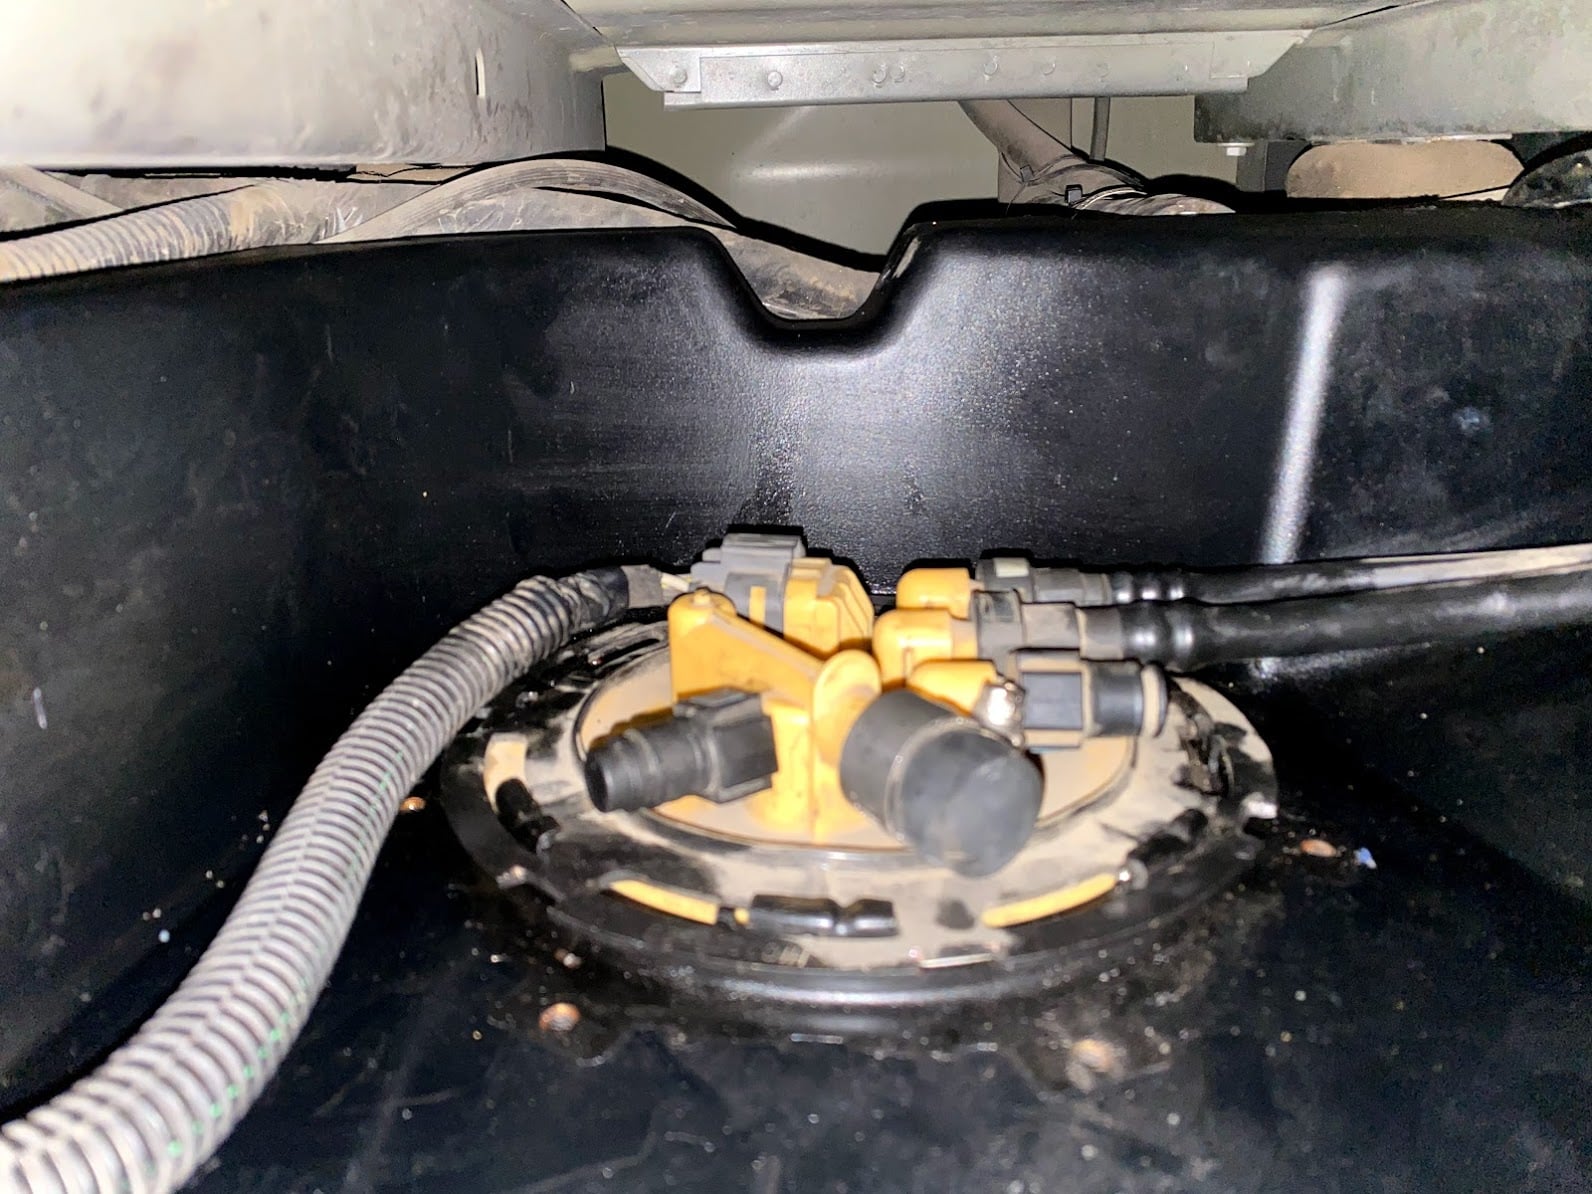
Using a precision pick or flat head screwdriver, pull out the red lock on the electrical connector. The depress the button on the top of the connector and pull the electrical connector off.
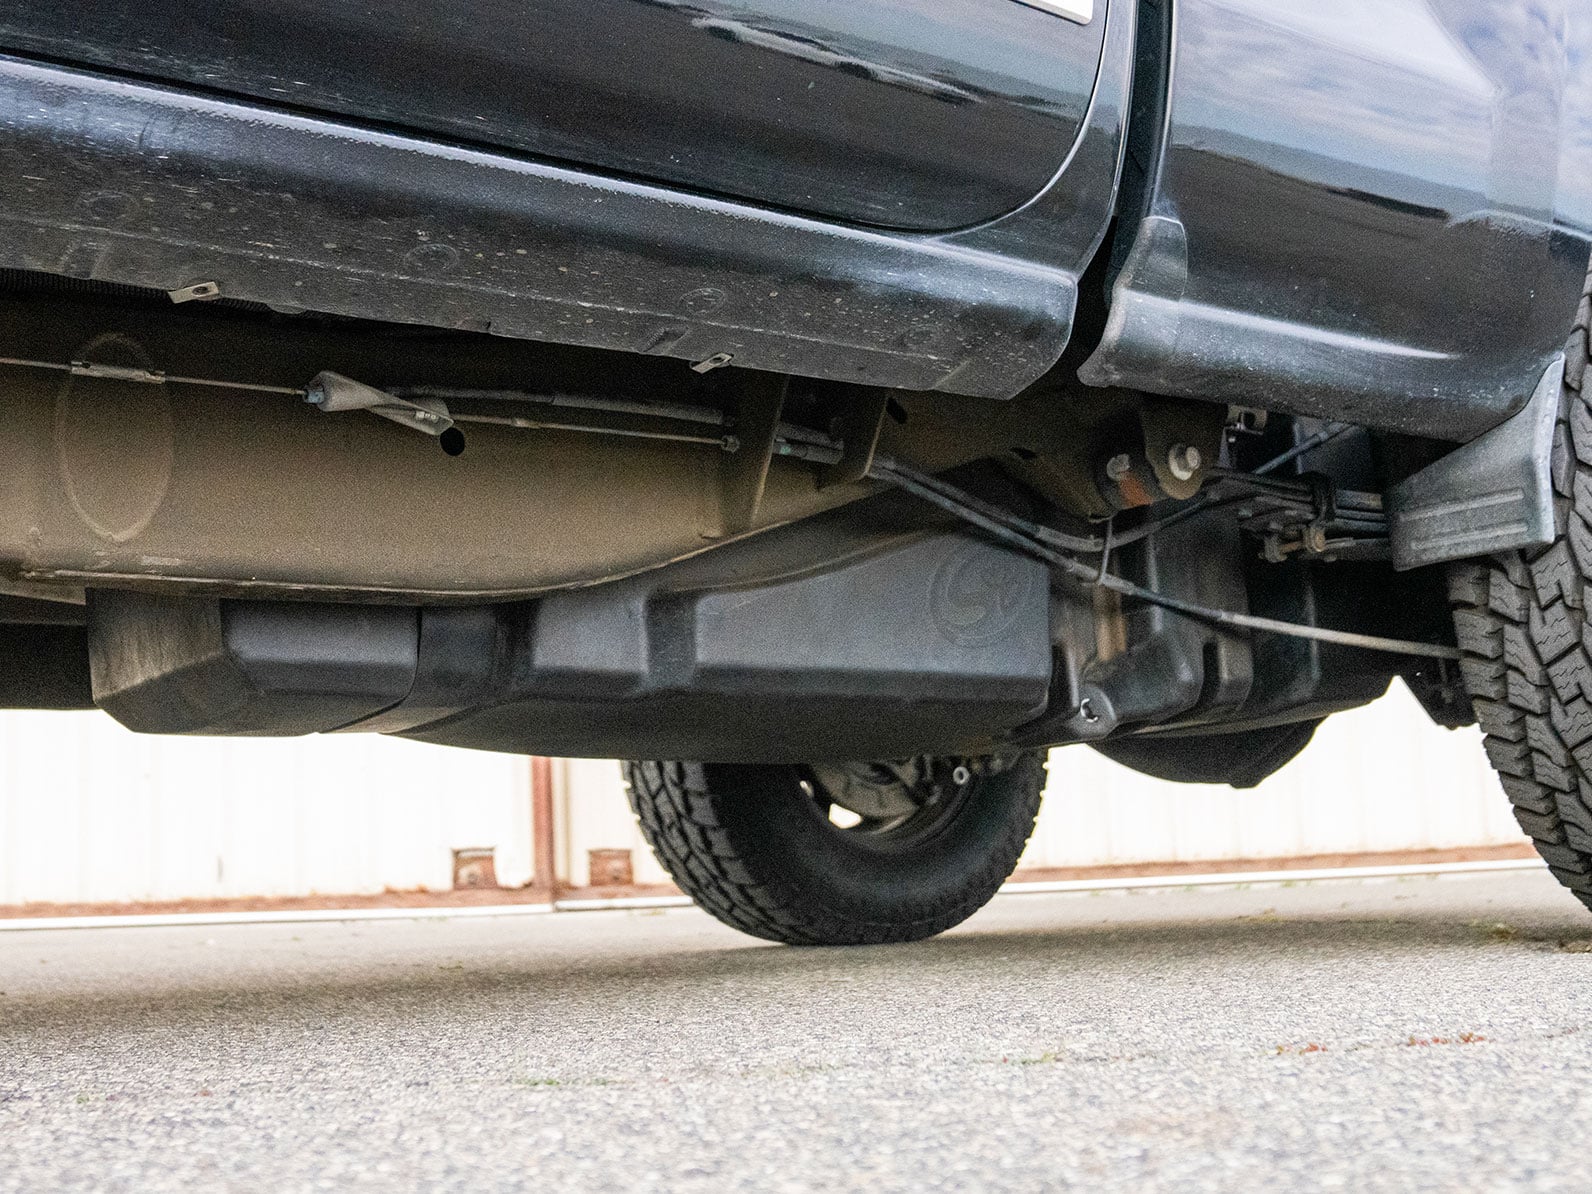
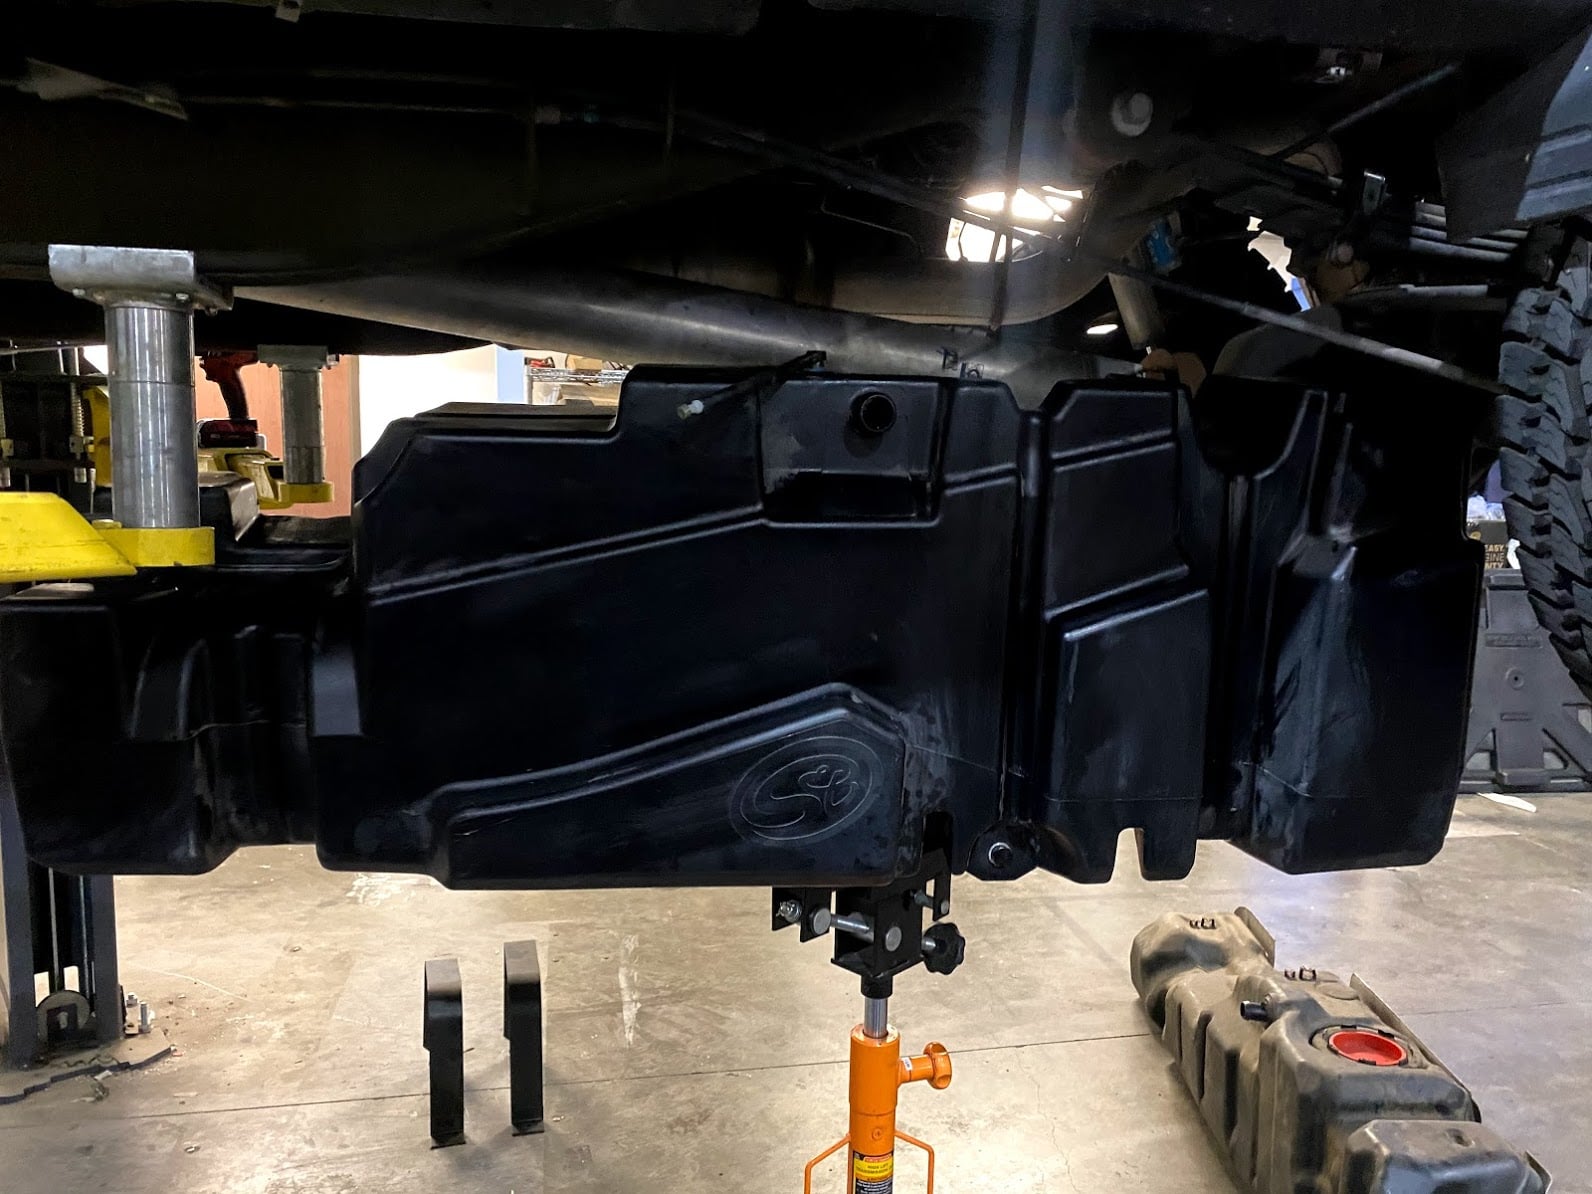
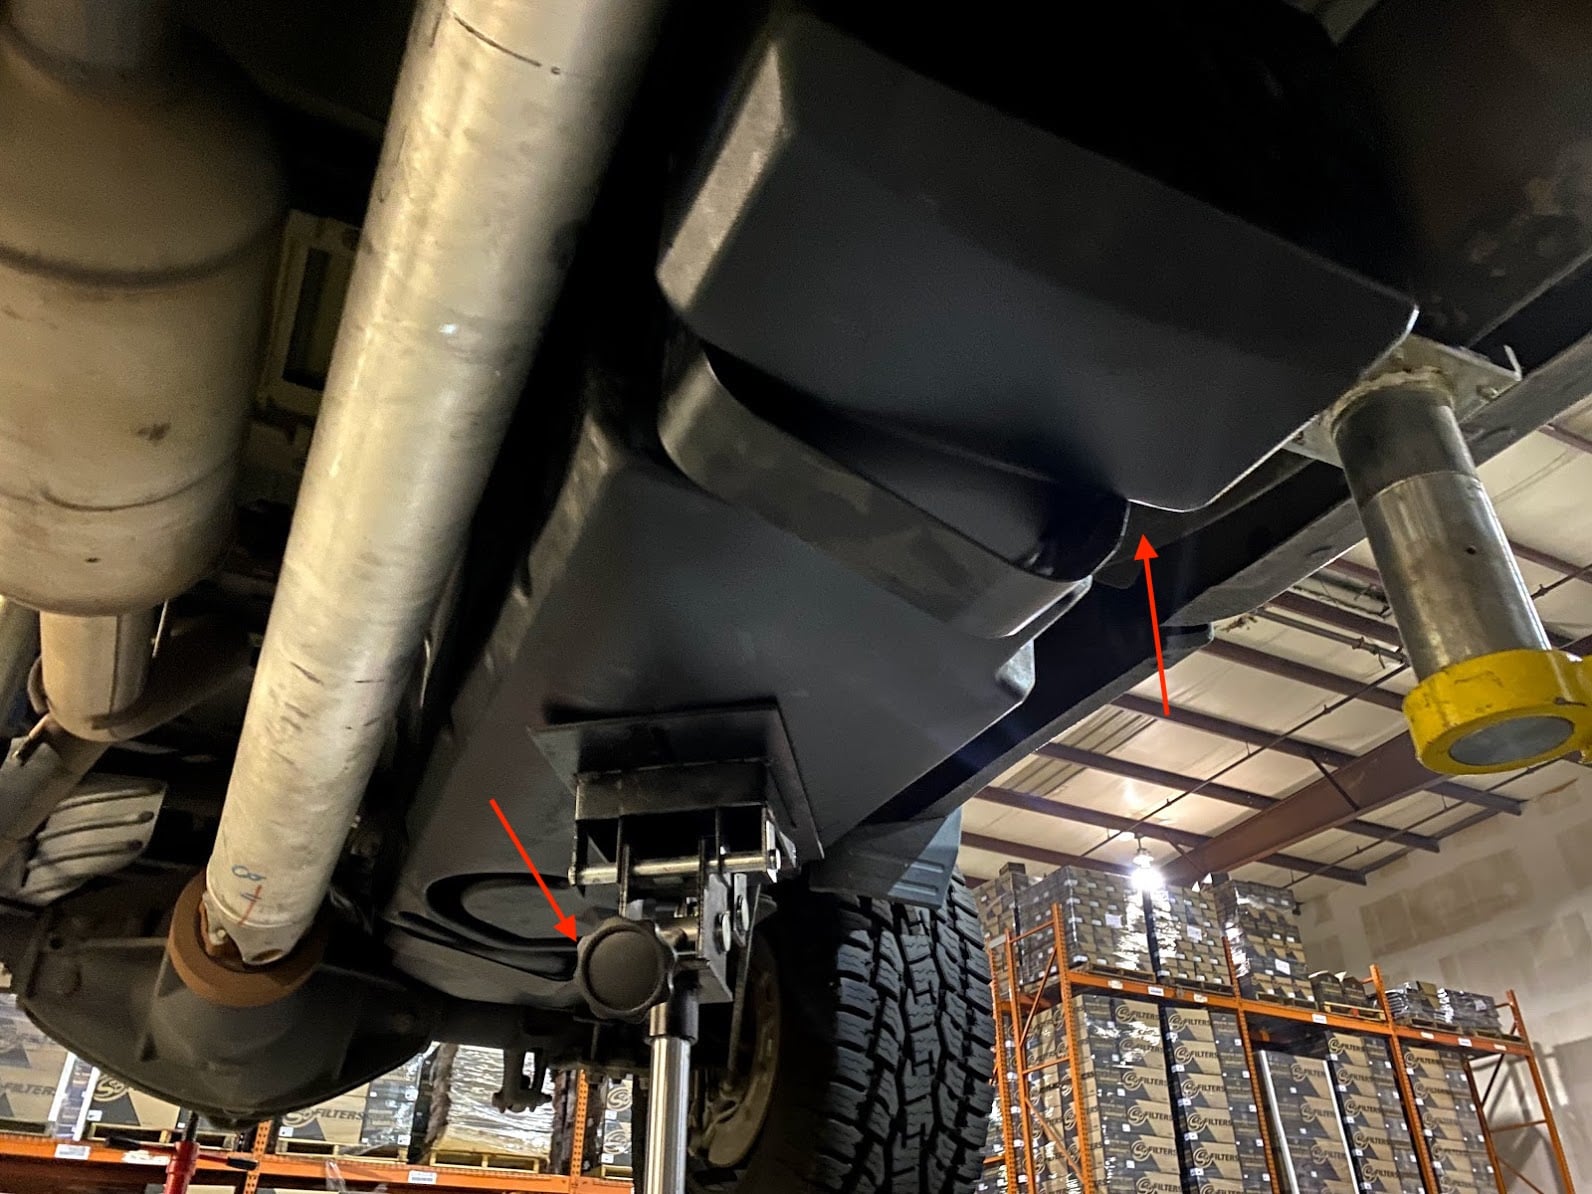
Remove the OEM skid plate if equipped. 3 bolts hold on the fuel tank skid plate. This will not be used again.
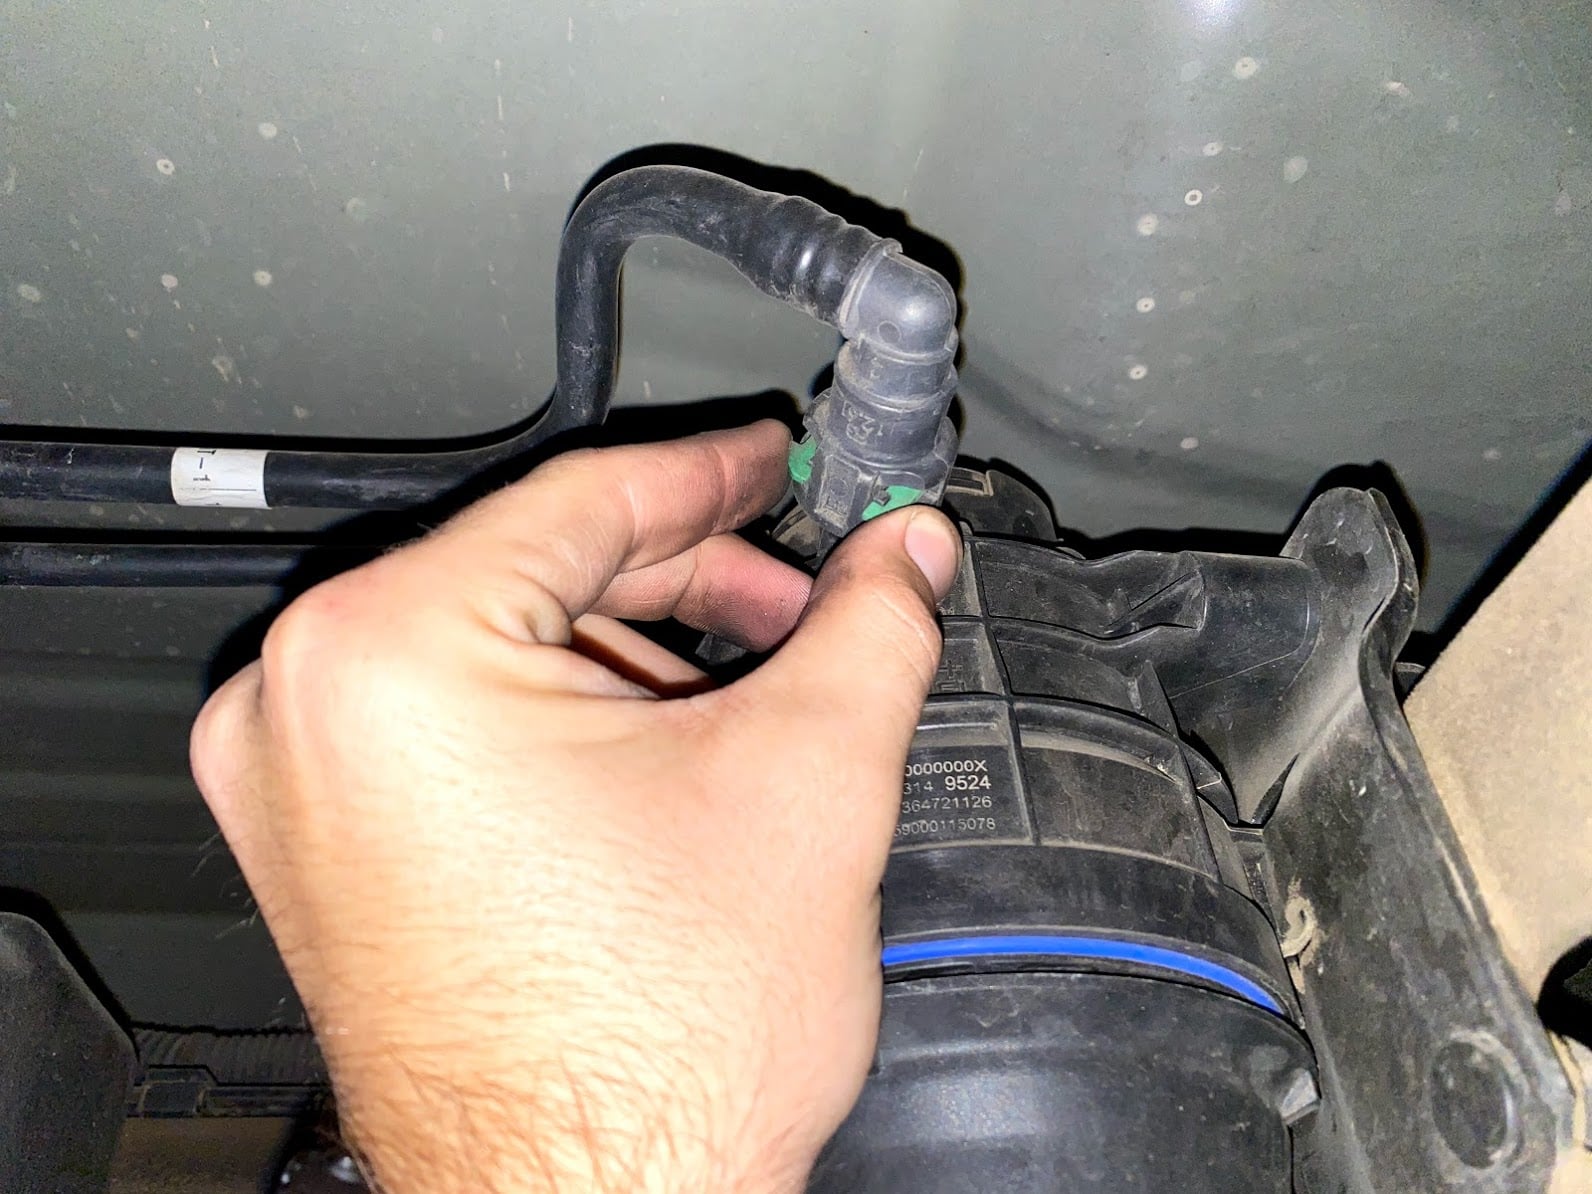
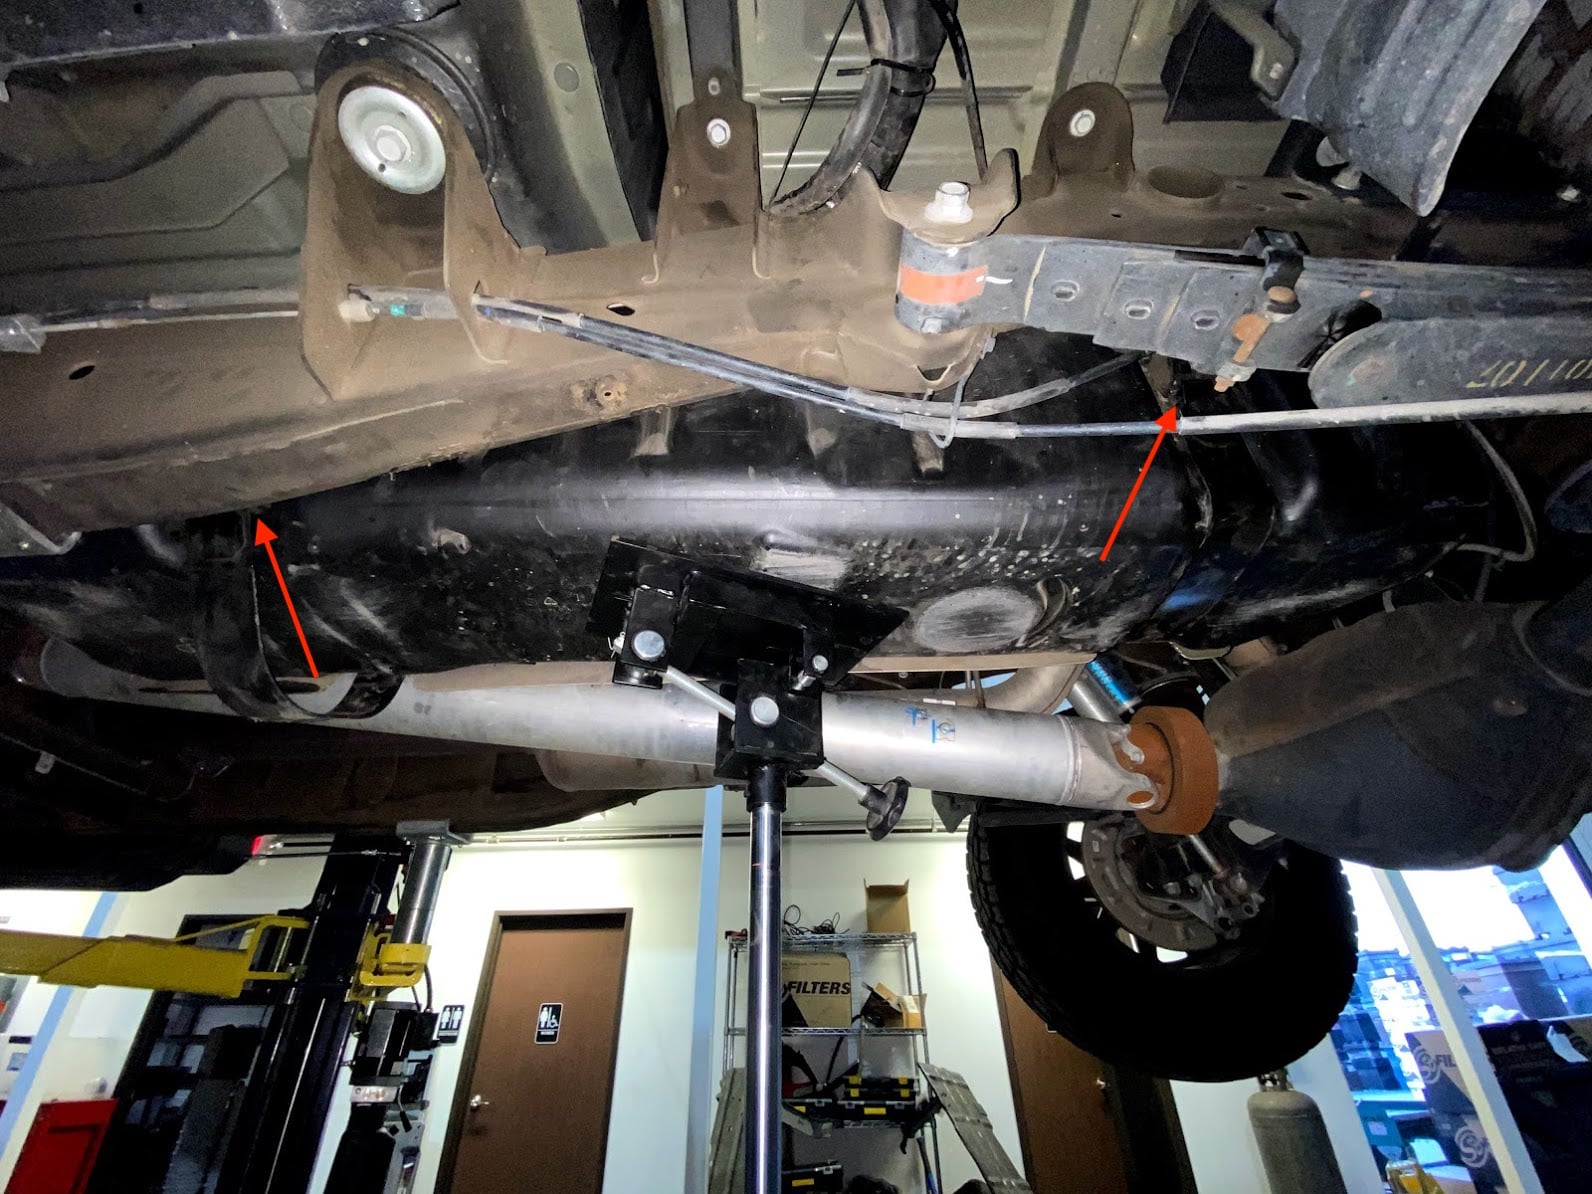
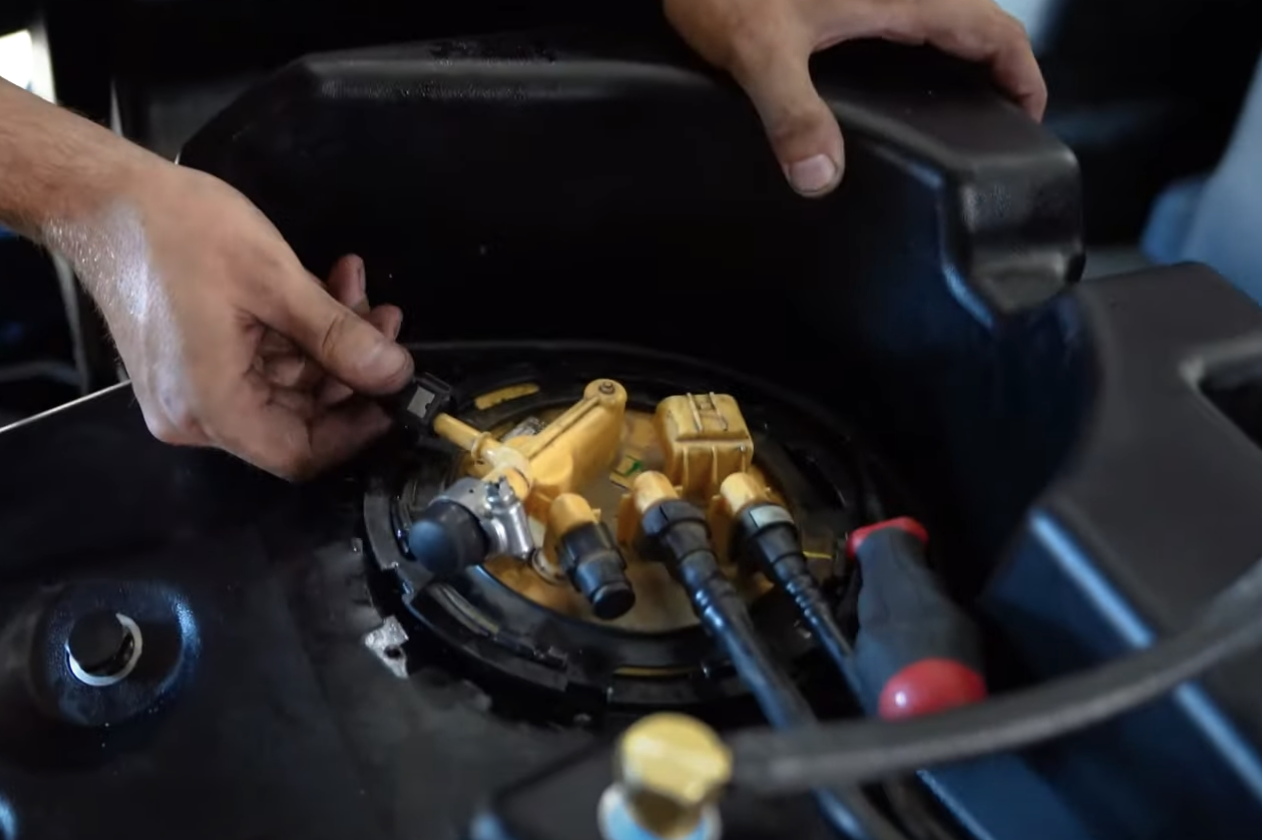
Disconnect and remove the return and feed fuel connectors.
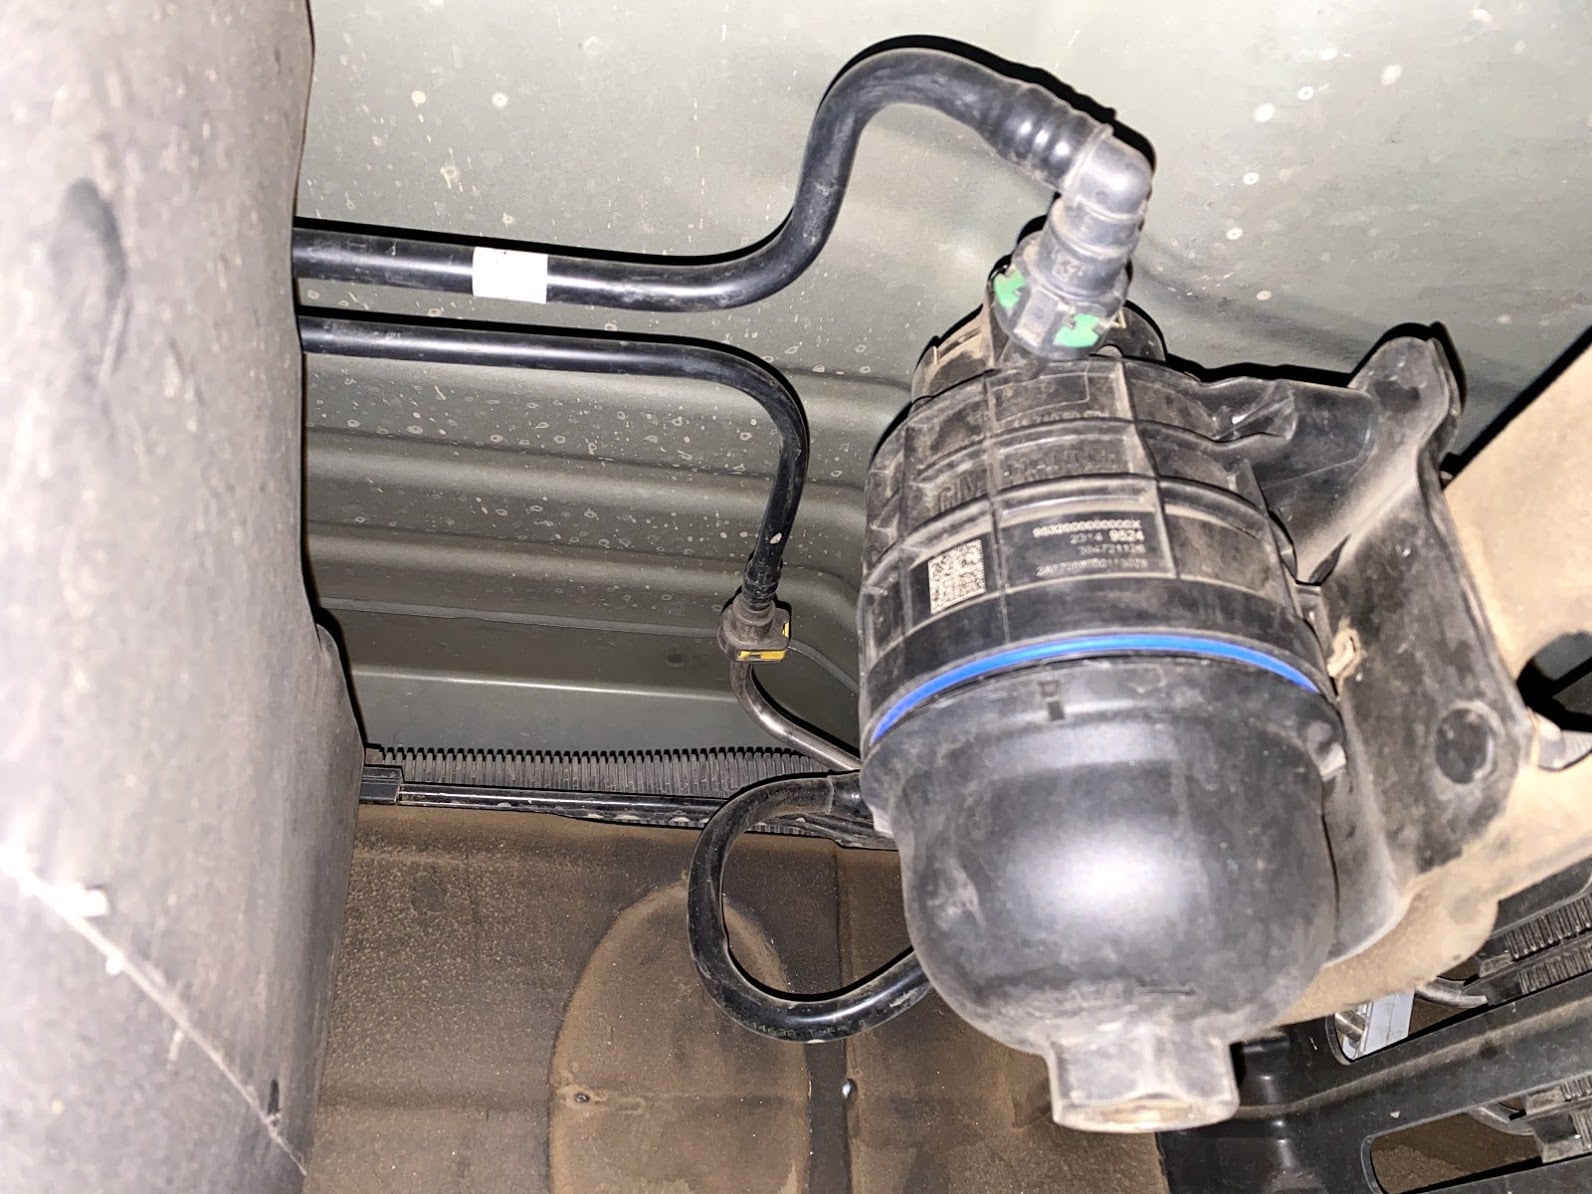
The green fuel retaining clip first slides toward the driveshaft then out of the connector.
Remove this additional bumper bracket found on some 2016 year trucks.
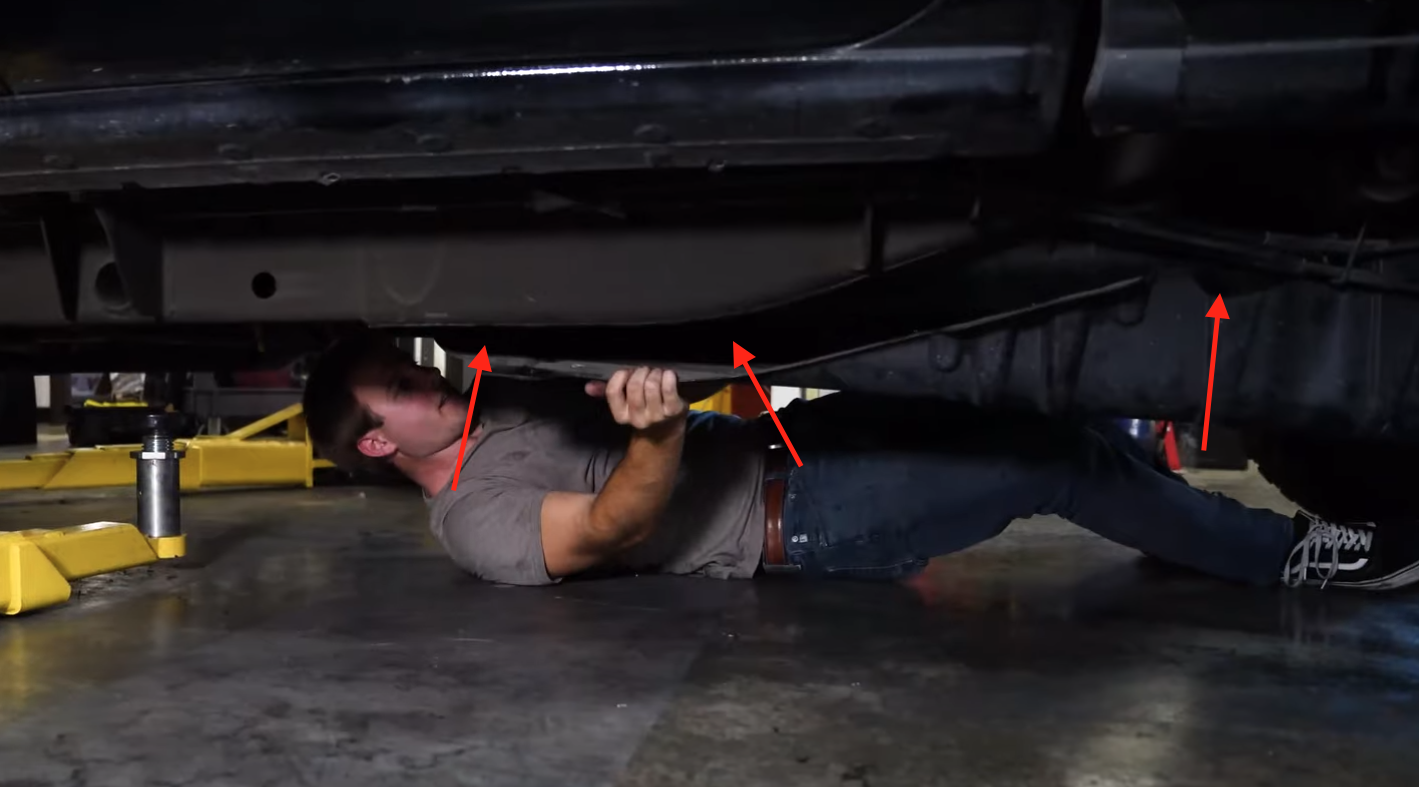
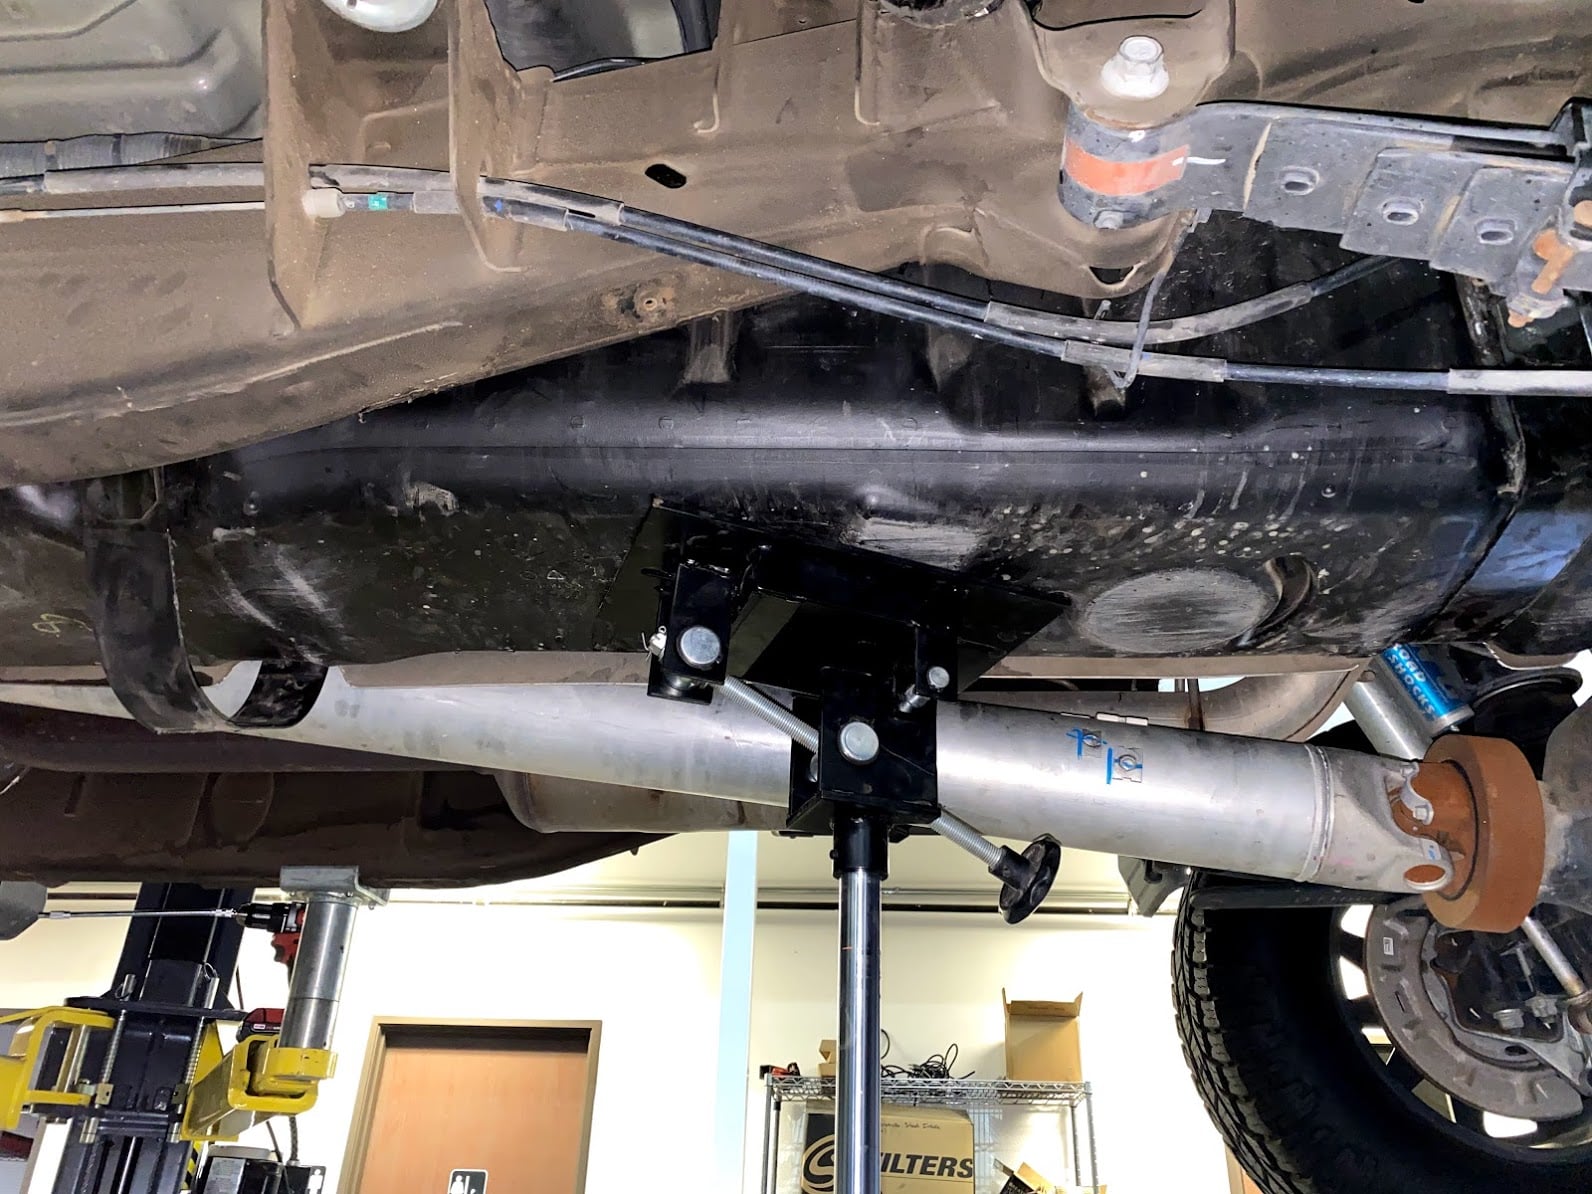
If you are doing this install on a lift, center the hydraulic jack underneath the fuel tank and raise until the jack contacts the tank. Caution: Support the tank properly as remaining fuel can slosh and cause the tank to shift. If you are doing this install on the ground, support the tank with ratchet straps, floor jack or with a partners hands while you remove the fuel tank straps.
- Lift Install: Hydraulic Jack
- Floor Install: Floor jack with added support to properly hold tank
Remove the 2 bolts that secure the fuel tank straps and then lift our the strap on the driveline side.
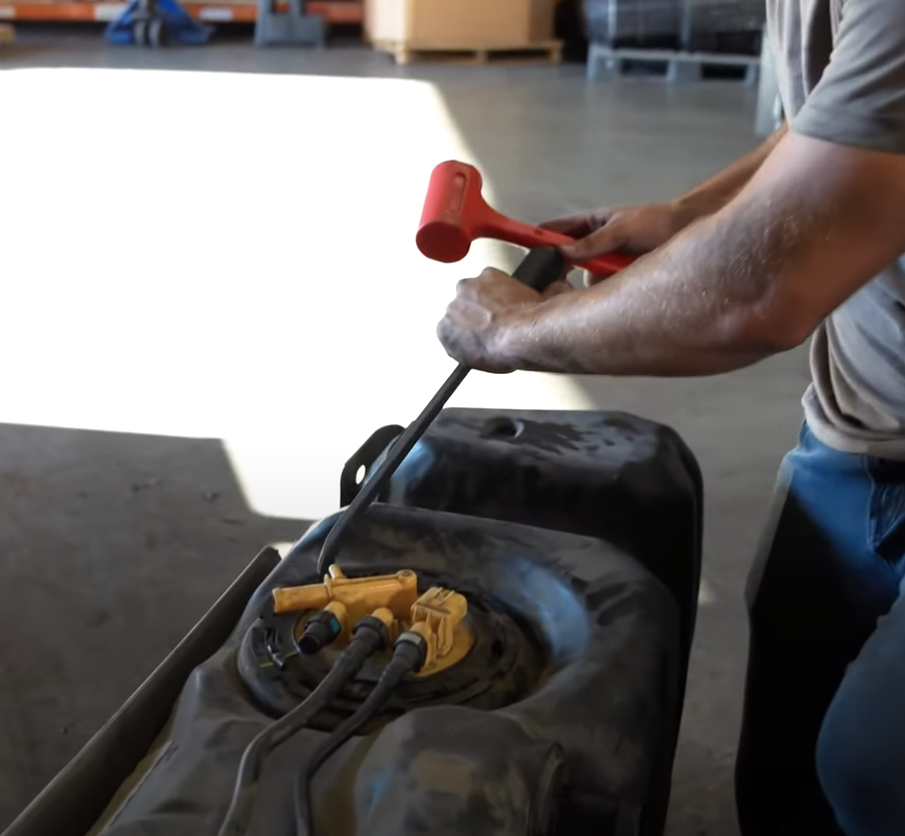
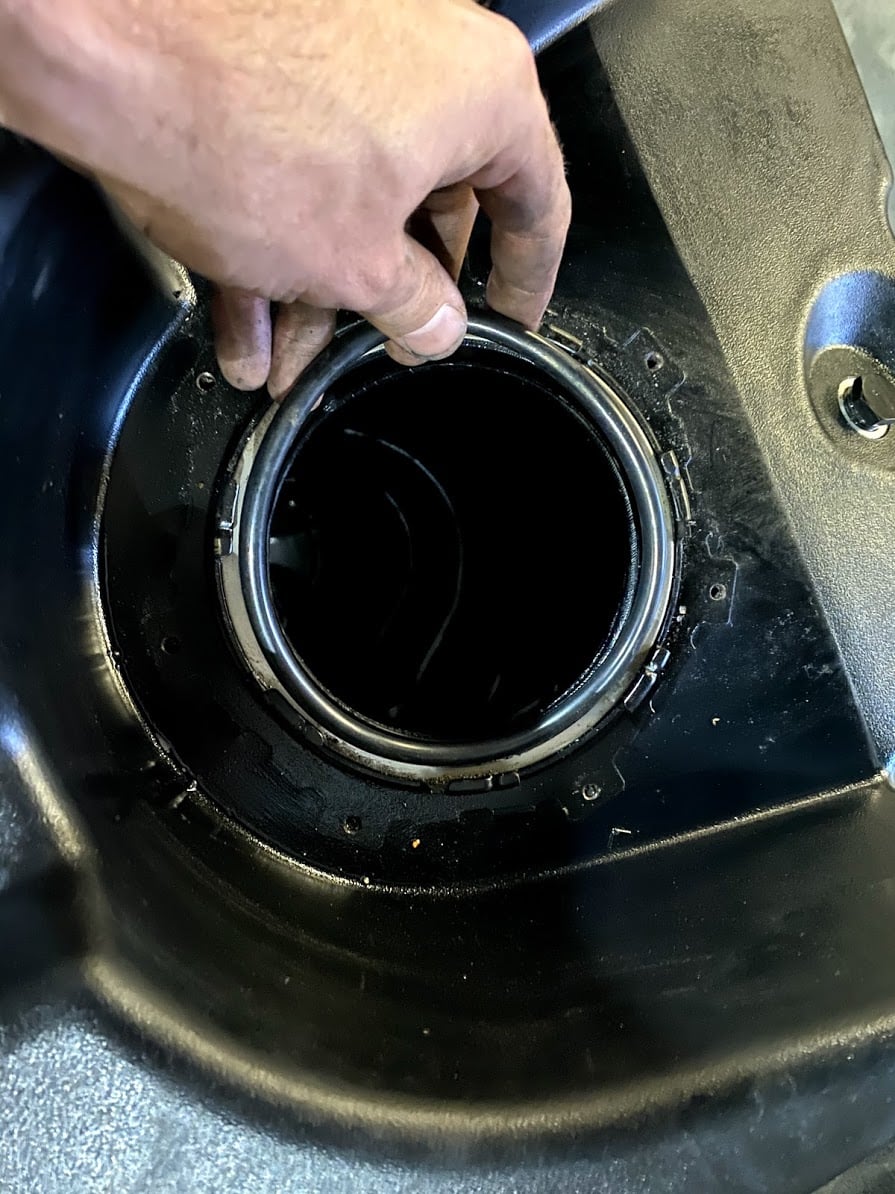
With a mallet and pry bar, hit the locking ring counter clockwise to remove the locking ring.
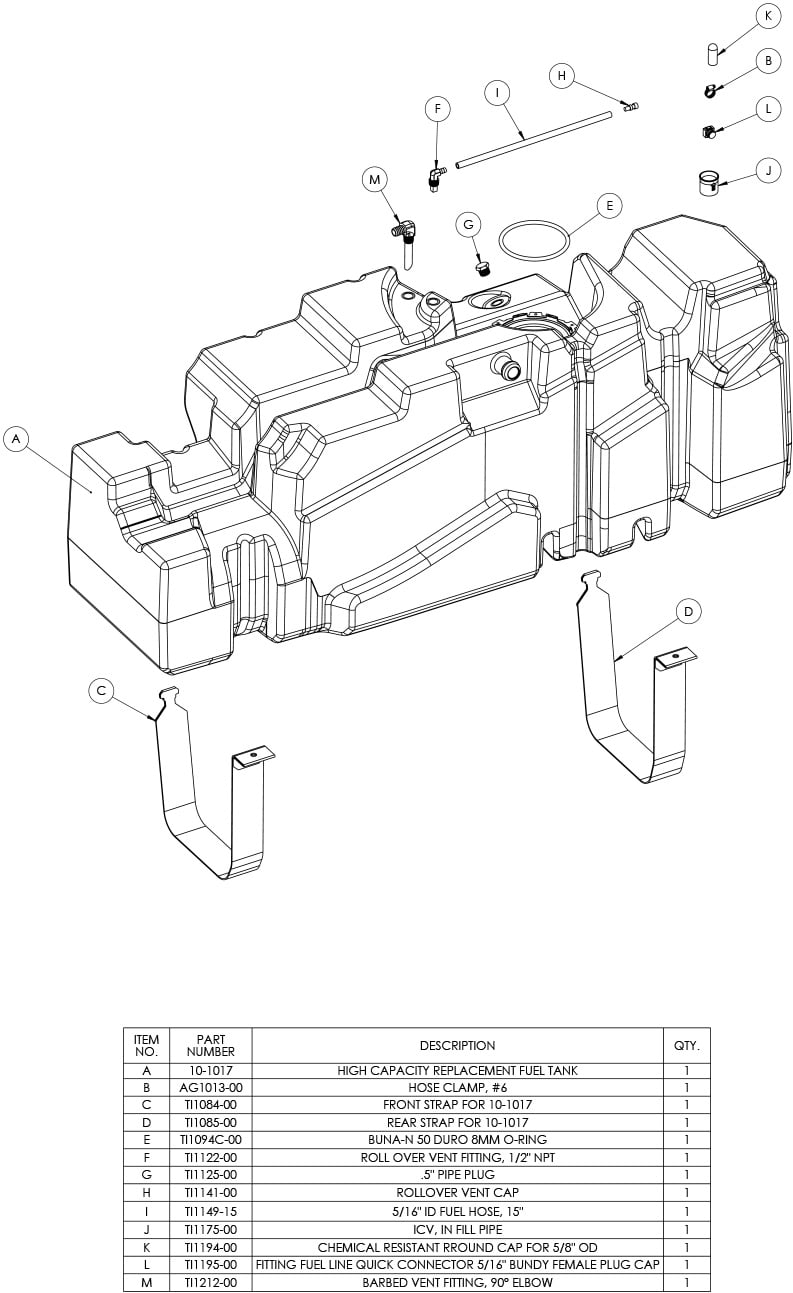
Check the inside of the tank to make sure there are no foreign debris. Place the o-ring in the o-ring groove.
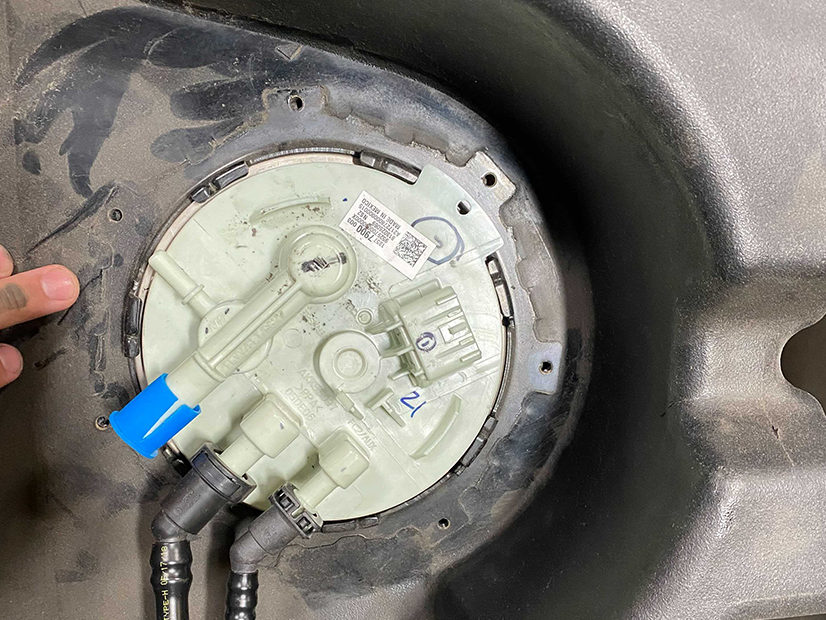
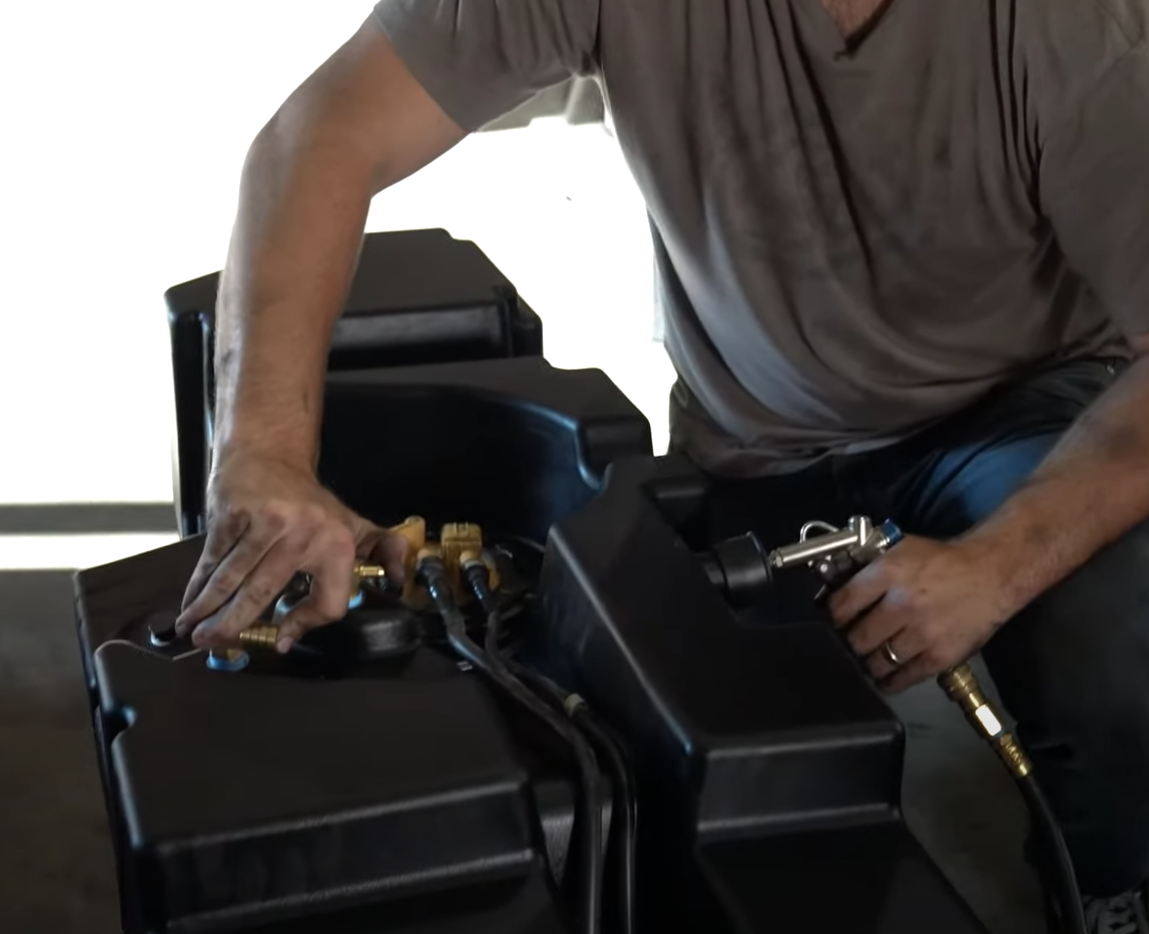
Disconnect the fuel lines from the fuel line retainers on the stock tank. Remove the sending unit and fuel lines from the stock tank. Then place the bucket into the S&B Tank with the tab facing the arrow.

If this is a 2011-2016 truck, the tab on the sending unit should be in the position to the right of the arrow marked on the tank.
Place the retaining ring over the sending unit and push down to get the ring started under the receiving teeth on the S&B Tank. With a pry bar and mallet, hit the ring clockwise until the ring is fully rotated under the indention.

Install the plugs over the vent rollover valve ports
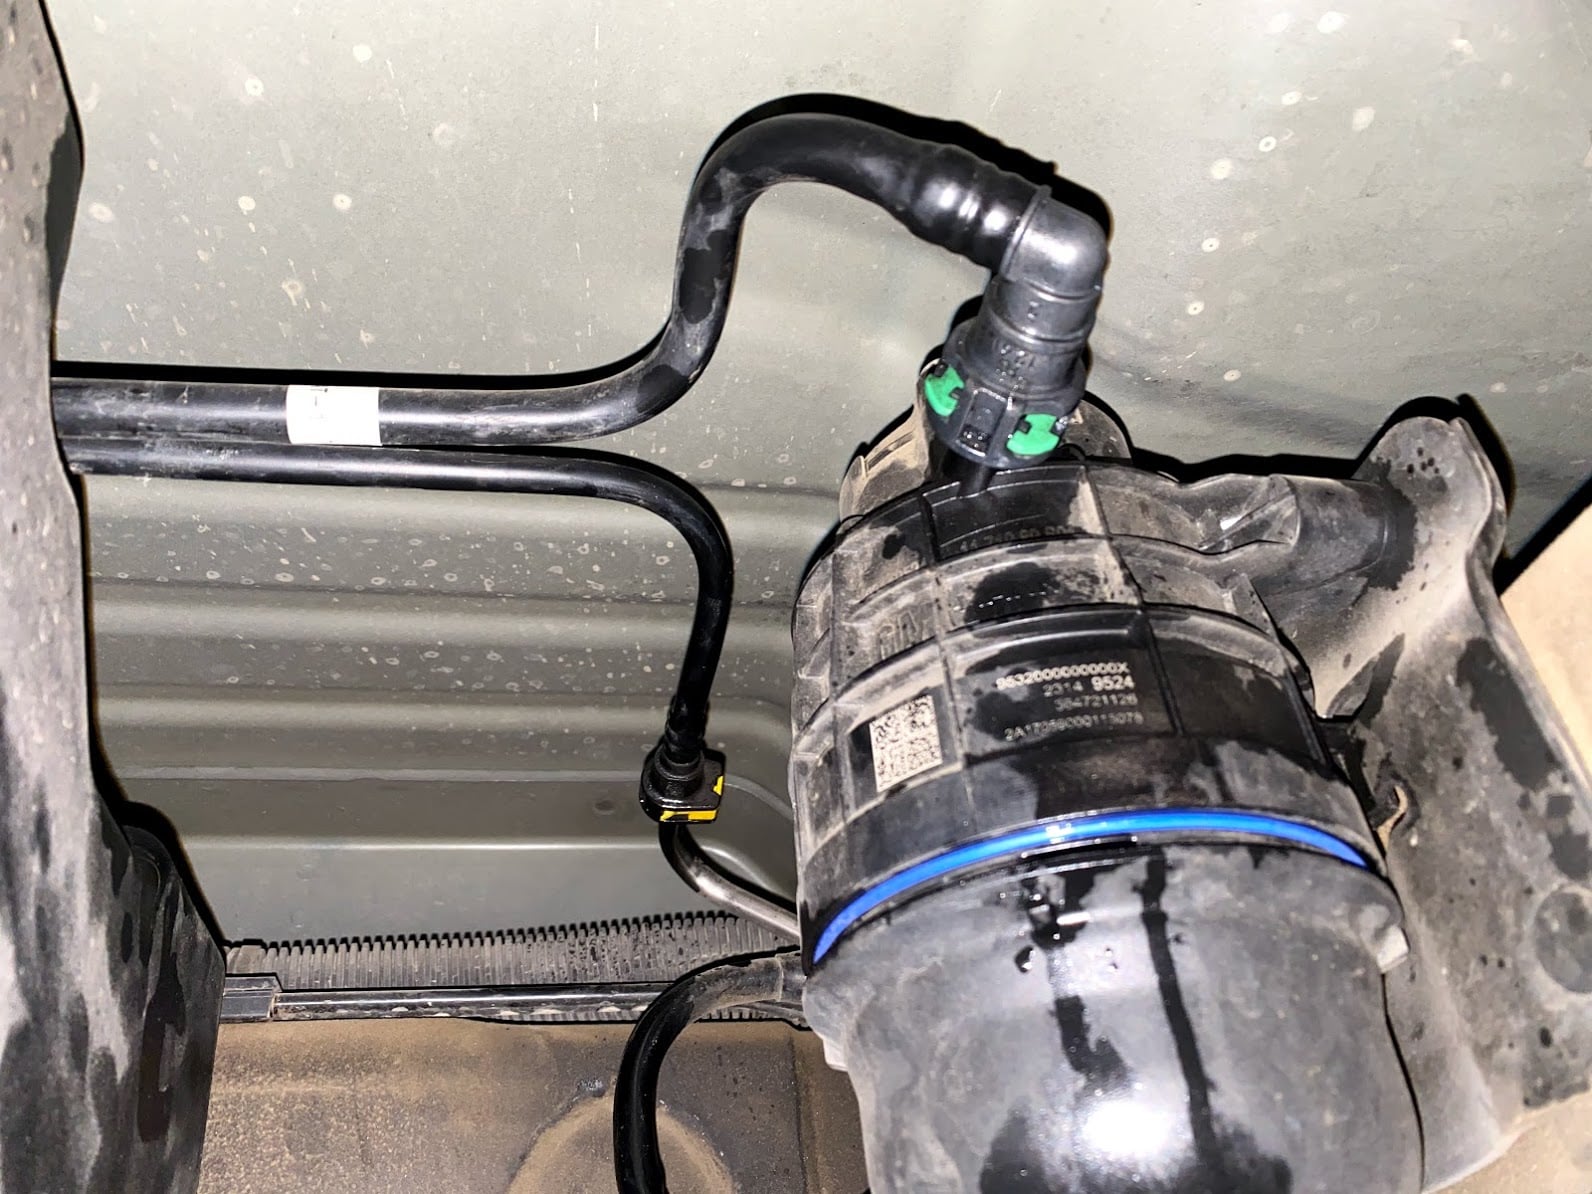
Install the rollover valve with the hose facing the filler.
For 2011-2016 trucks, install the 1/2" fuel line around the feed line.
Block off the open ports on the S&B Tank and pressurize the tank through the red filler cover. This is to ensure you got a good seal on the o-ring and there are no leaks. Spray the o-ring area with soapy water.
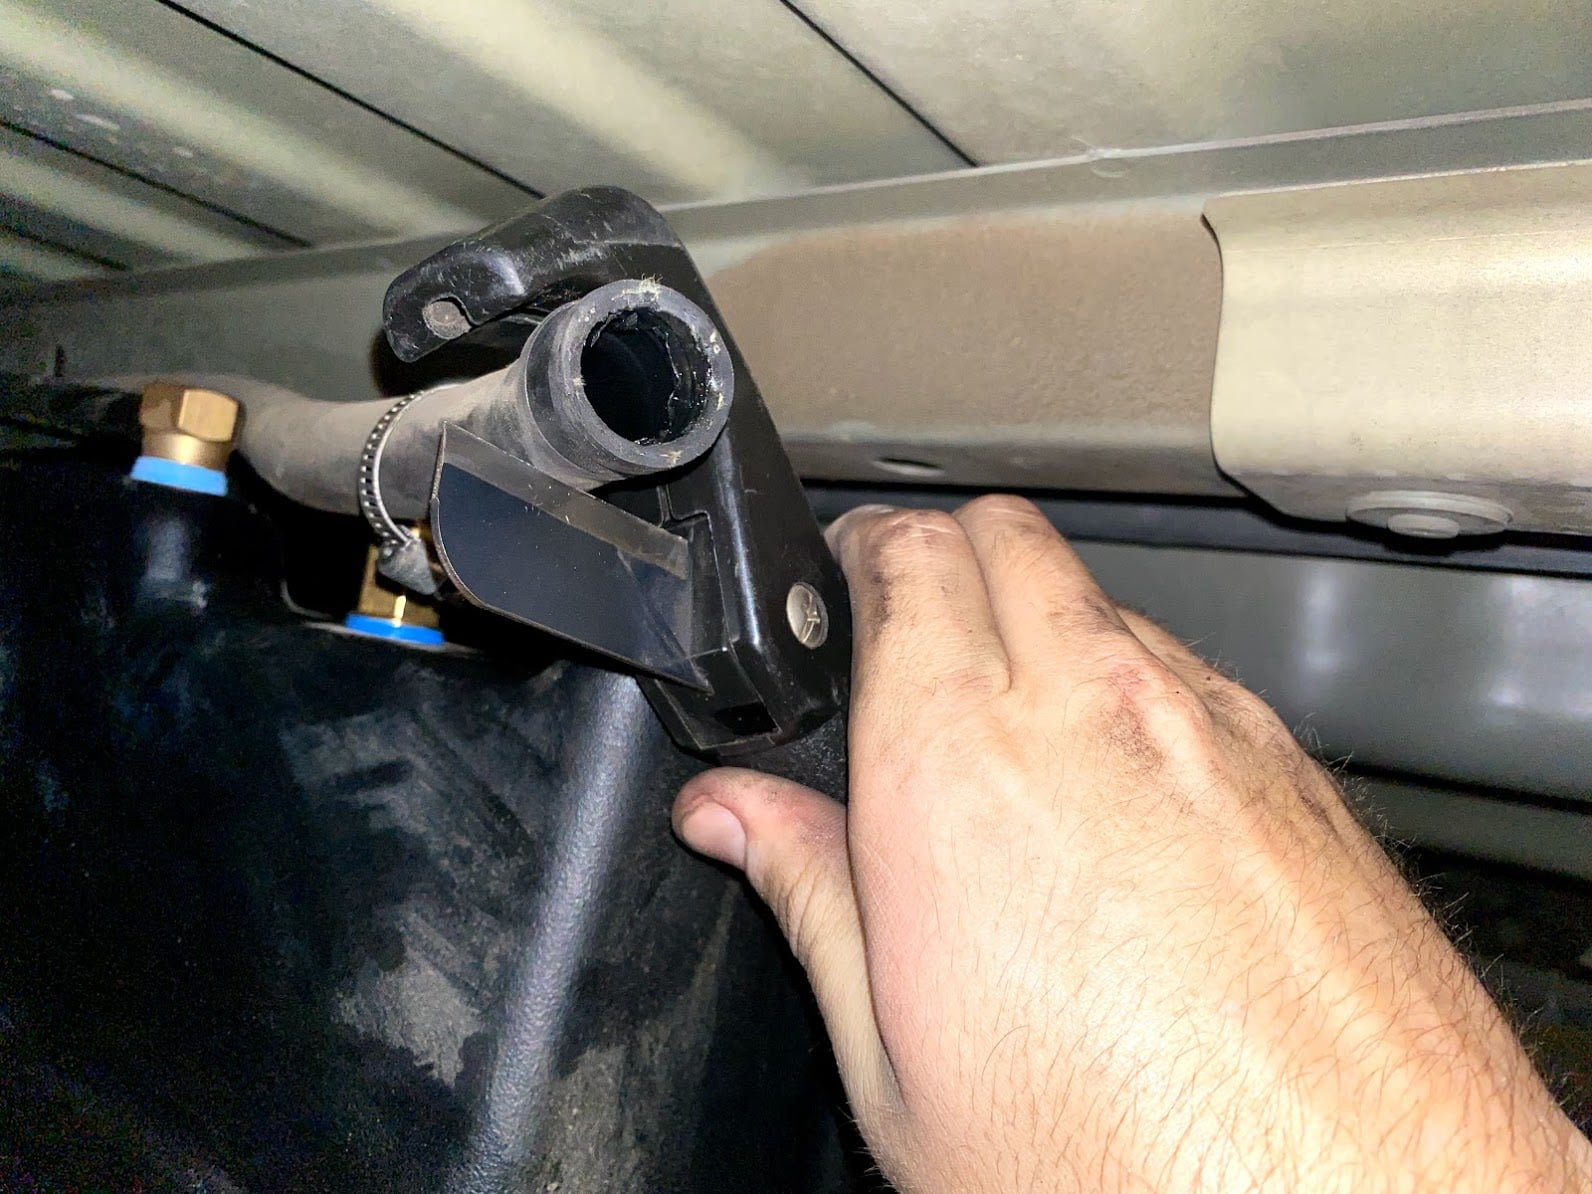
Install the white inlet check valve into the filler hose before installing the tank. The blue arrow should be pointing into the tank.

Place the tank onto the transmission jack and lift the tank into place. The tank will need to be angled over the driveshaft. The driveshaft can be disconnected from the rear axle and held away from the tank to make this easier.
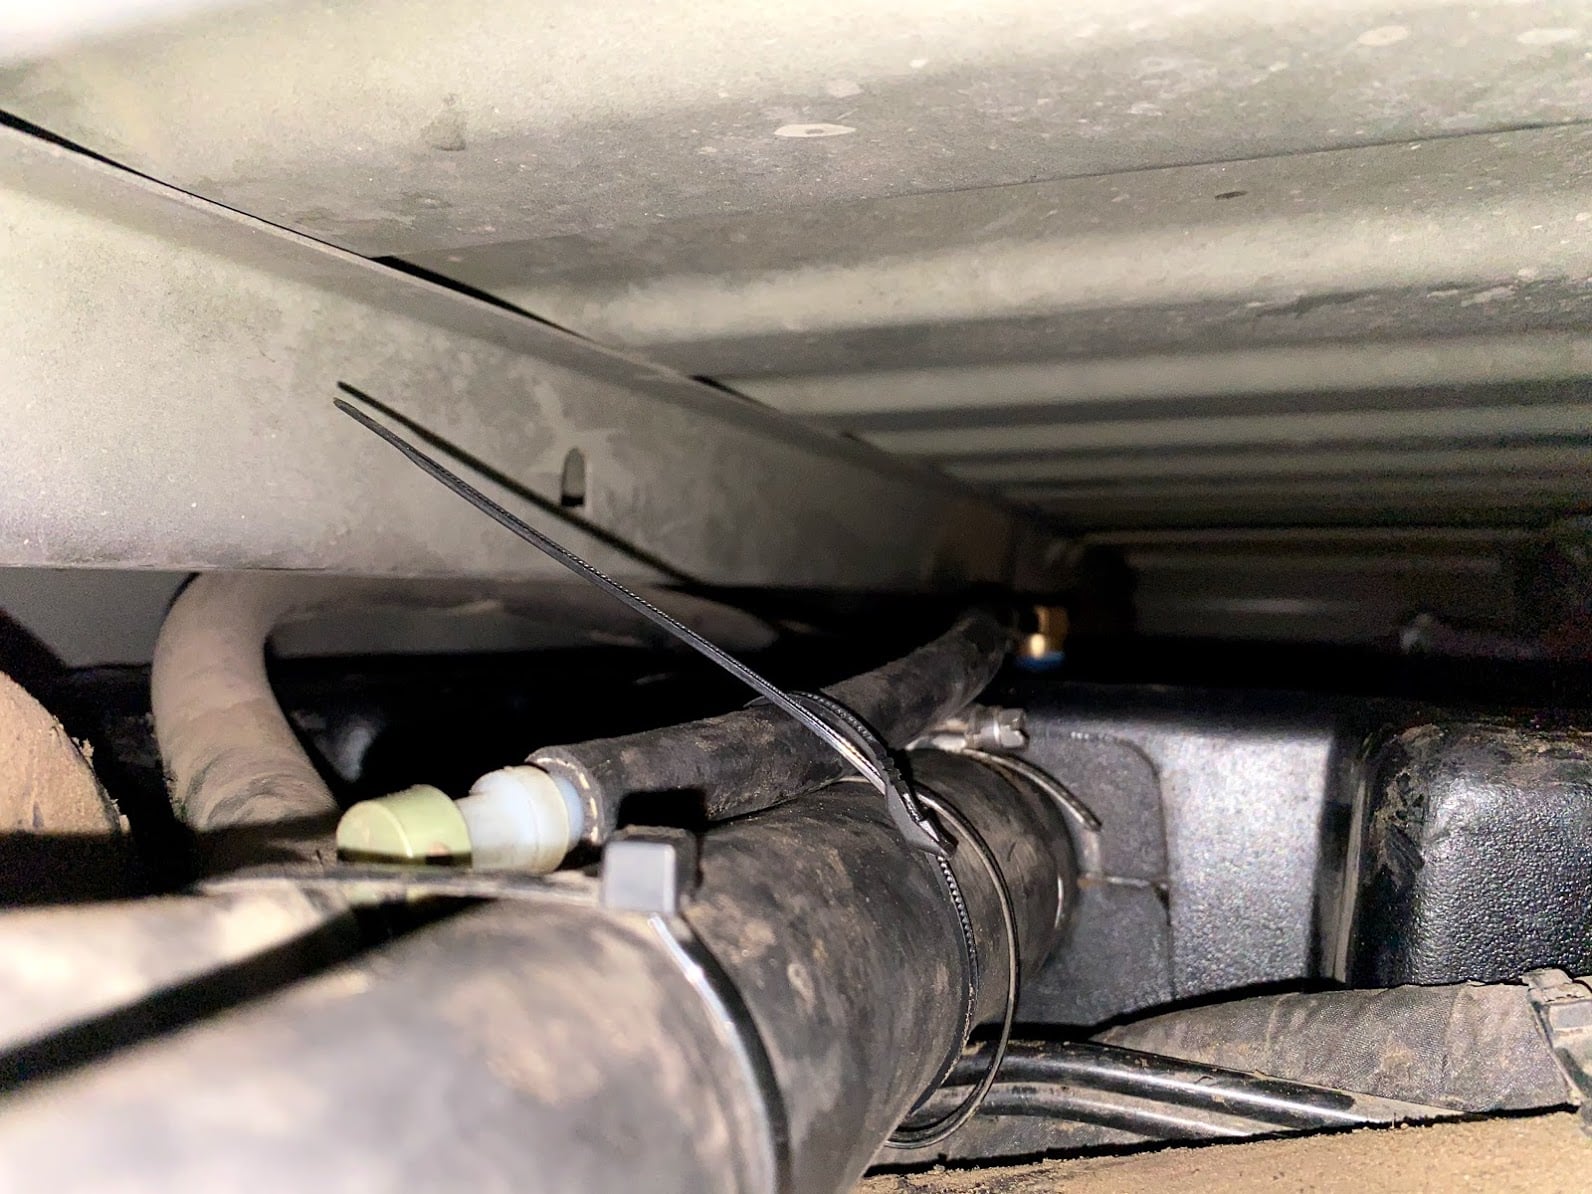
The vent hose will be installed on the S&B 5/8" barb fitting. When the tank is all the way jacked up into the truck. Measure out the correct length to cut the vent hose and make the cut. Then install the vent hose onto the barb and tighten the hose clamp
Reinstall the electrical connector and slide the red locking tab into the locked position.
Install the S&B Straps. Start by installing the rear strap first. If you are installing this on a 2020+ truck, the included bolt can be used on the front strap to make it easier to install. Putting pressure on the underside of the front strap can help with installation.
Reconnect both fuel line connectors and slide the retaining clips to the locked position. Gently attempting to separate the connectors after they are in the locked position can make sure they are connected correctly.
Reinstall the filler hose onto the S&B Tank and zip tie the breather line onto the filler hose.
This final checklist is very important.
#1 Make sure all bolts and nuts are safely fastened and torqued.
#2 Ensure there is proper driveshaft clearance.
#3 Double check fuel line connections, the electrical connection as well as the vent and fill lines.
#4 Lastly, fill the tank full and check for any leaks.
If you have any questions, call or text us at 909.675.1313