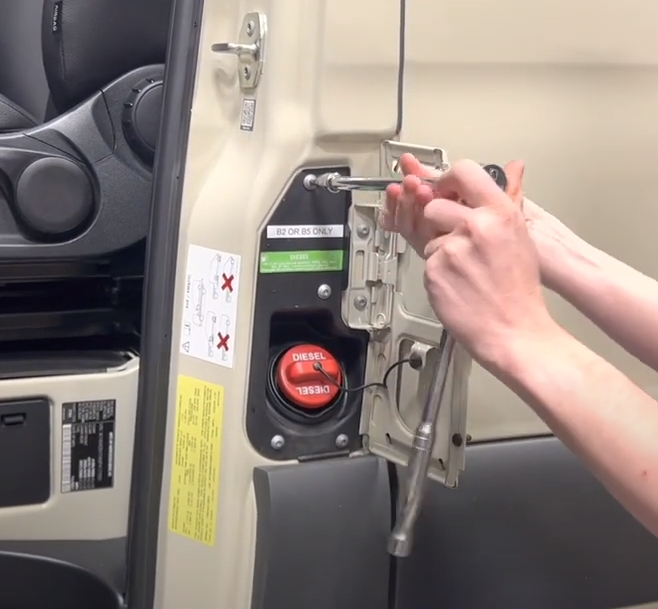
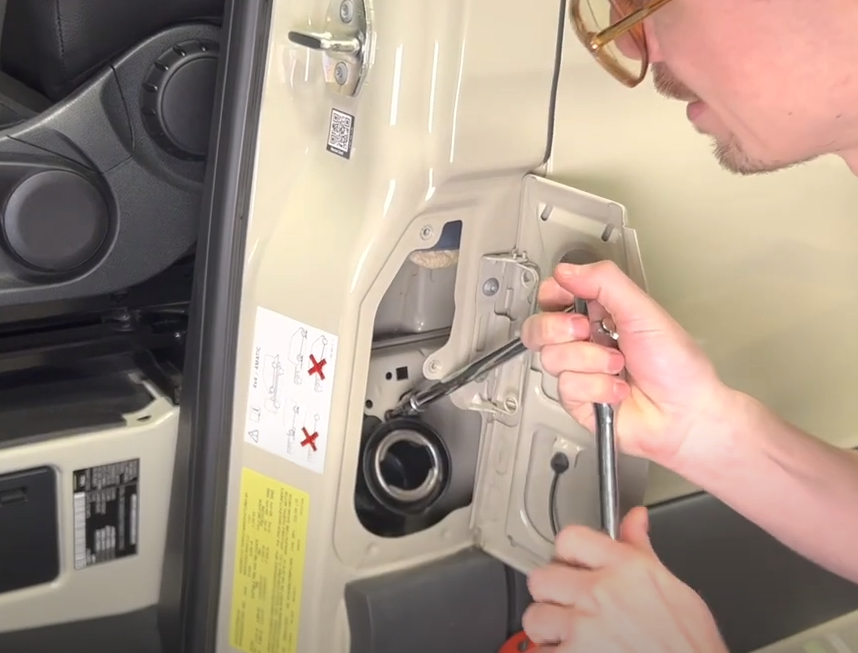
STEP 1
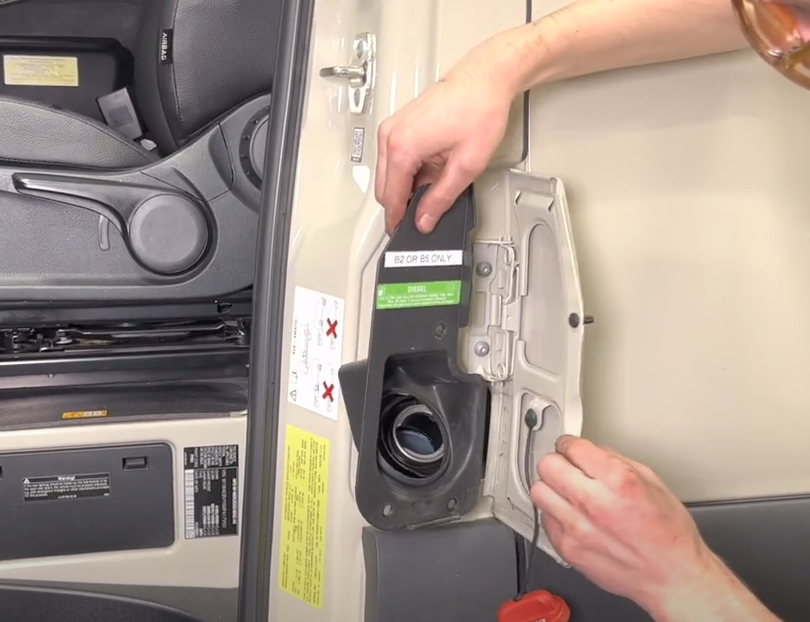
With a torx T-30 remove the 4 bolts holding the plastic filler door.
Before installing S&B Tank, conduct pressure test to ensure o'ring is properly seated.
Auxiliary Fuel Tanks will void the Lifetime Warranty. DIESEL FUEL ONLY
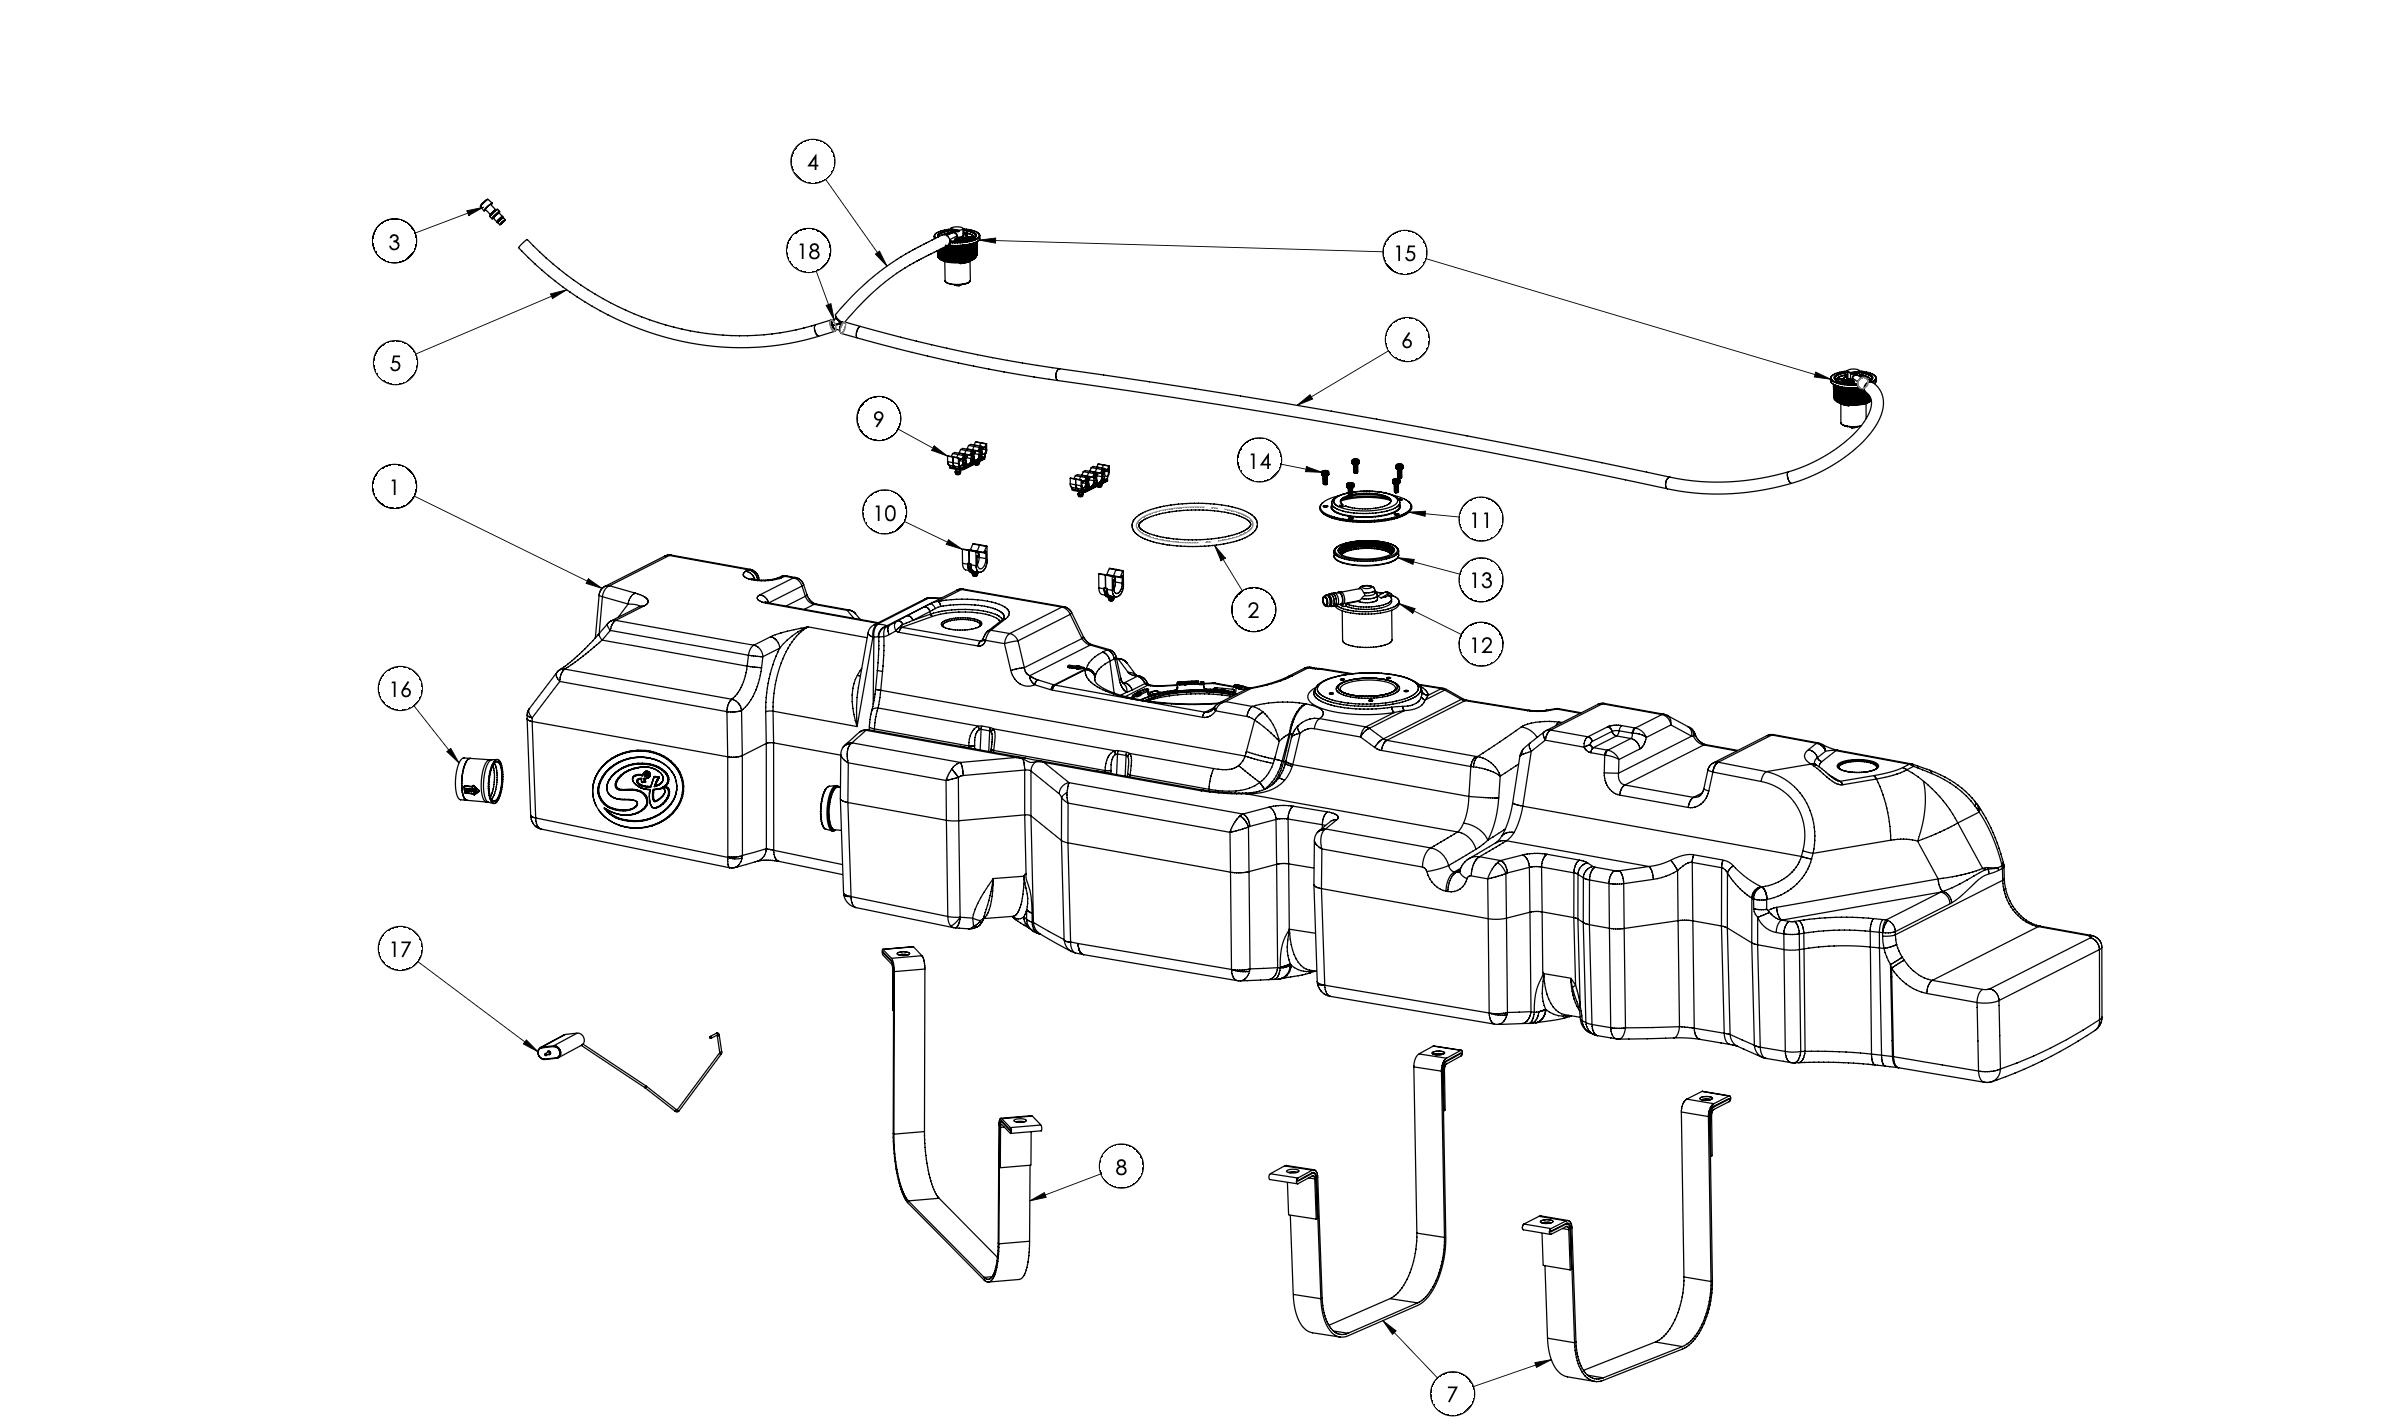
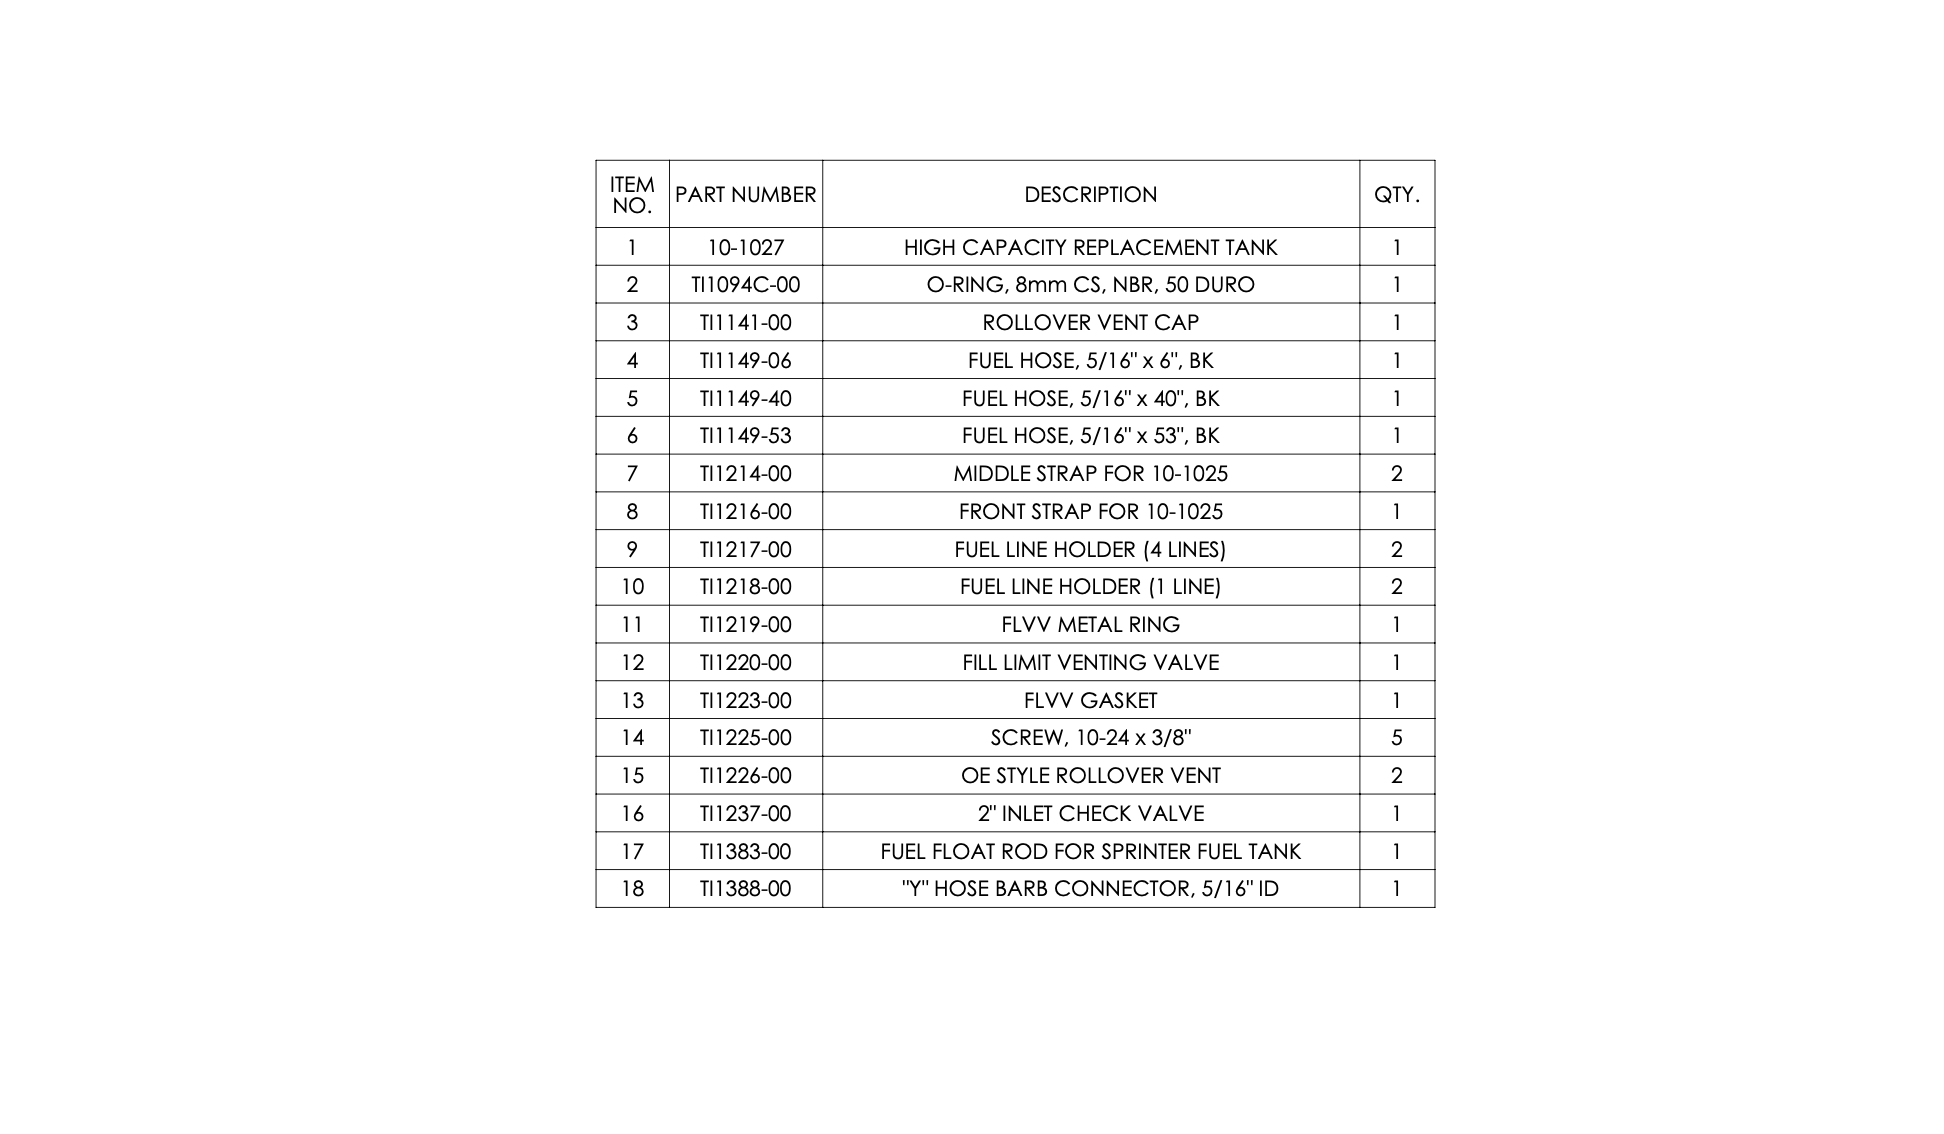
With a torx T-30 remove the 4 bolts holding the plastic filler door.
Close the door partially to free the plastic door then remove the plastic door and release the filler cap from the filler

Use a torx t-30 to remove the screw holding the filler to the body.
Remove the Styrofoam insert that surrounds the plastic filler.
Disconnect the ground spade connector
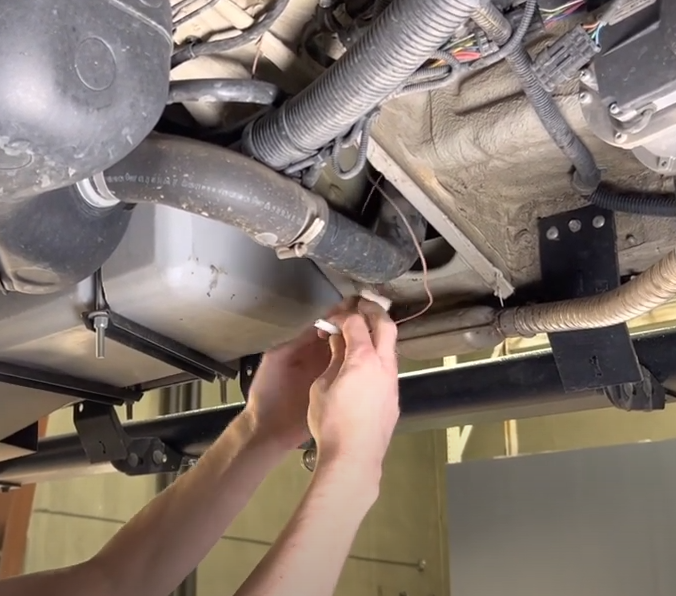
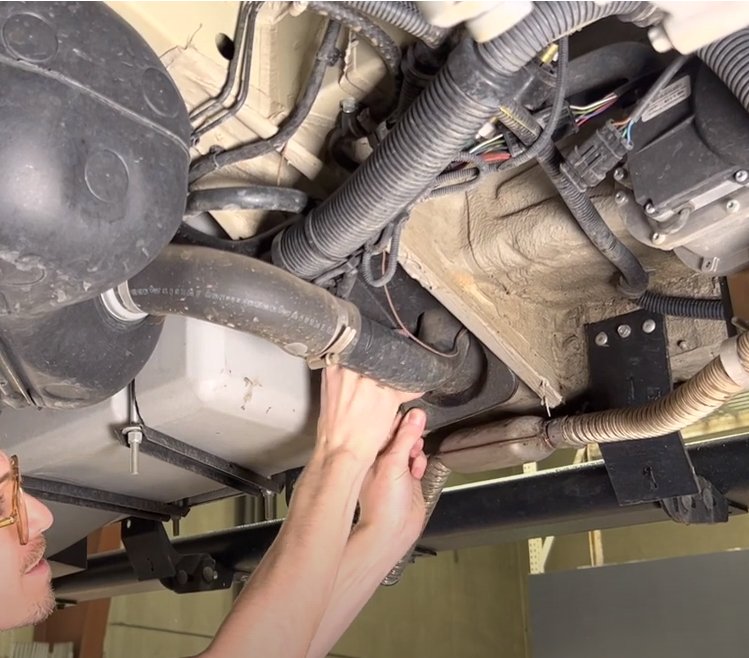
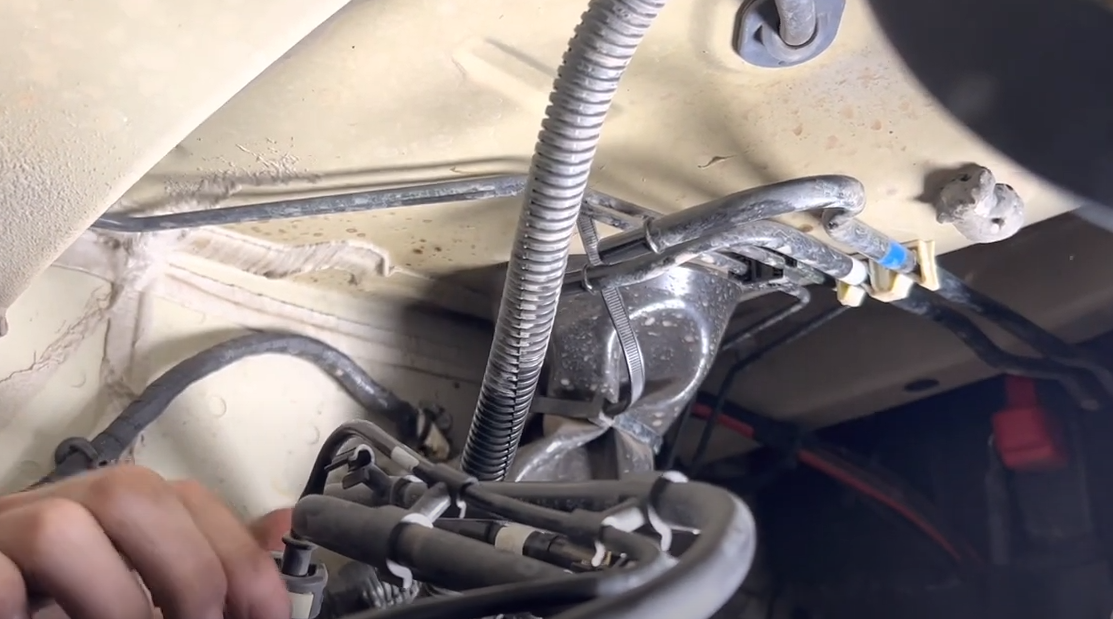
Disconnect the 3 fuel lines and the electrical connector. Remove the zip tie holding the electrical connector wire harness to the fuel lines. Please see minute 3 of the install video if you have questions on how to disconnect the lines or electrical connector

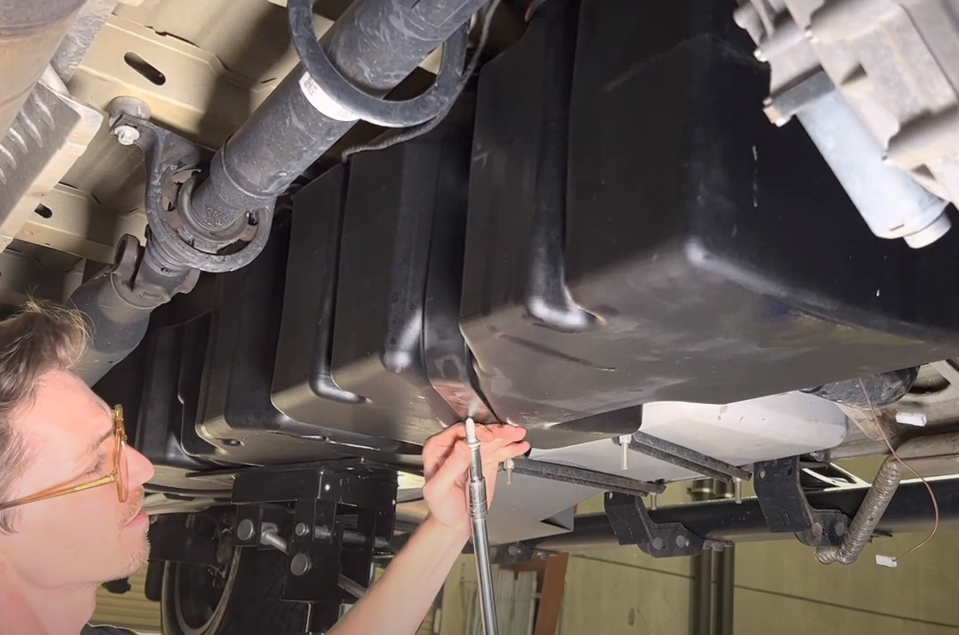
Position jack under fuel tank to support tank. It is now time to drop the tank (someone to assist you will make this part easier). If you are doing the install on the ground, support the underside of the tank with a floor jack or straps.
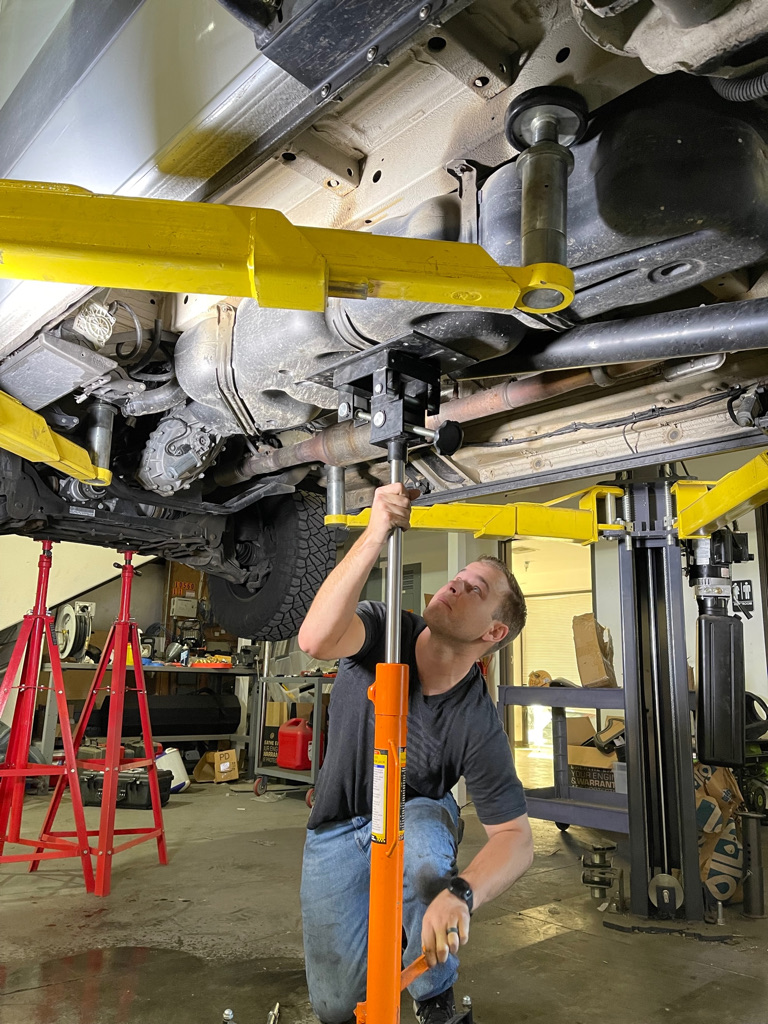
Next loosen (6) 11mm bolts holding 3 straps to the tank and retain the bolts for installation of the S&B tank. Lower tank and remove it from under the vehicle.
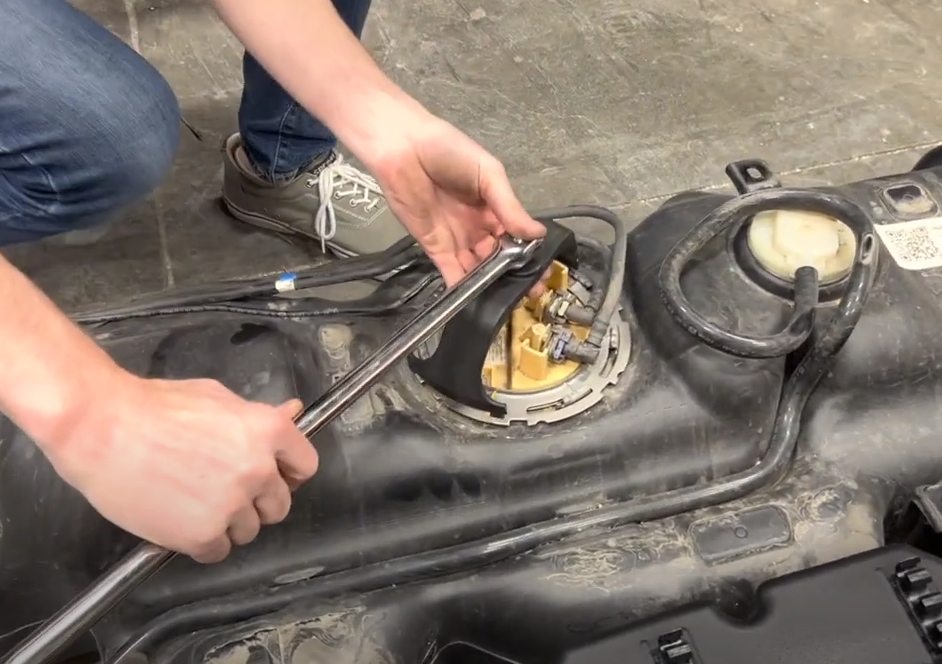
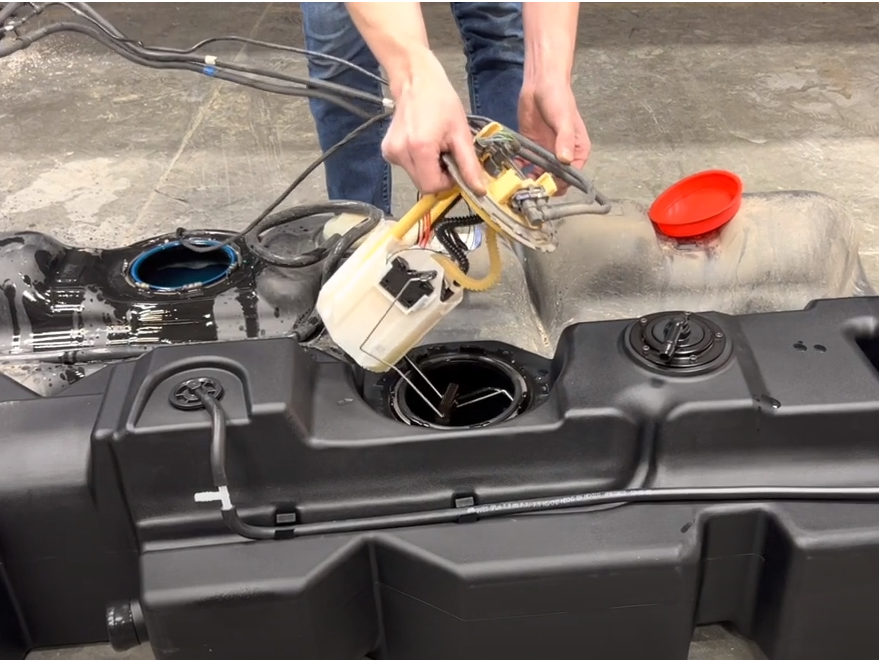
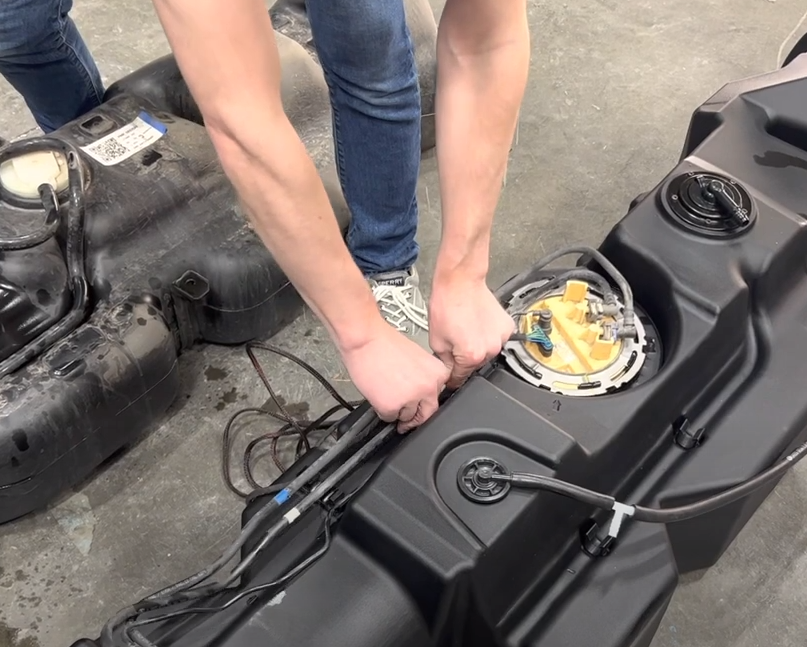
Remove fuel pump assembly from the old tank. This can be done by using a pry bar or screwdriver and hammer to remove the locking ring. Take the screwdriver and place it on the outside teeth of the locking ring and firmly pound the locking ring counter clockwise until it releases. Pull fuel pump module out being careful of the orientation as you pull out (be careful of the float and the black pickup snake).
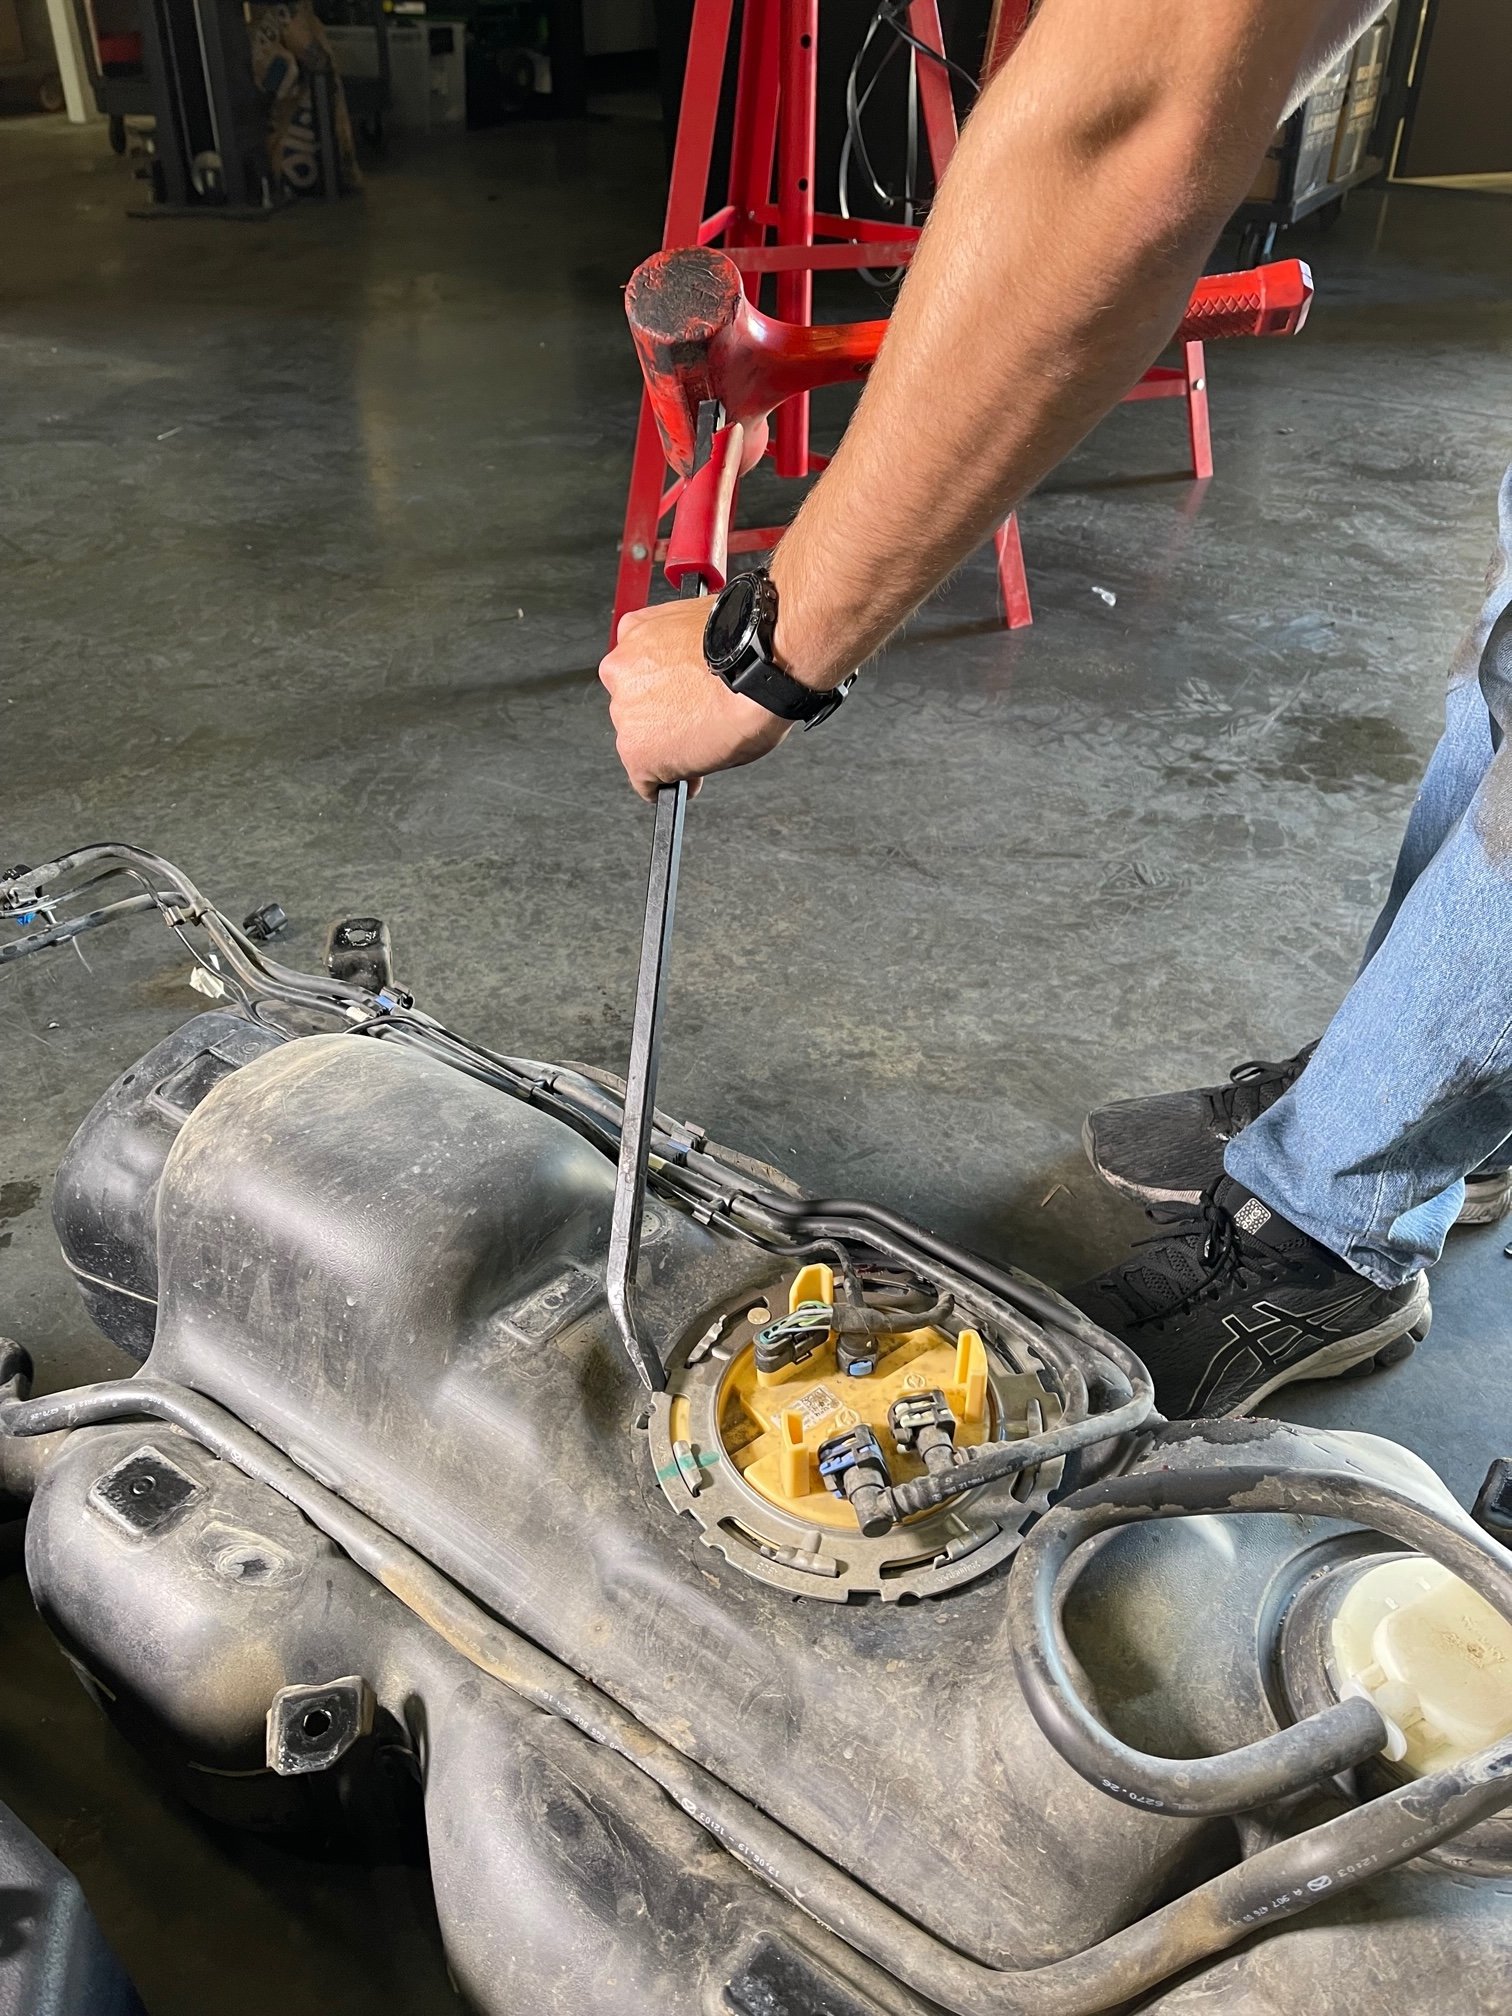
You can also use a special fuel locking ring tool to remove the ring. These can be found on Amazon or your local auto parts store.
Place large black S&B O-ring in the S&B Tank O-ring groove. Place the sender/pump assembly into the S&B tank. Next using a screwdriver and hammer but now rotating the ring clockwise (be sure All tabs on ring lock under S&B tank tabs or tank will not seal!). The picture shows the ring before it is locked into place.
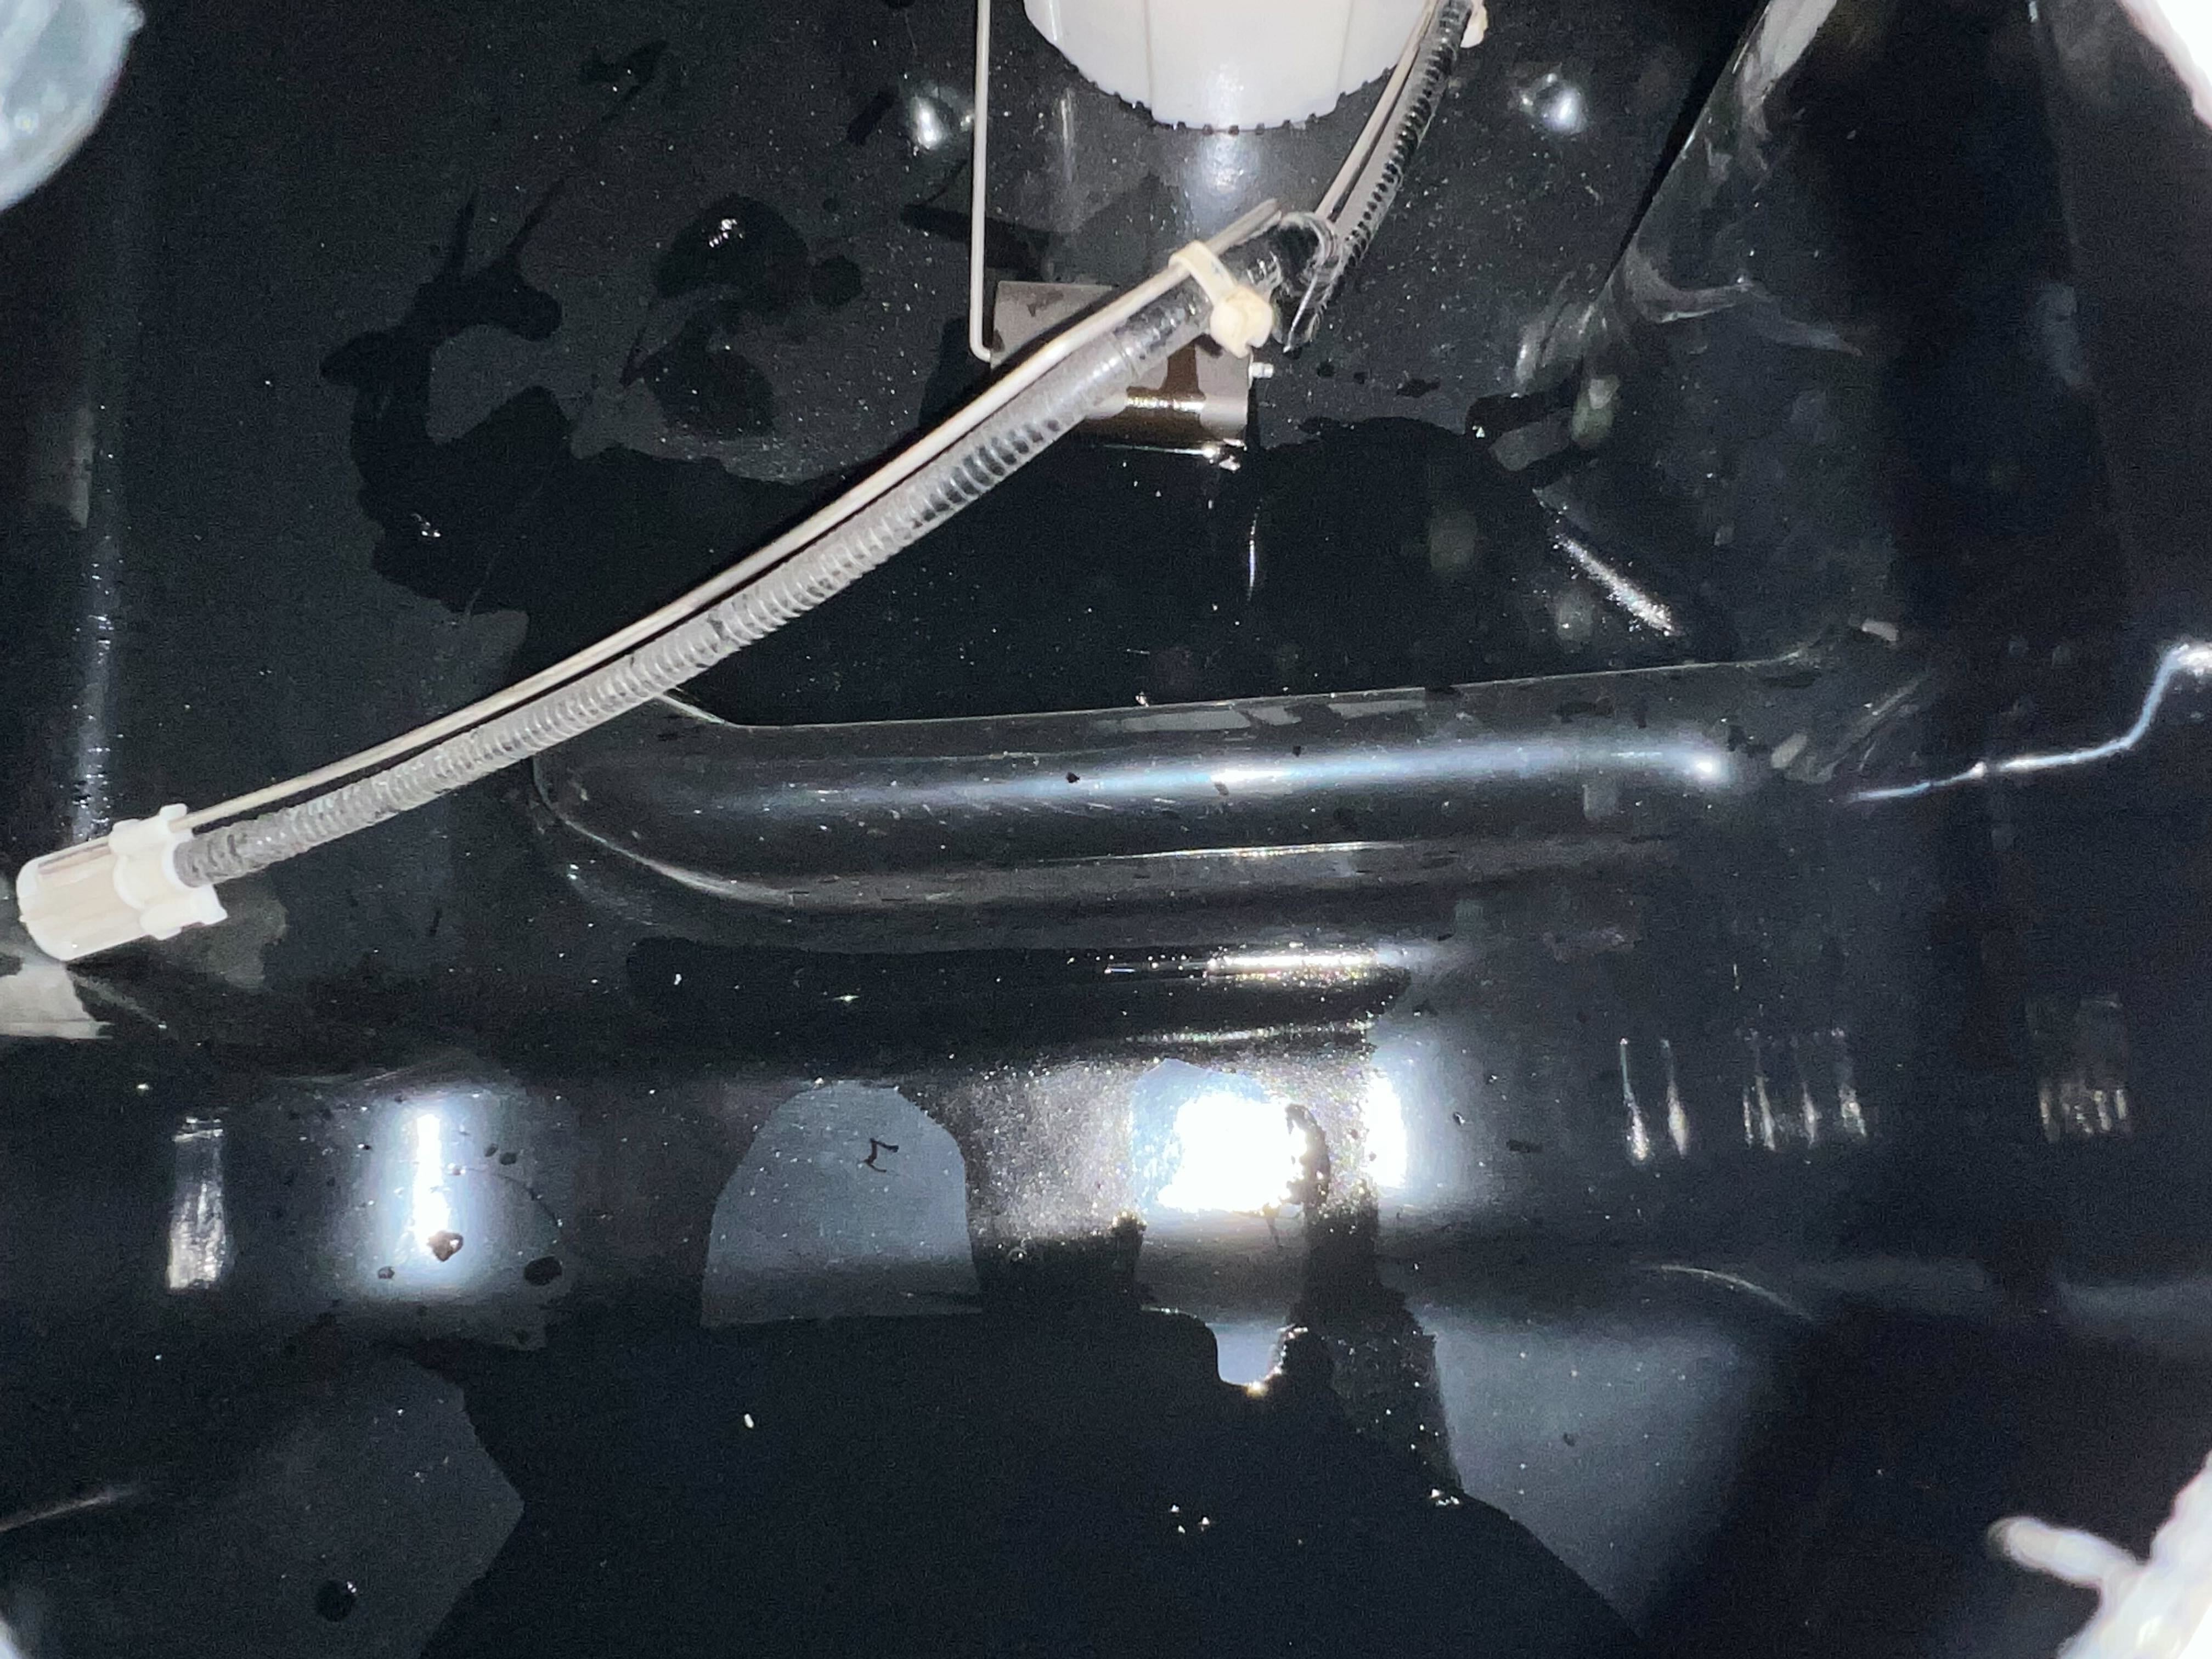
Remove the 5 bolts holding down the main vent and remove the vent so you can see inside.

Use a flash light or take a picture in the tank to make sure there is separation between the float and venturi tube.
This is what it looks like if the sending unit is NOT installed incorrectly and the tube is hitting the float. This would lead to the gauge getting stuck and the gauge eventually falling and not moving from empty.
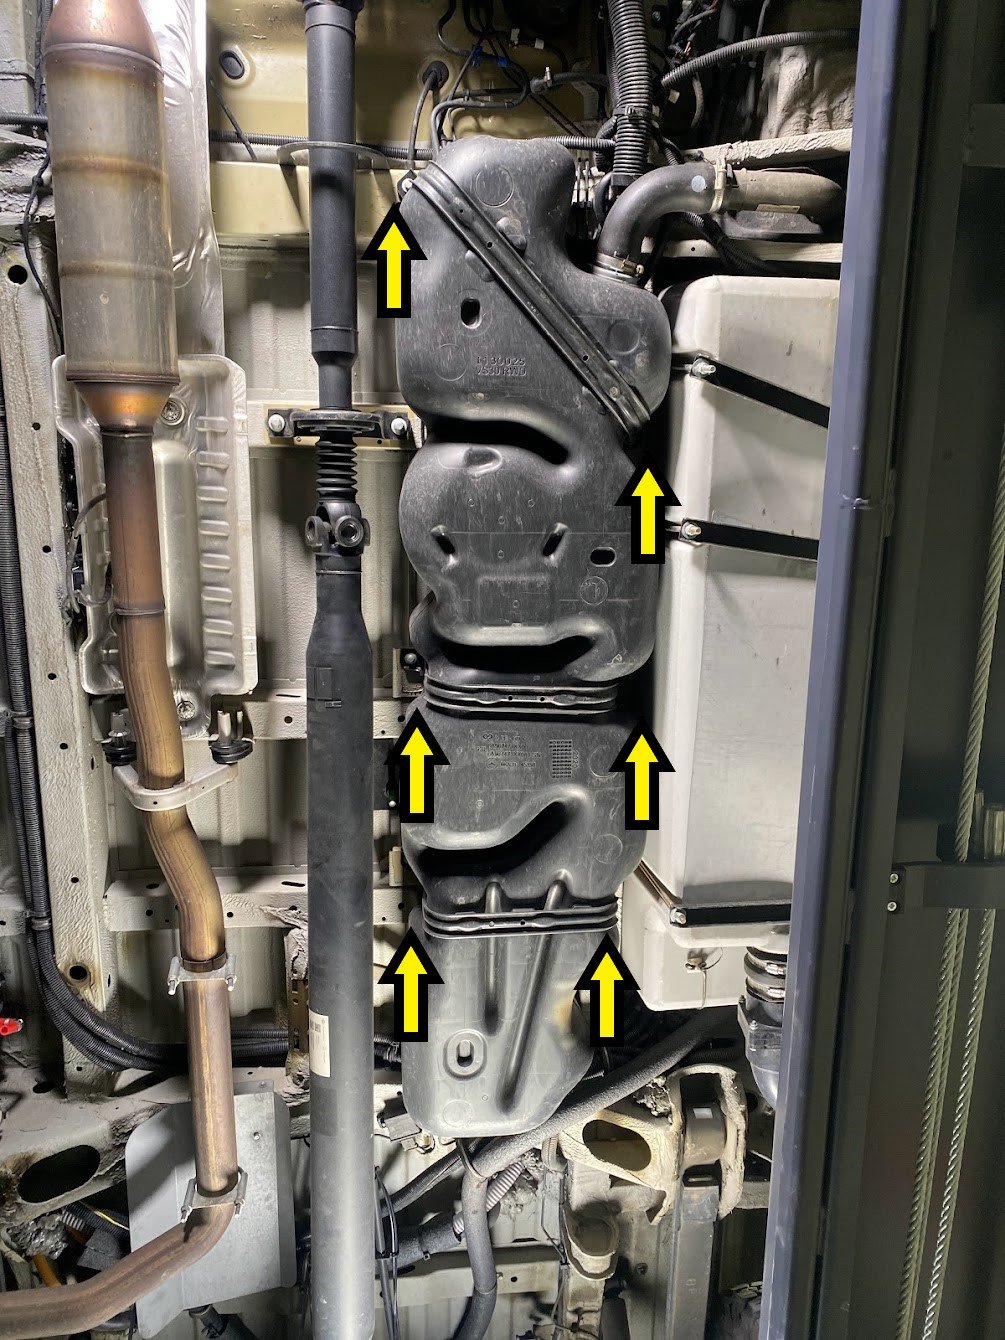
Route the fuel lines and electrical harness through the brackets on the S&B Tank.
Remove the main vent from the OEM tank and install it onto the S&B Tank.

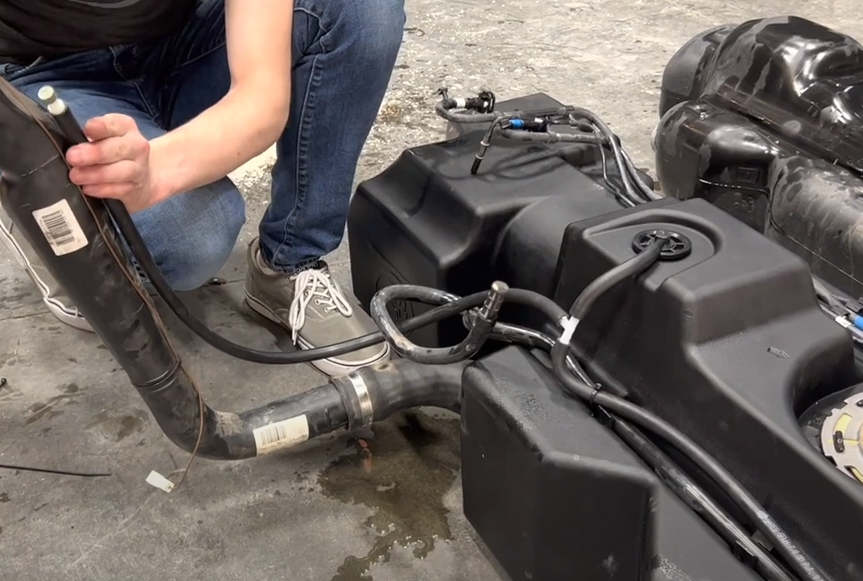
Use a 5/16" socket or flat head screwdriver to remove the hose clamp attaching the filler to the tank. There will be some fuel trapped in the filler. You can tilt the tank back or bend the filler over to get the fuel out before removing this hose clamp.
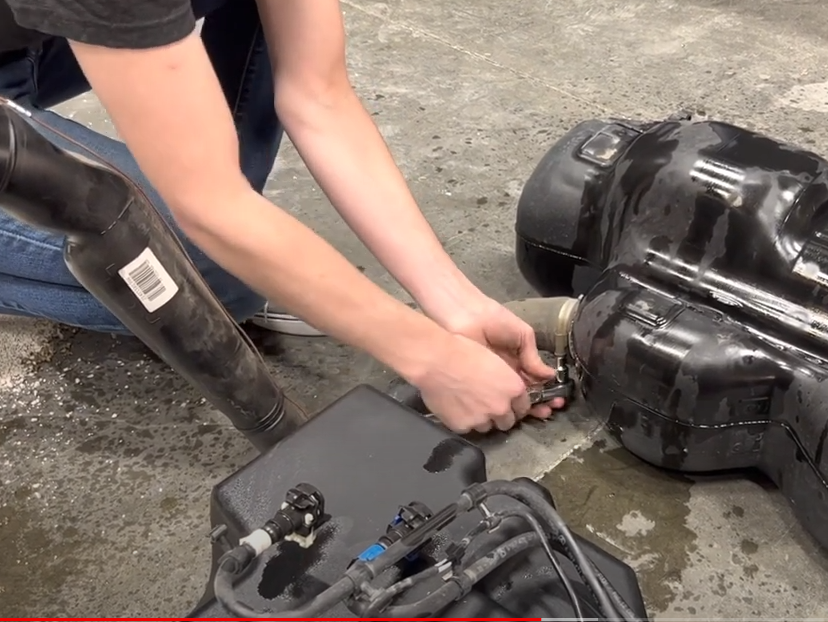
Insert the check valve into the tank end of the hose with the arrow facing into the tank. Install the filler onto the S&B Tank
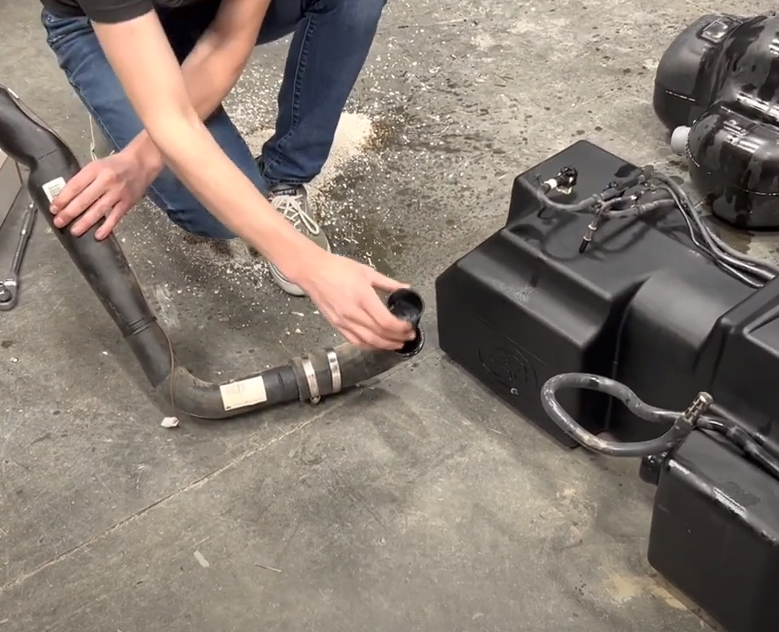
Install the included 5/16" hose(in the white box) onto the T connector which is already installed in the hose on the tank. Zip tie the 5/16" hose onto the filler.
Reconnect the fuel lines and electrical connector. Gently try to pull the connectors apart to make sure they are connected and locked
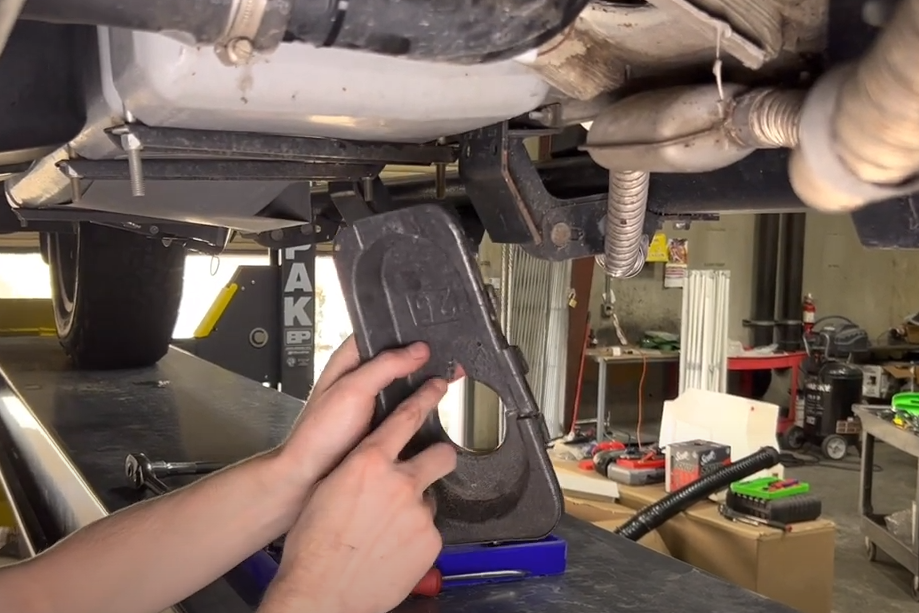
Install the 3 new fuel tank straps
Notch the Styrofoam piece and reinstall. Reconnect the ground spade connector.
Reinstall the 5 bolts and filler door
This final checklist is very important. #1 Make sure all nuts are safely fastened and torqued. #2 Ensure there is proper driveshaft clearance and the straps are tight #3 Double check fuel line connections, the electrical connection as well as the vent and fill lines. #4 Lastly, fill the tank full and check for any leaks. If you have any questions, call or text us at 909.675.1313
