IMPORTANT NOTE 1
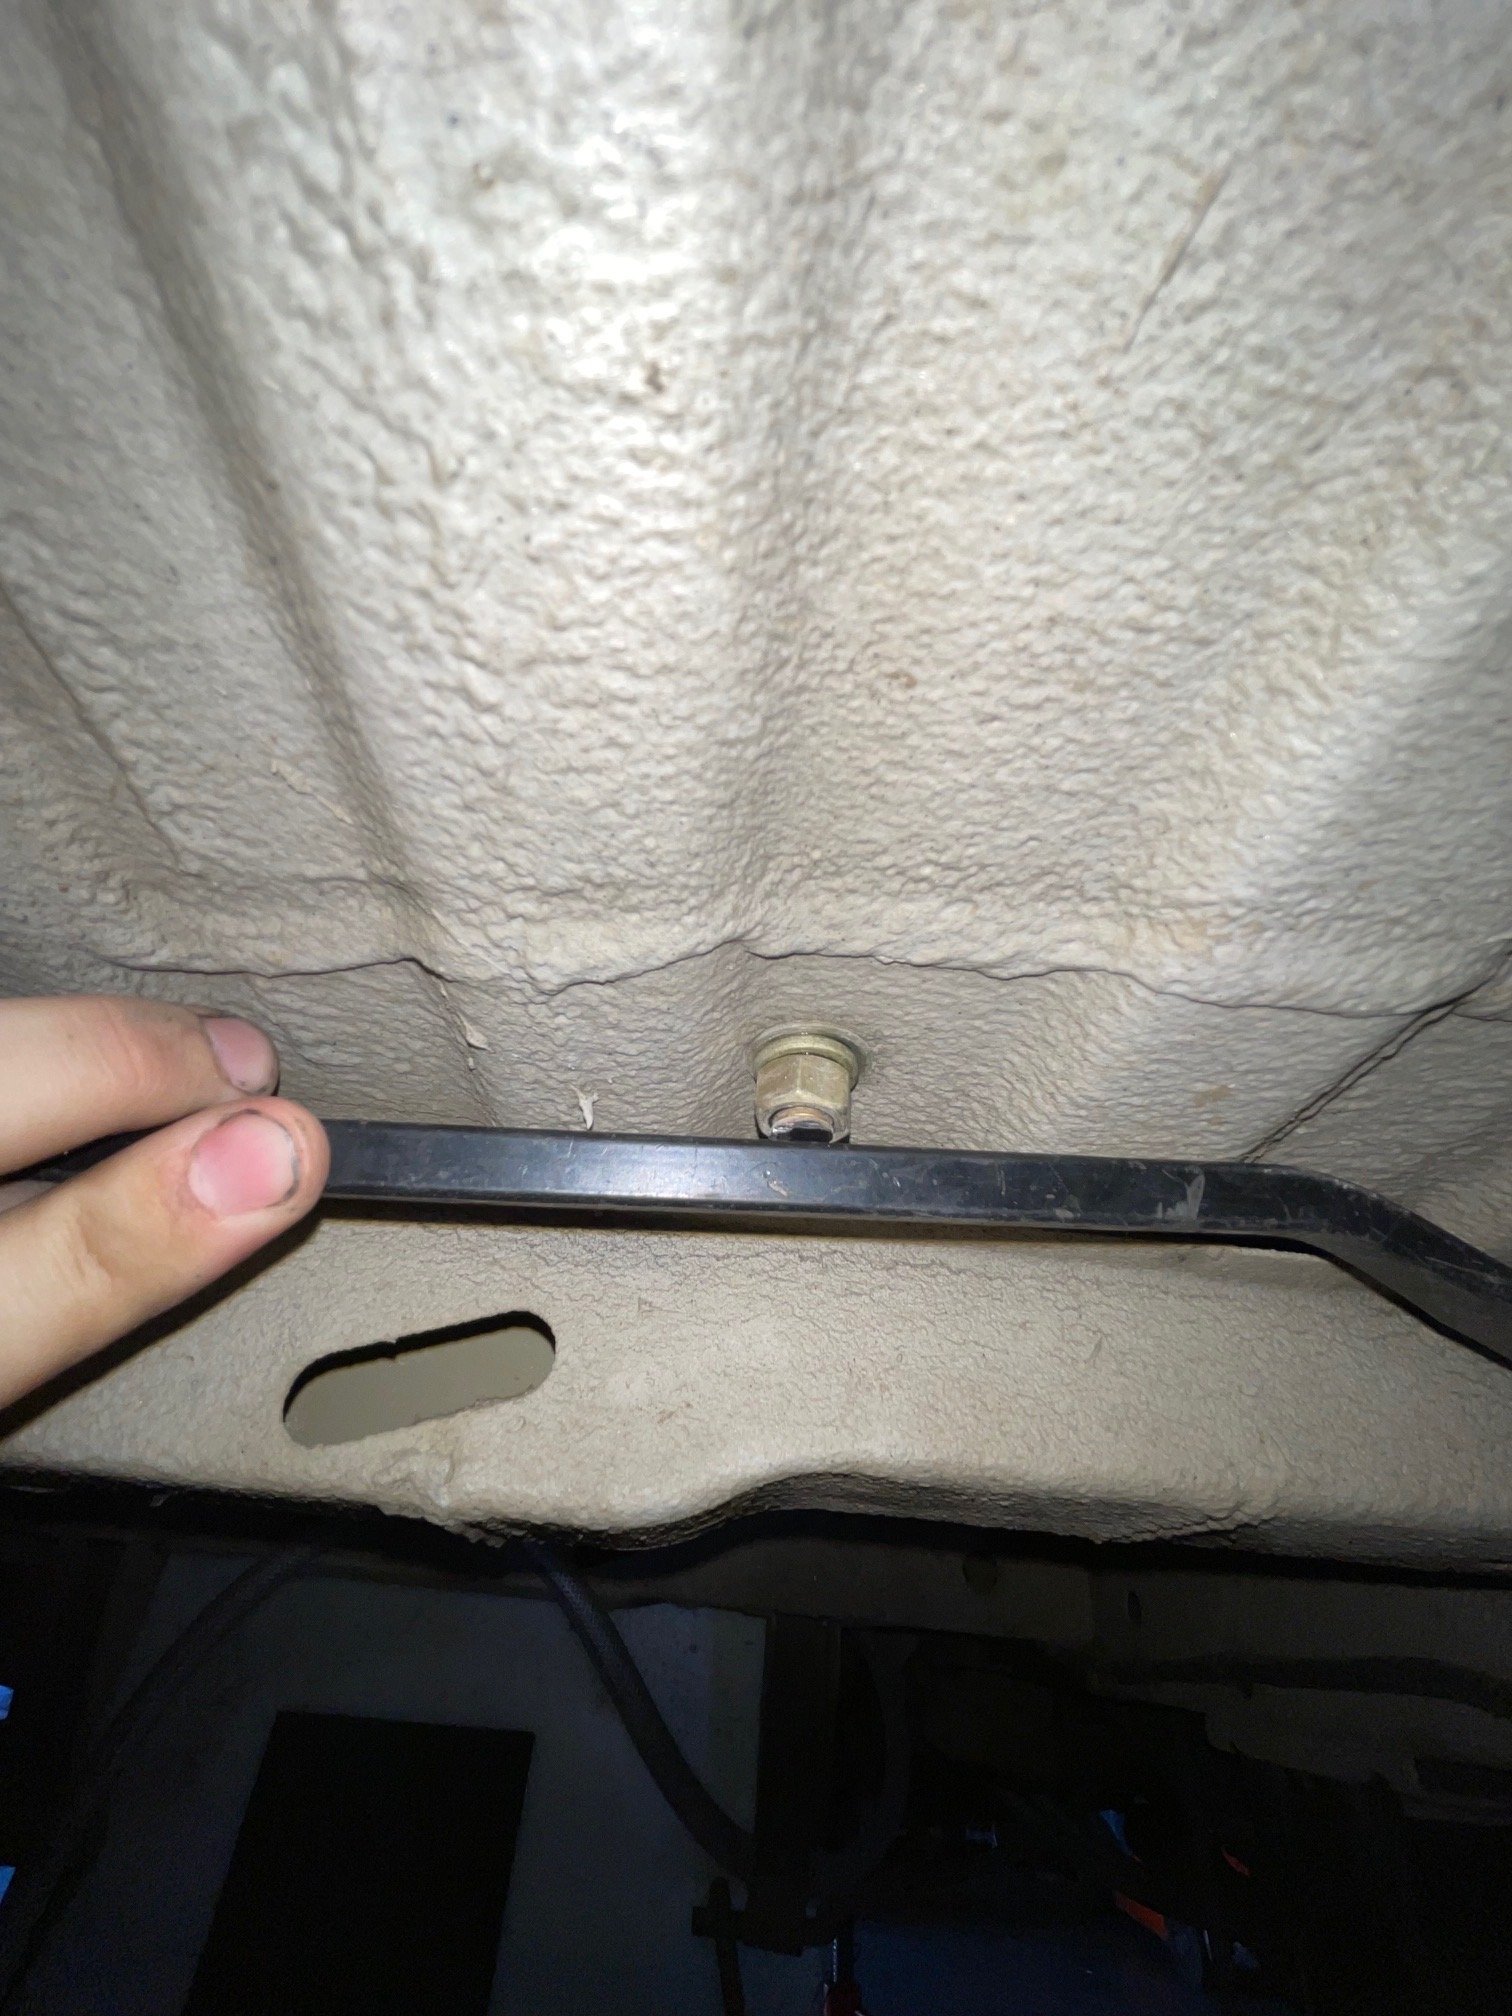
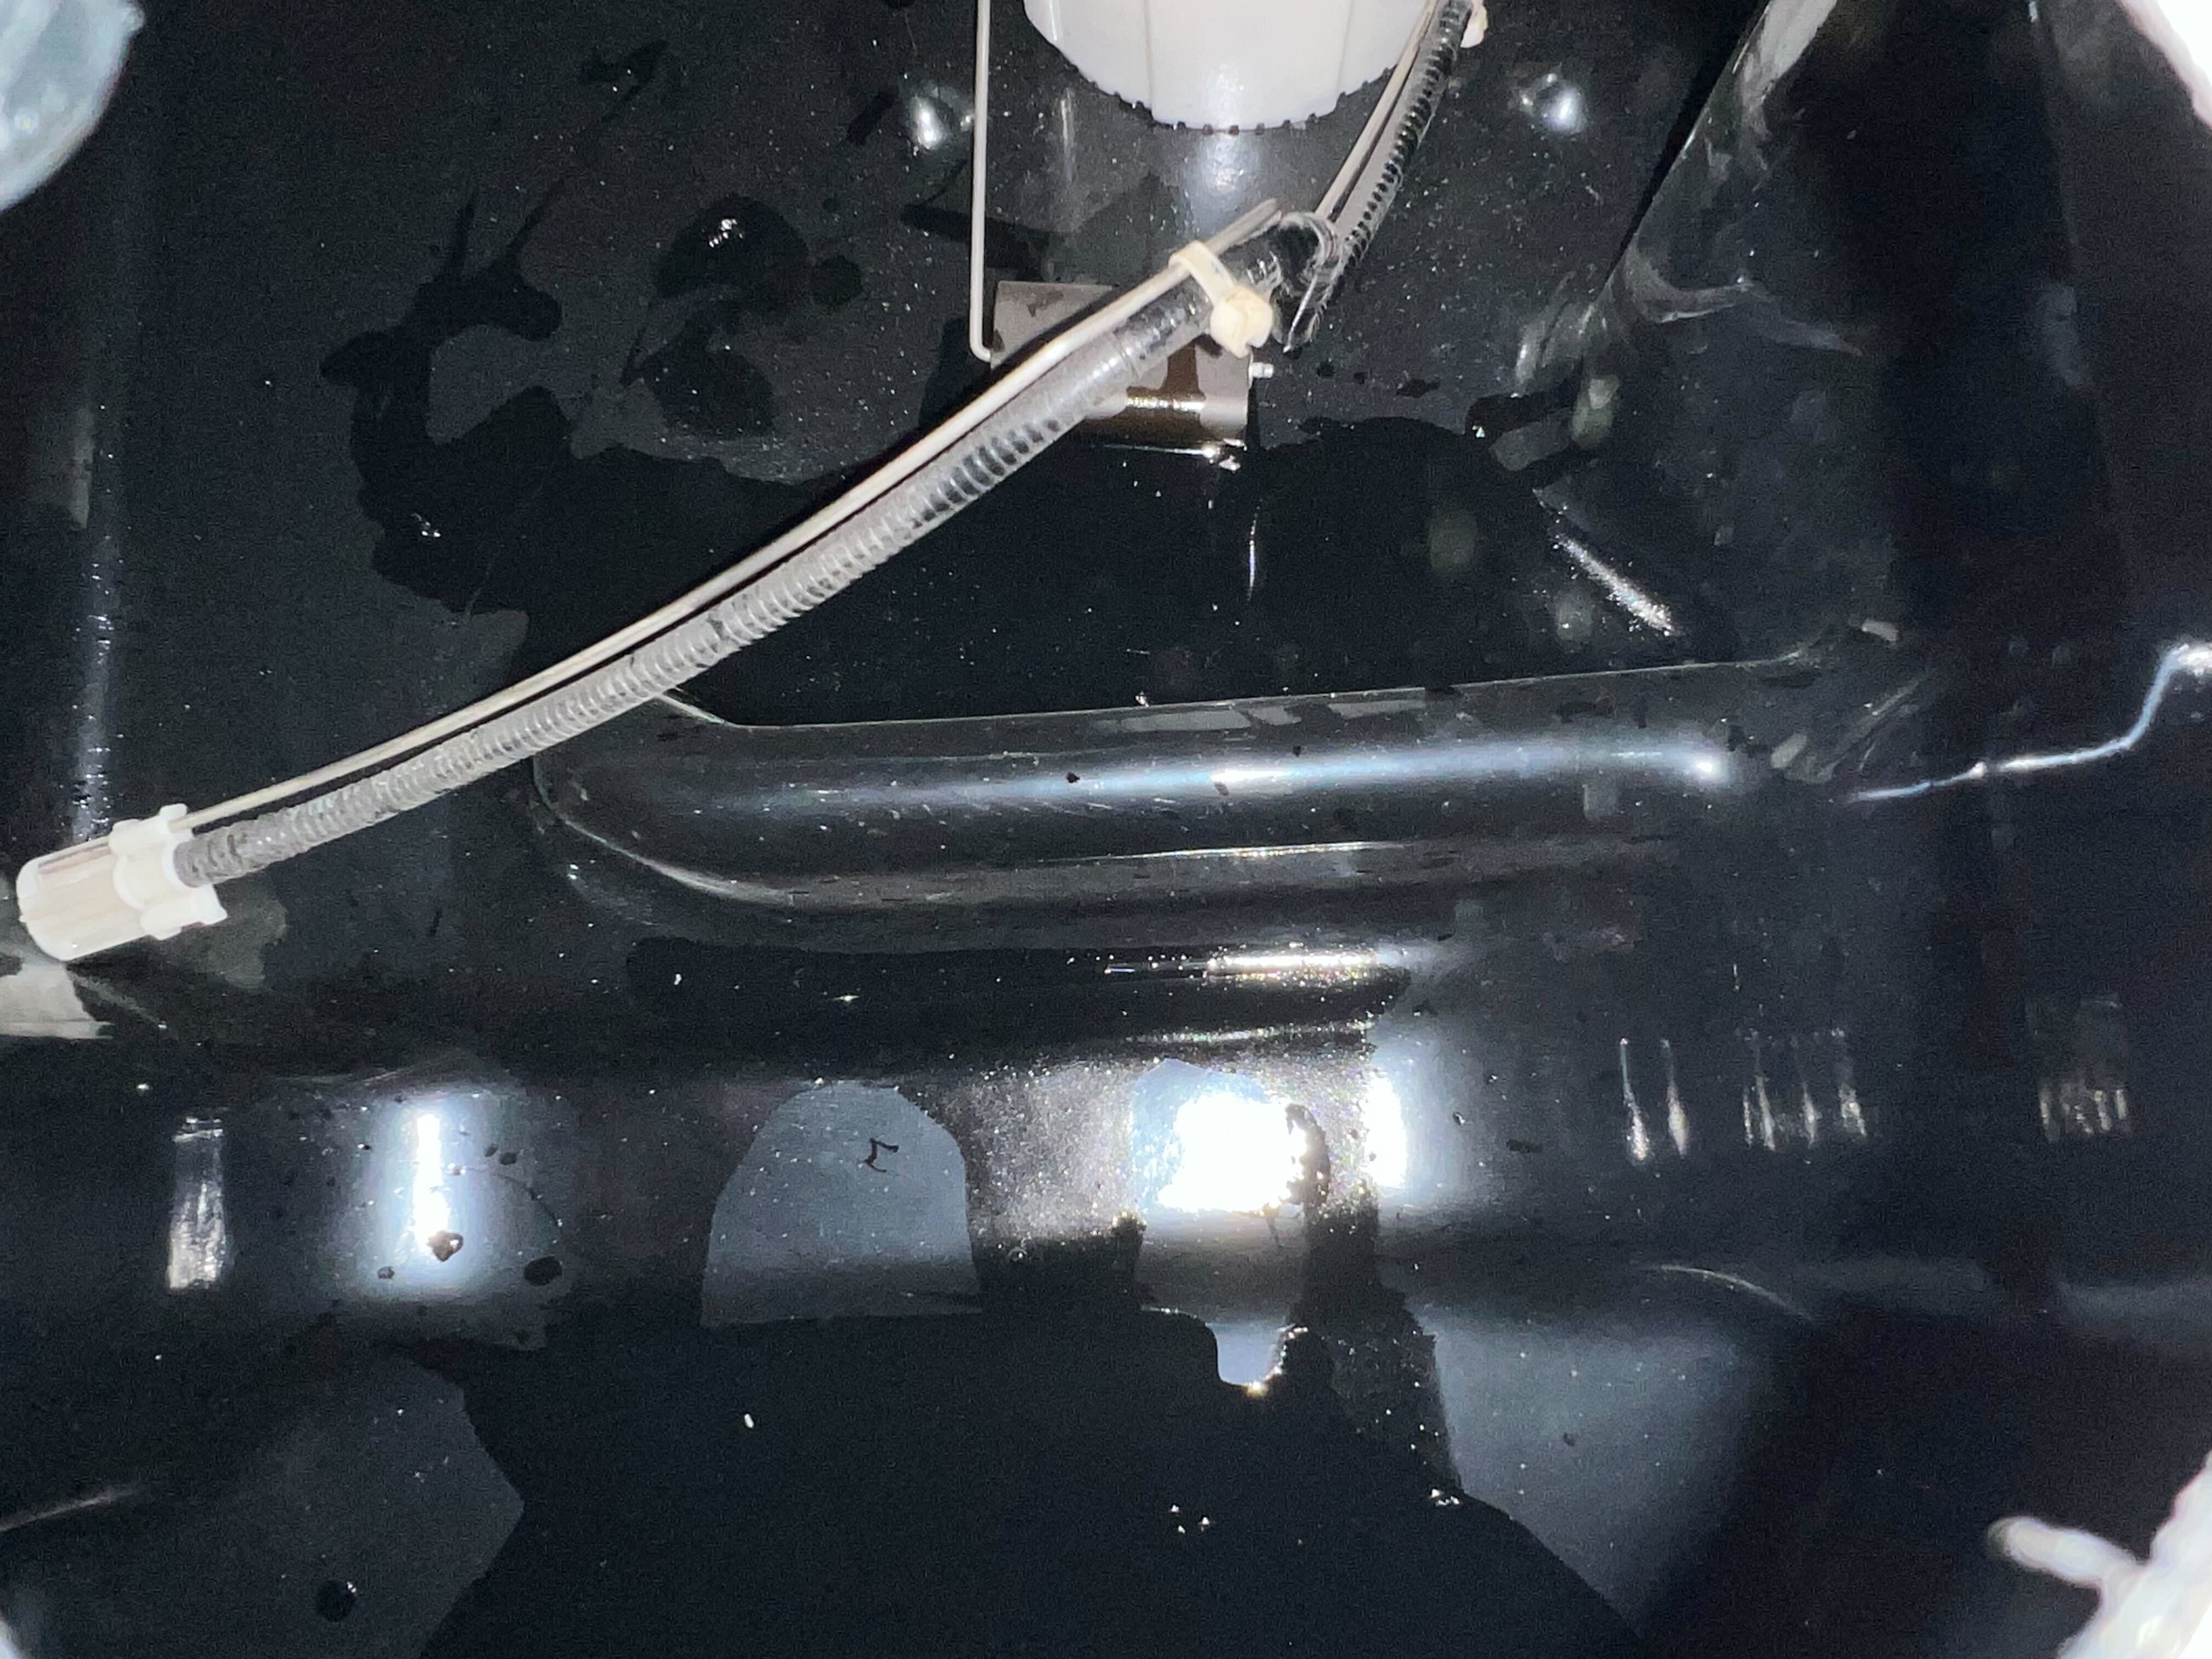
Please check to make sure your van has the lateral crossmember behind the original tank. The image in the step below shows what it would look like if you van didn't have the crossmember
Auxiliary Fuel Tanks will void the Lifetime Warranty.
DIESEL FUEL ONLY
Please check to make sure your van has the lateral crossmember behind the original tank. The image in the step below shows what it would look like if you van didn't have the crossmember
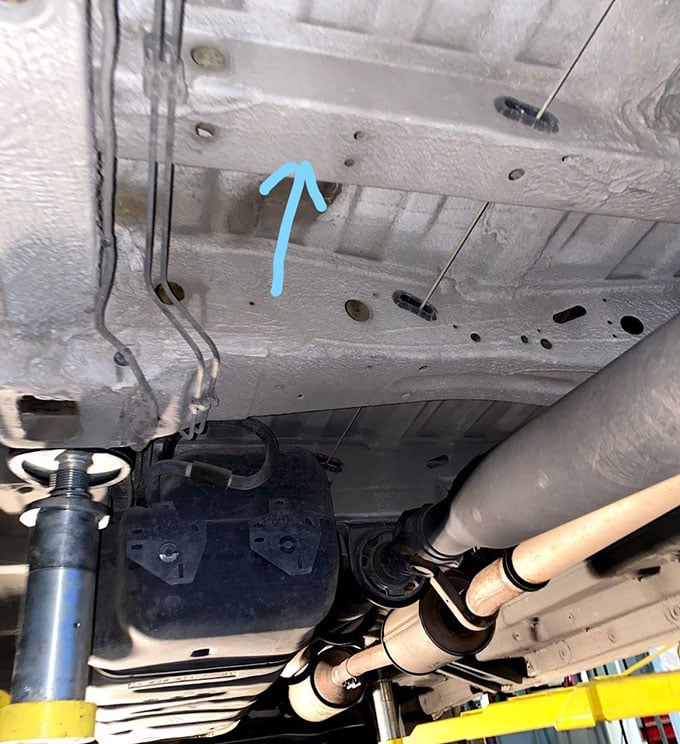
No lateral crossmember behind fuel tank
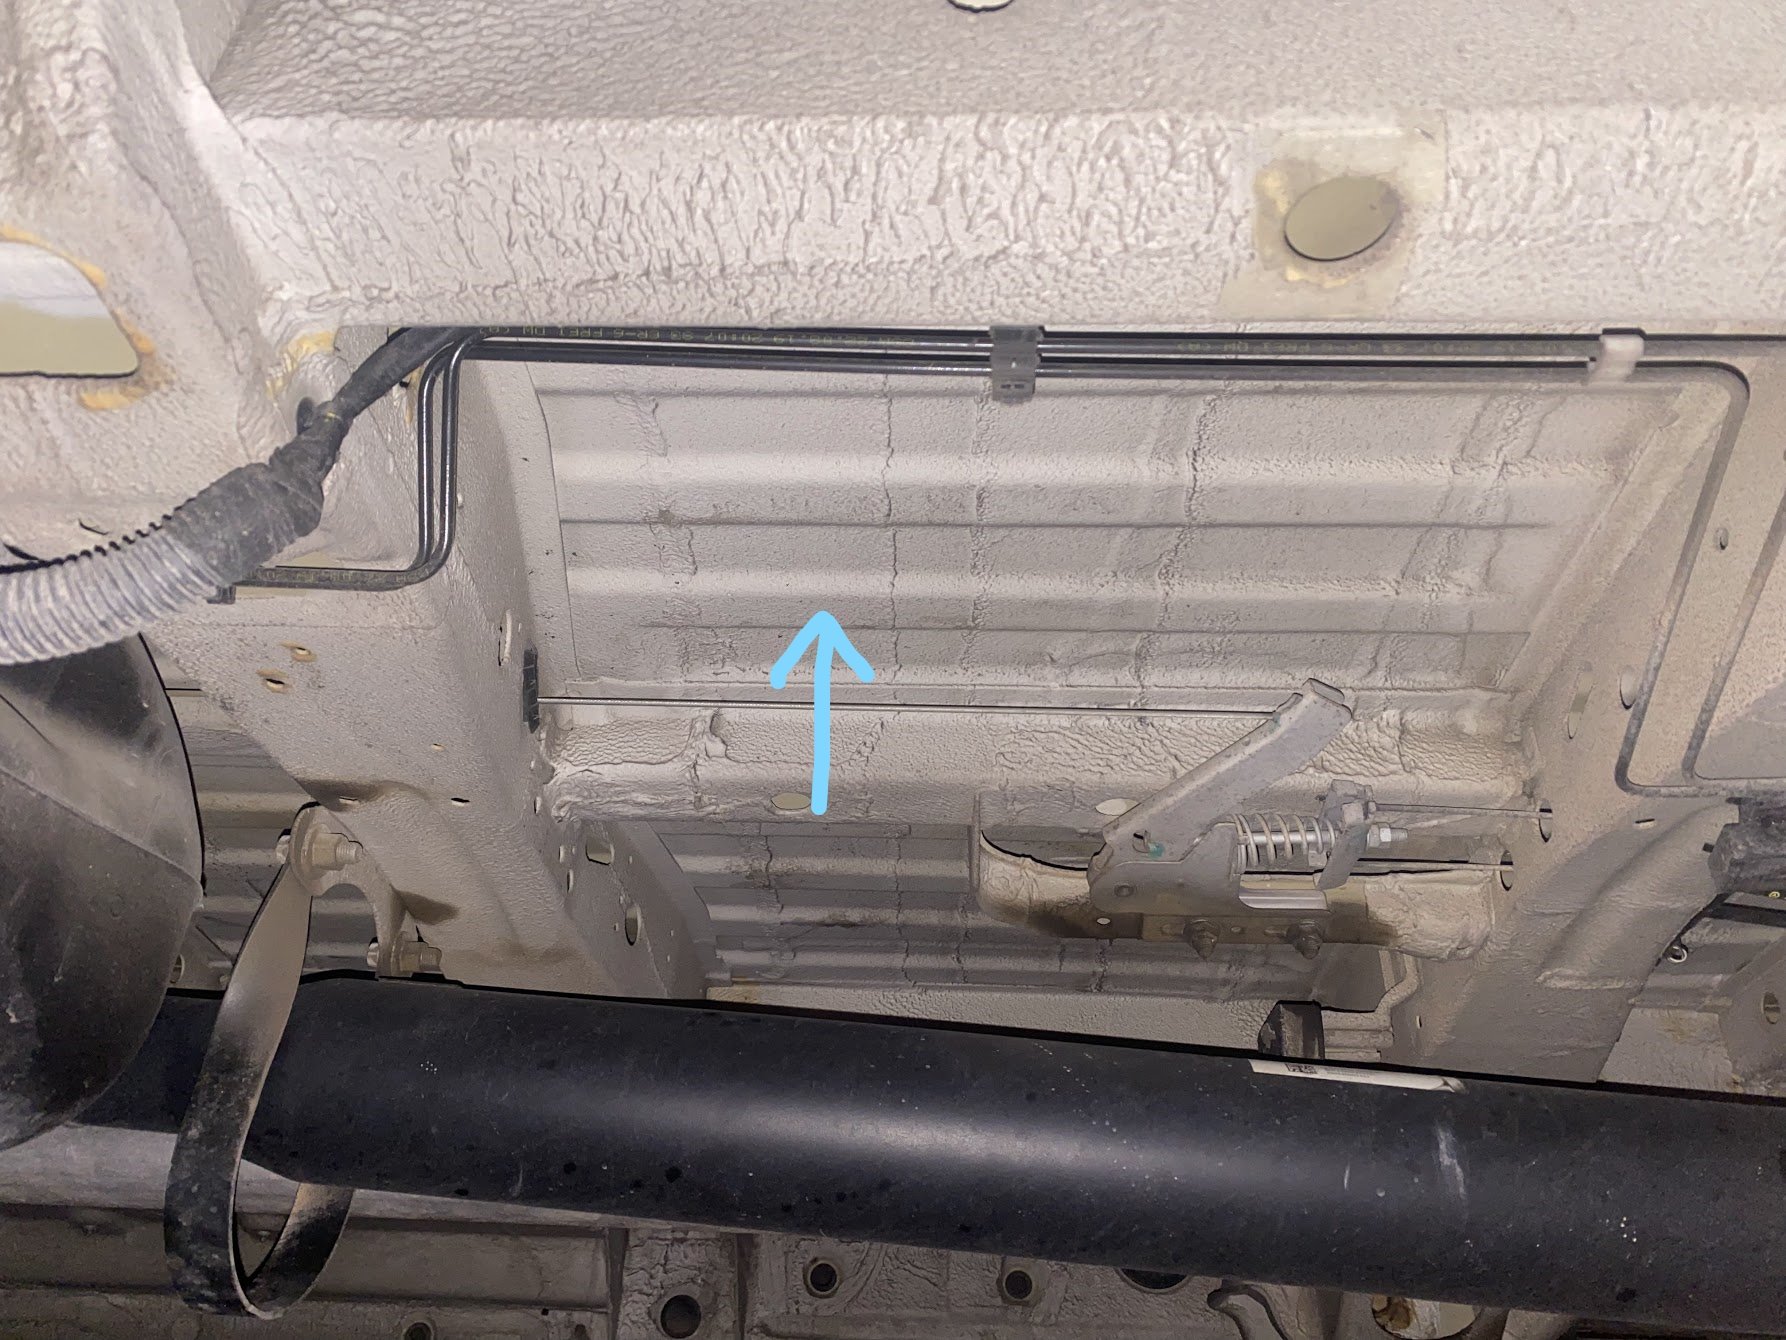
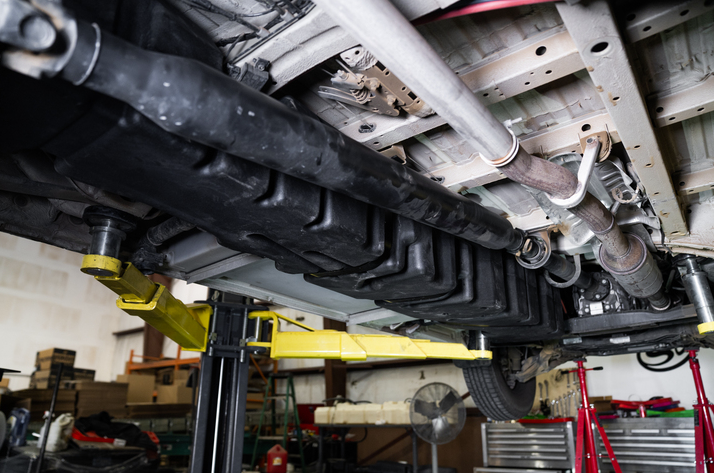
Inspect the underside of the Vehicle for any obstructions. The S&B Tank extends further forward and further back, please make sure there is not anything mounted that will interfere with the tank
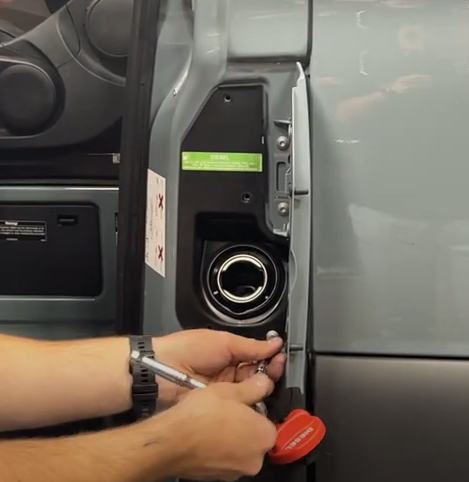
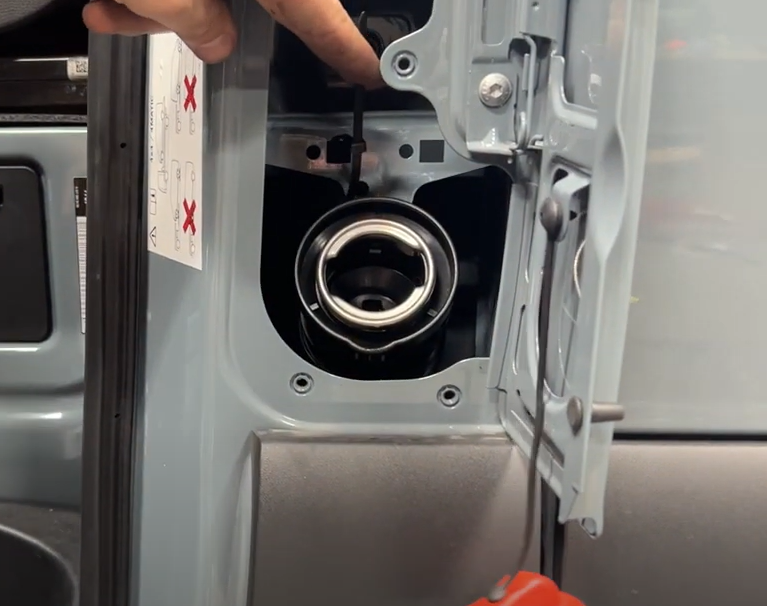
Remove the filler door cover with a T30 Torx
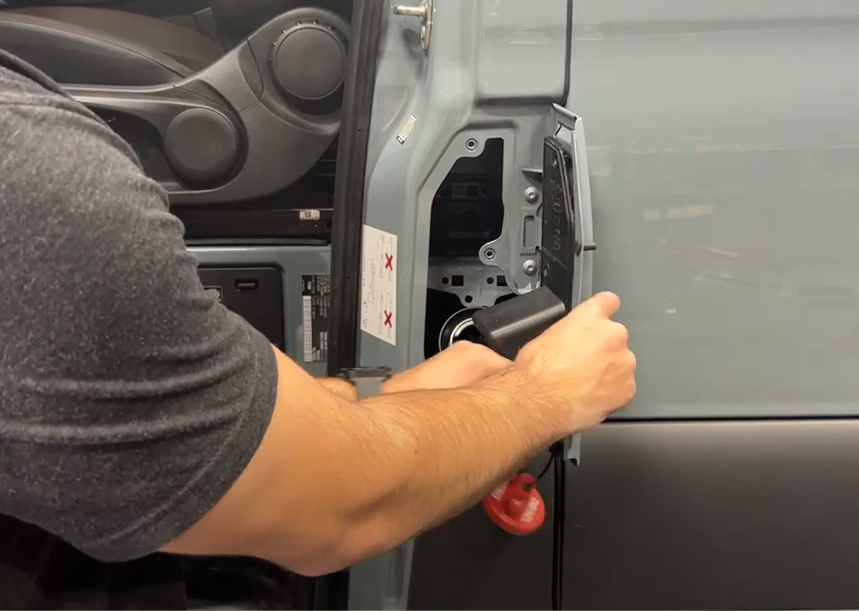
Close the metal door then swing it back open with the plastic door to remove the plastic door.
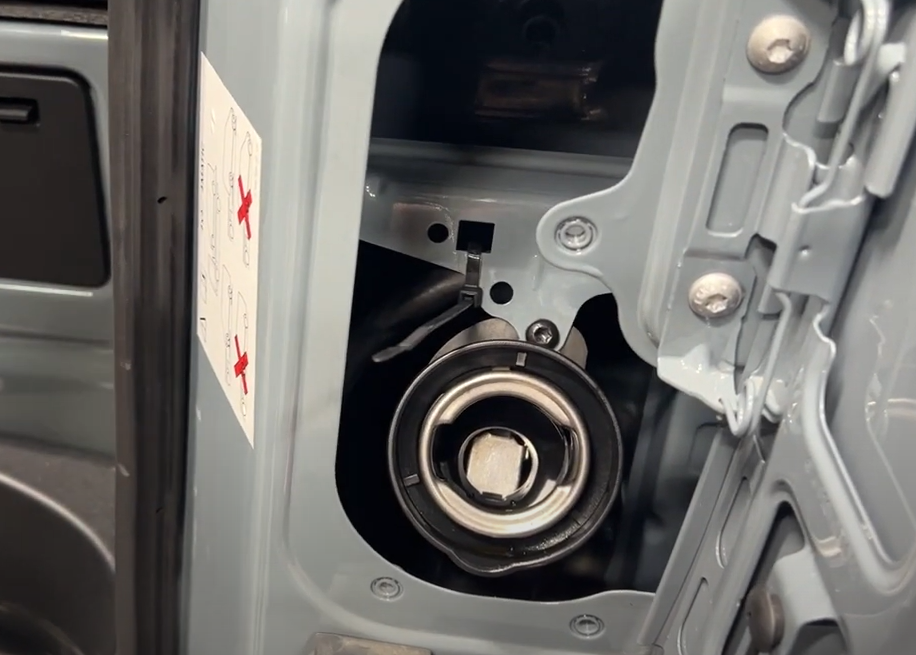
Create a loop around the square hole
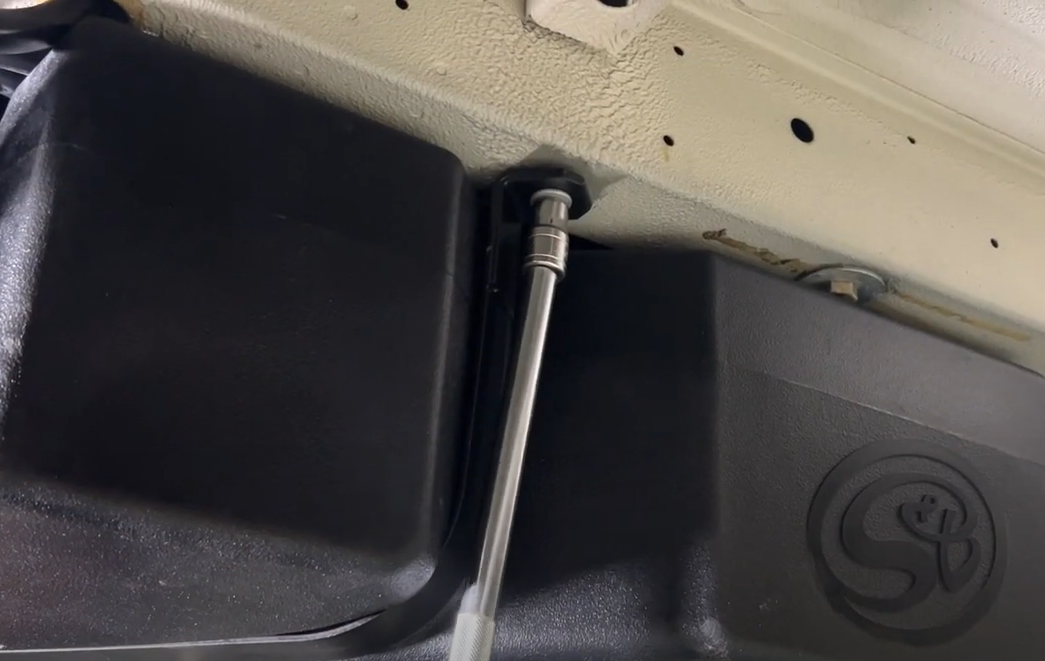
Fish the included 40" of 5/16" black down down the space next to the filler. The end with the white/green dust cap should be zip tied to the backside of the metal plate. If it's not zip tied to the backside of the plate, it will interfere with the plastic filler door. If you need help with this step, please see minute 3 of our install video in the link below.
https://www.youtube.com/watch?v=wq5jHfJgwcc
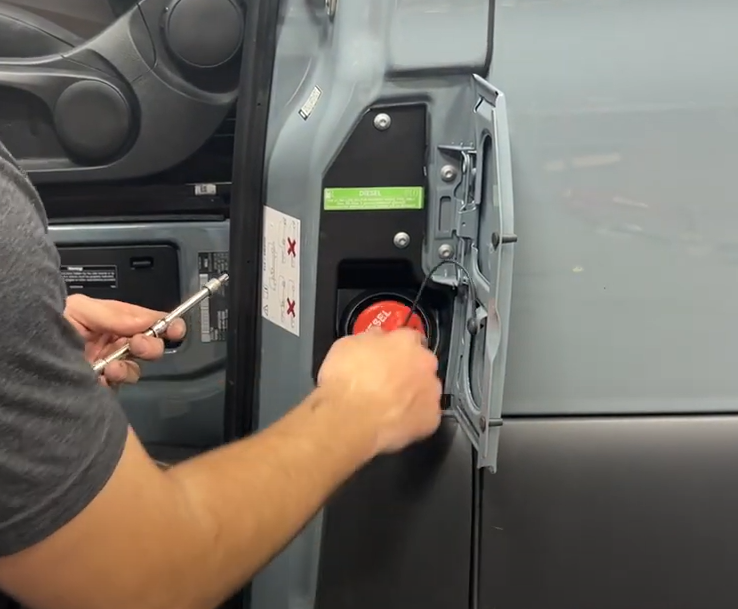
Reinstall the plastic filler door and diesel fuel cap
Remove the Styrofoam cover and pull the end of the 5/16"through. This end will be connected to the T fitting on the hose attached to the S&B Tank
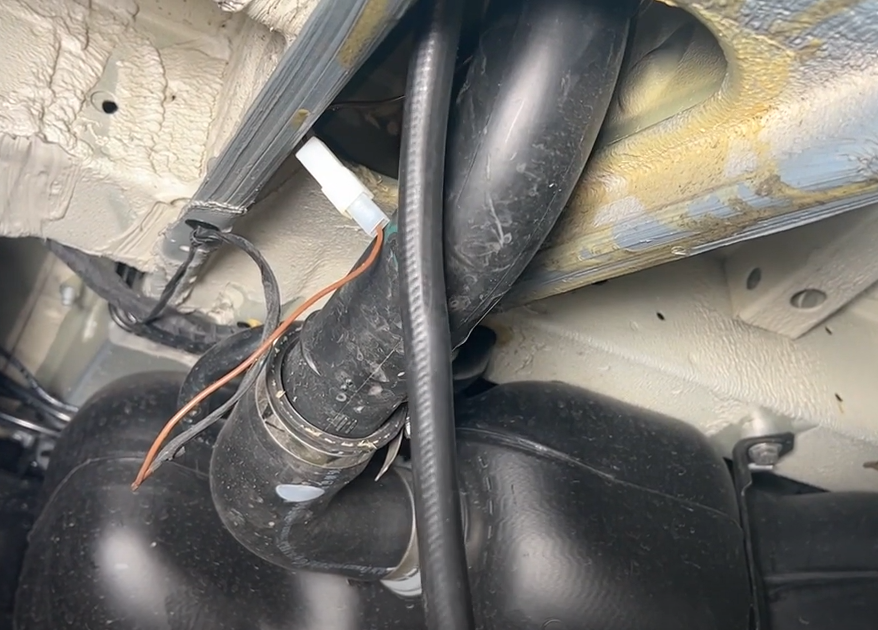
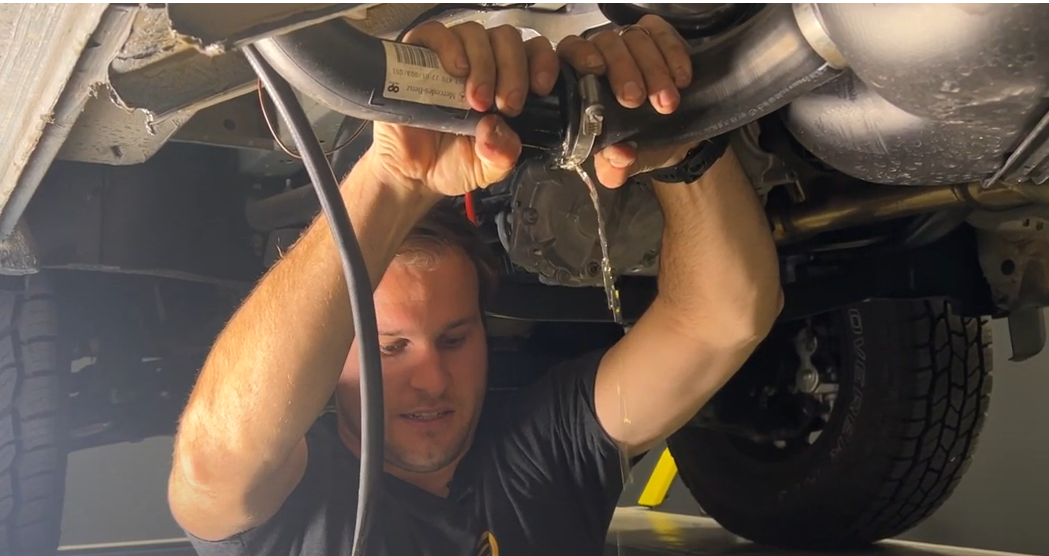
Loosen the hose clamp attaching the rubber hose to the plastic filler. There is a check valve inside of the tank so fuel from the tank will not come out through the hose but there will be fuel trapped in the filler. Slightly remove the hose from the plastic filler so fuel trickles out into a bucket. There may be up to a gallon of fuel that comes out. To make a future step easier, you can also loosen the hose clamp on the tank side of the hose.
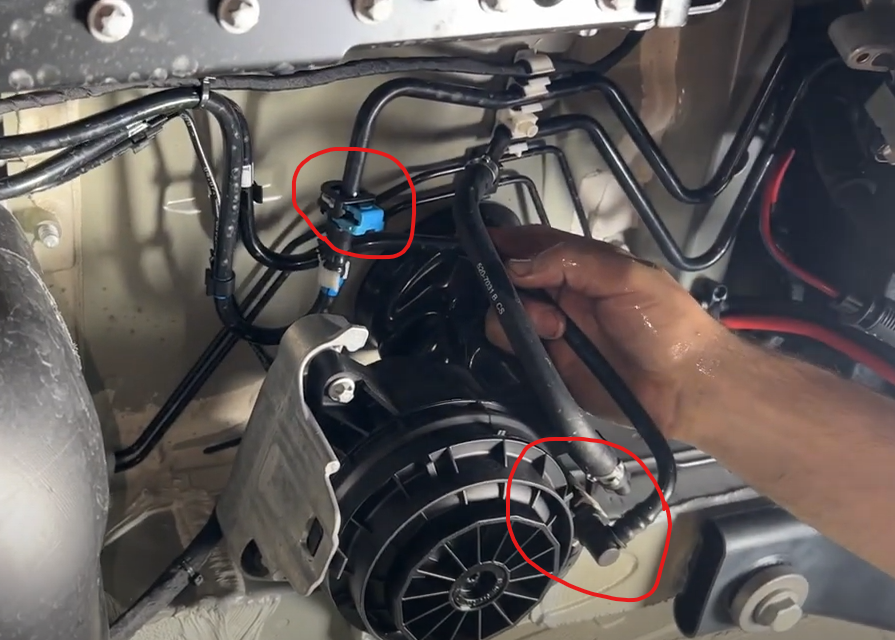
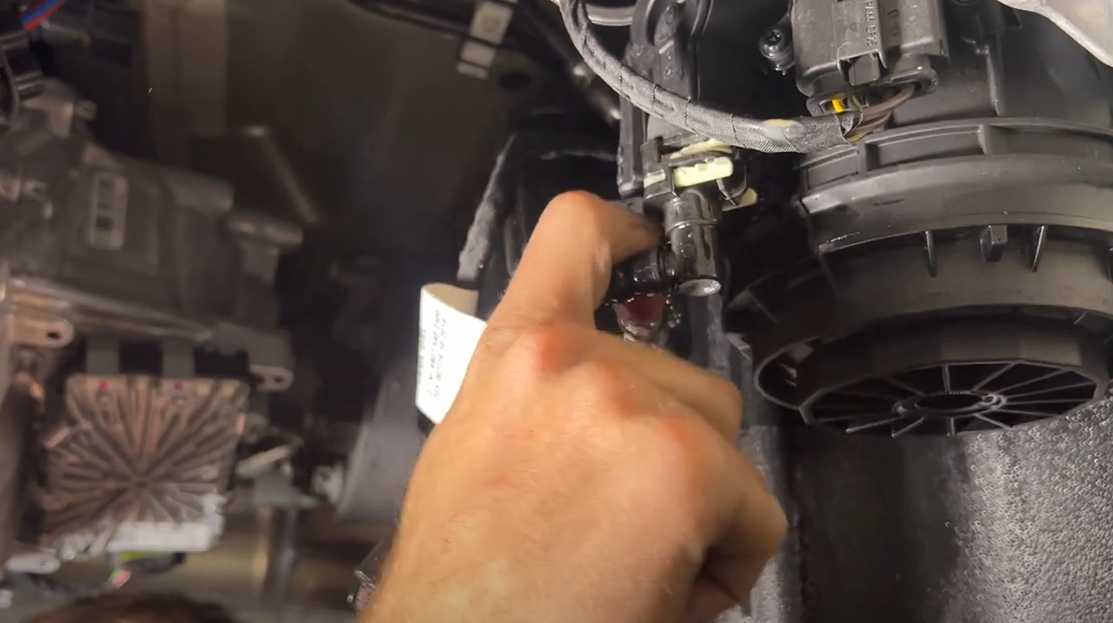
Slide the safety lock out on the blue and white connectors and disconnect the fuel lines. If you need help disconnecting these, please see 5:30 of the install video below. If you van have a aux fuel tap connected to a heater, please remove this connection as well.
https://www.youtube.com/watch?v=wq5jHfJgwcc
Depress the tab on the electrical connector and remove the connector

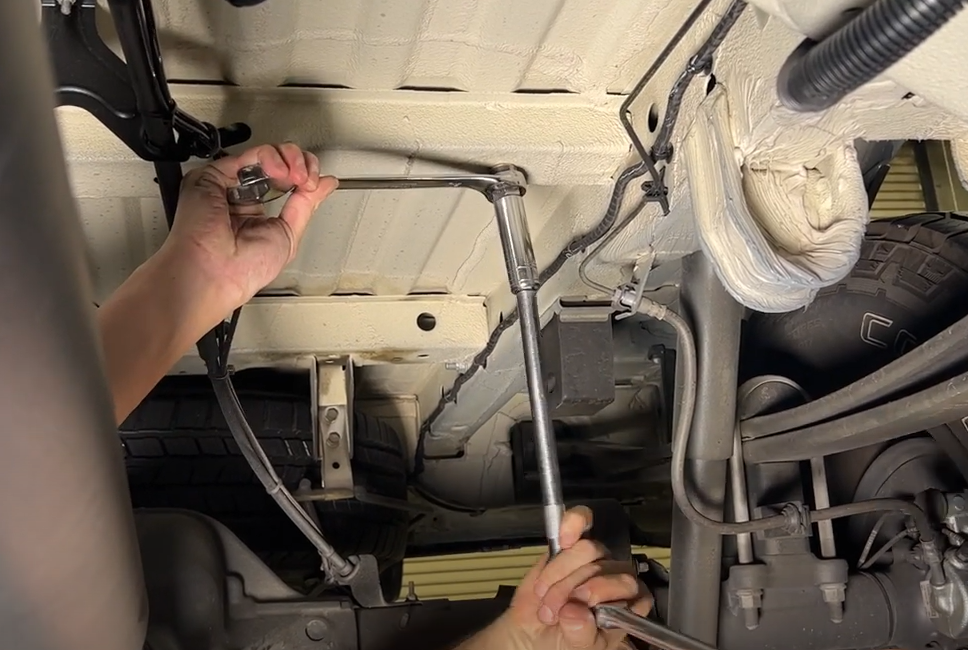
With a 11mm socket, remove the 3 tank straps. Support the tank with a jack or ratchet straps during this step. You do not need to drill or open up any holes for these plus nuts. Insert, the the plus nuts into the crossmember holes.
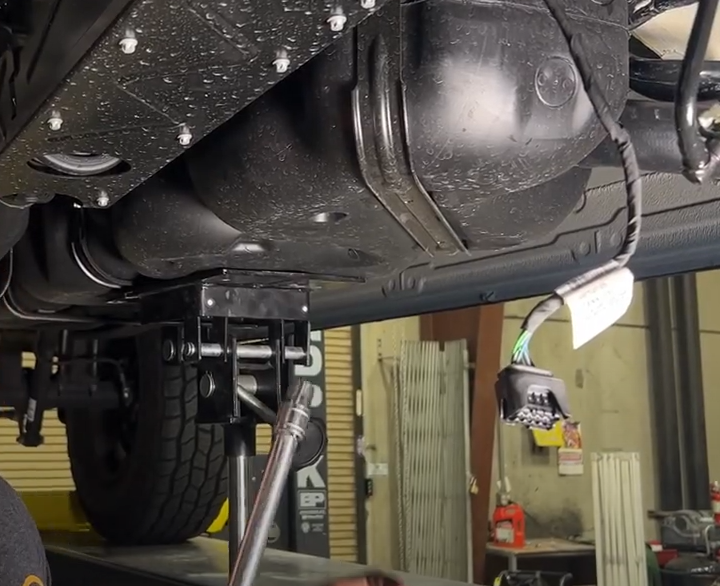
With the included steel tool and long bolt. Hand tighten the bolt with the steel piece in between the plus nut and bolt.
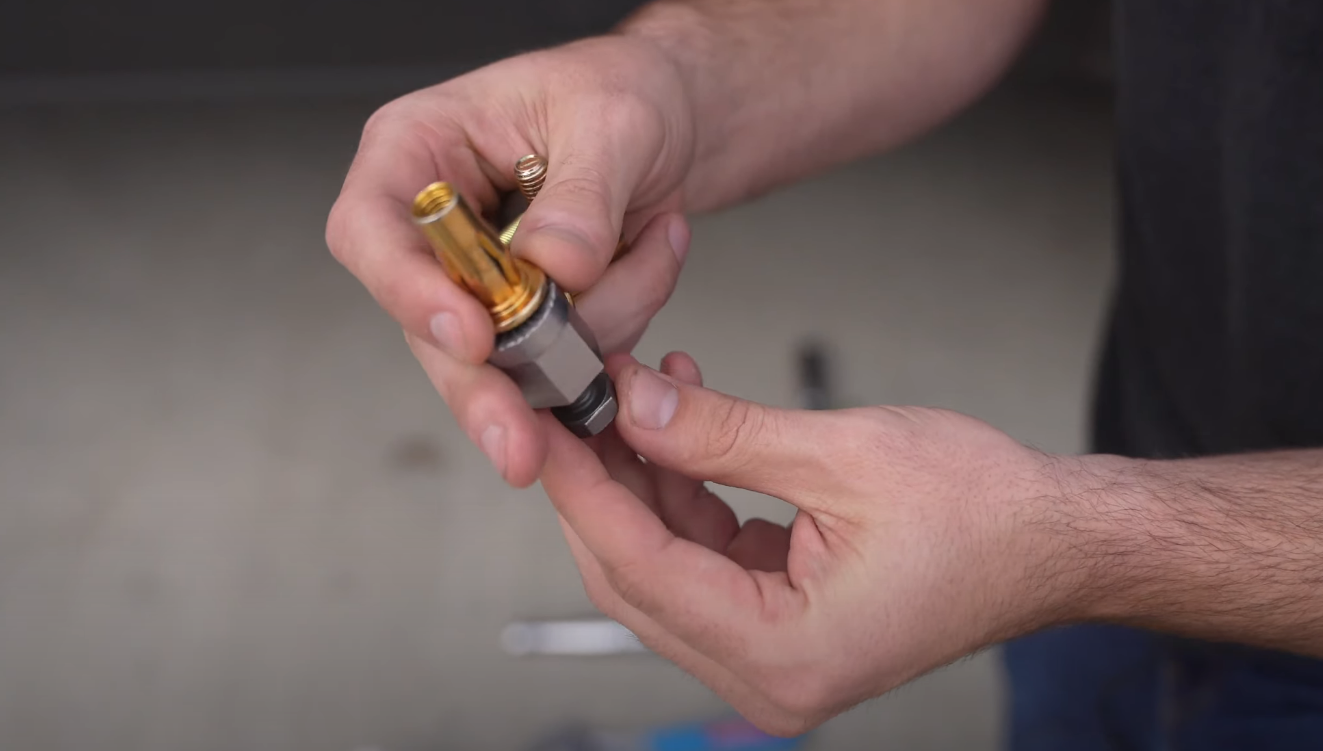
With pressure applied up on the plus nut hold the steel piece with a 7/8" open end wrench and tighten the bolt with a 17mm socket until the plus nut is completely opened up and "activated". Then remove the bolt and repeat the steps with the other plus nut. It helps to have someone help the wrench while ratcheting in the bolt. We included an extra plus nut just incase one doesn't get installed correctly.
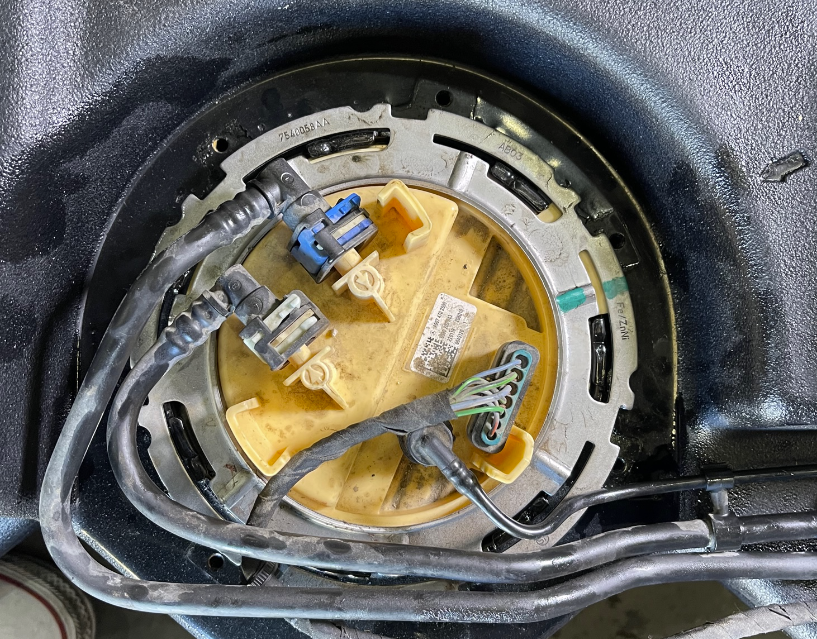
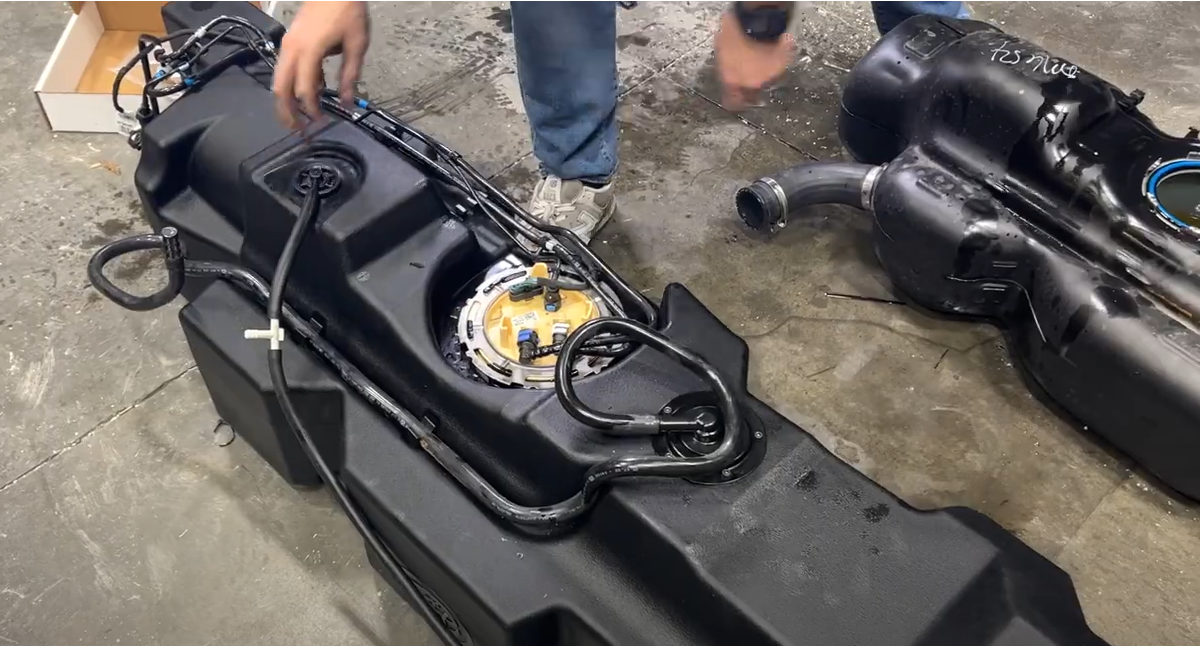
Either with a special fuel locking ring tool or a dead blow and pry bar, rotate the locking ring counterclockwise to remove the fuel pump. Pop out the fuel lines and electrical line from the holder on the OEM tank and remove the fuel pump from the tank. Pour out the fuel from the bucket into the OEM tank and be careful to not damage the fuel float when removing. This tool can be purchased on Amazon or your local auto parts store by searching "Universal Fuel Tank Lock Ring Tool Fuel Sender Tank"

Now it's time to replace the OEM float. Remove the OEM fuel float and replace it with the longer S&B float. Needle nose pliers can help with the removal and install of the S&B float.
Please follow the link below to watch how to install the float and adjust it if necessary.
After the float has been installed, go ahead and verify that the float is barely contacting the floor.

Place the S&B o-ring into the o-ring groove and rotate the ring clockwise until it passes under the ring indention. Snap in the fuel lines and electrical connector into the fuel line holders on the S&B Tank.
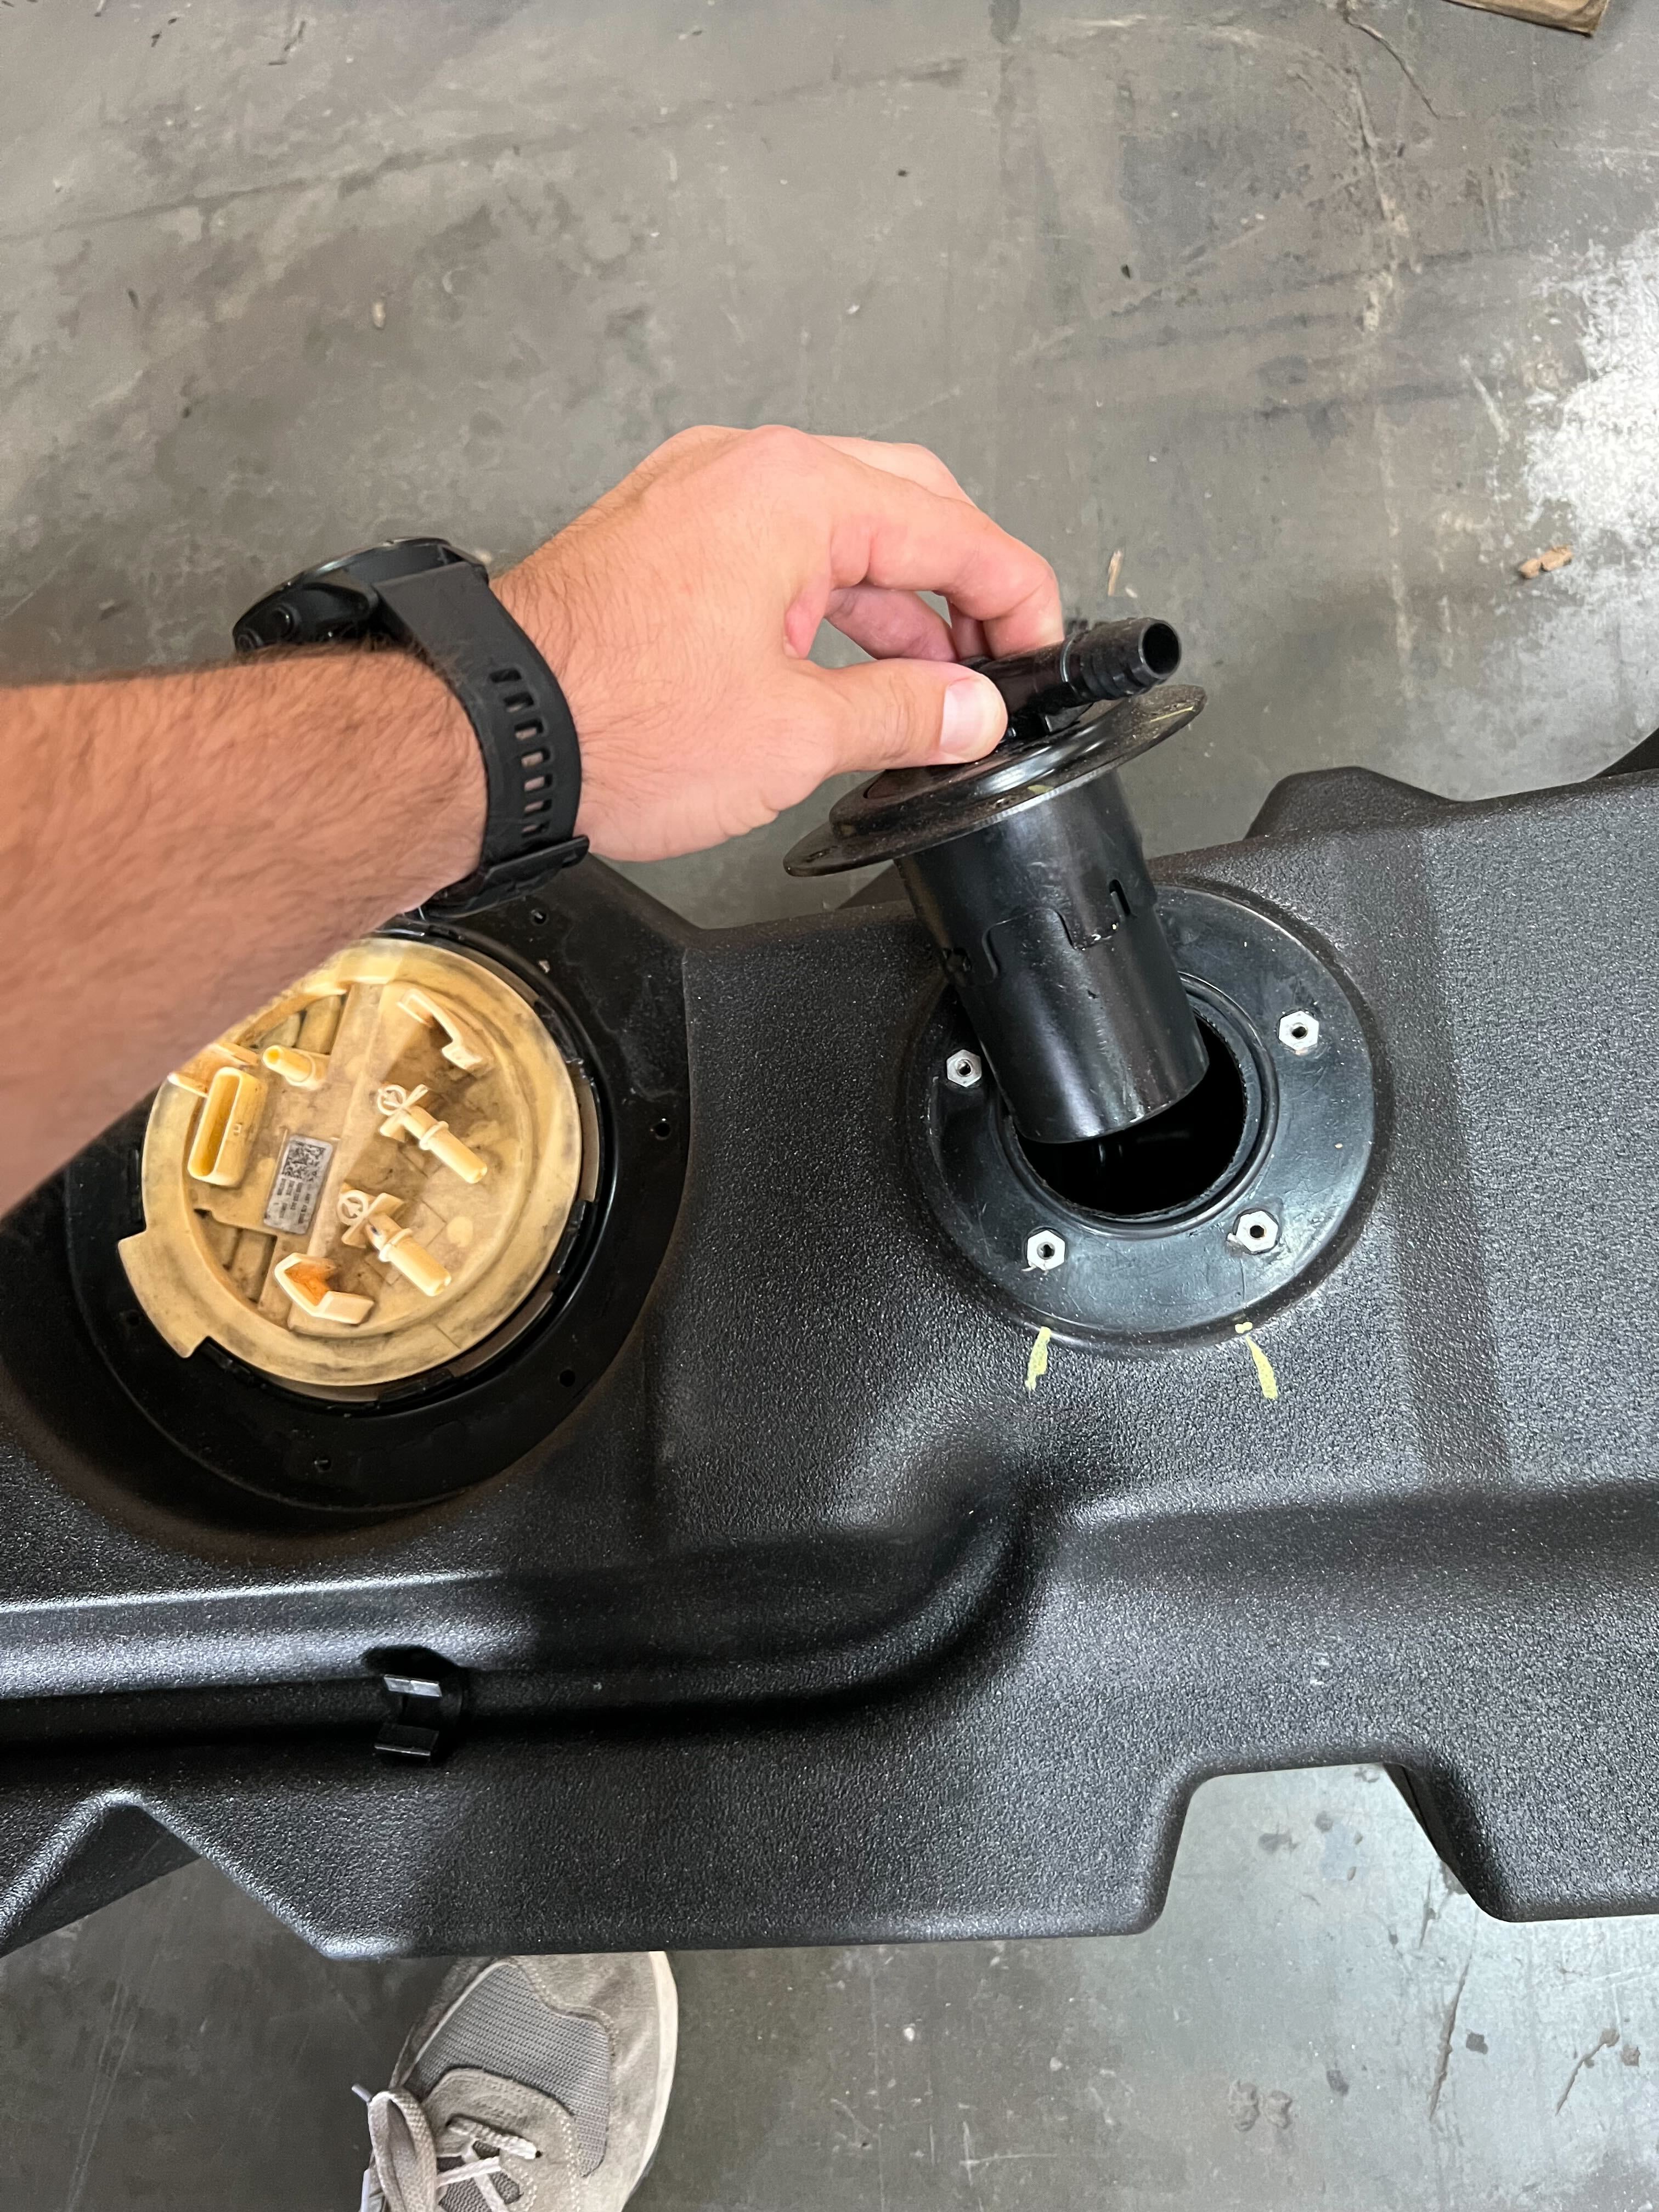
Remove the 5 bolts holding down the main vent and remove the vent so you can see inside.
Use a flash light or take a picture in the tank to make sure there is separation between the float and venturi tube.
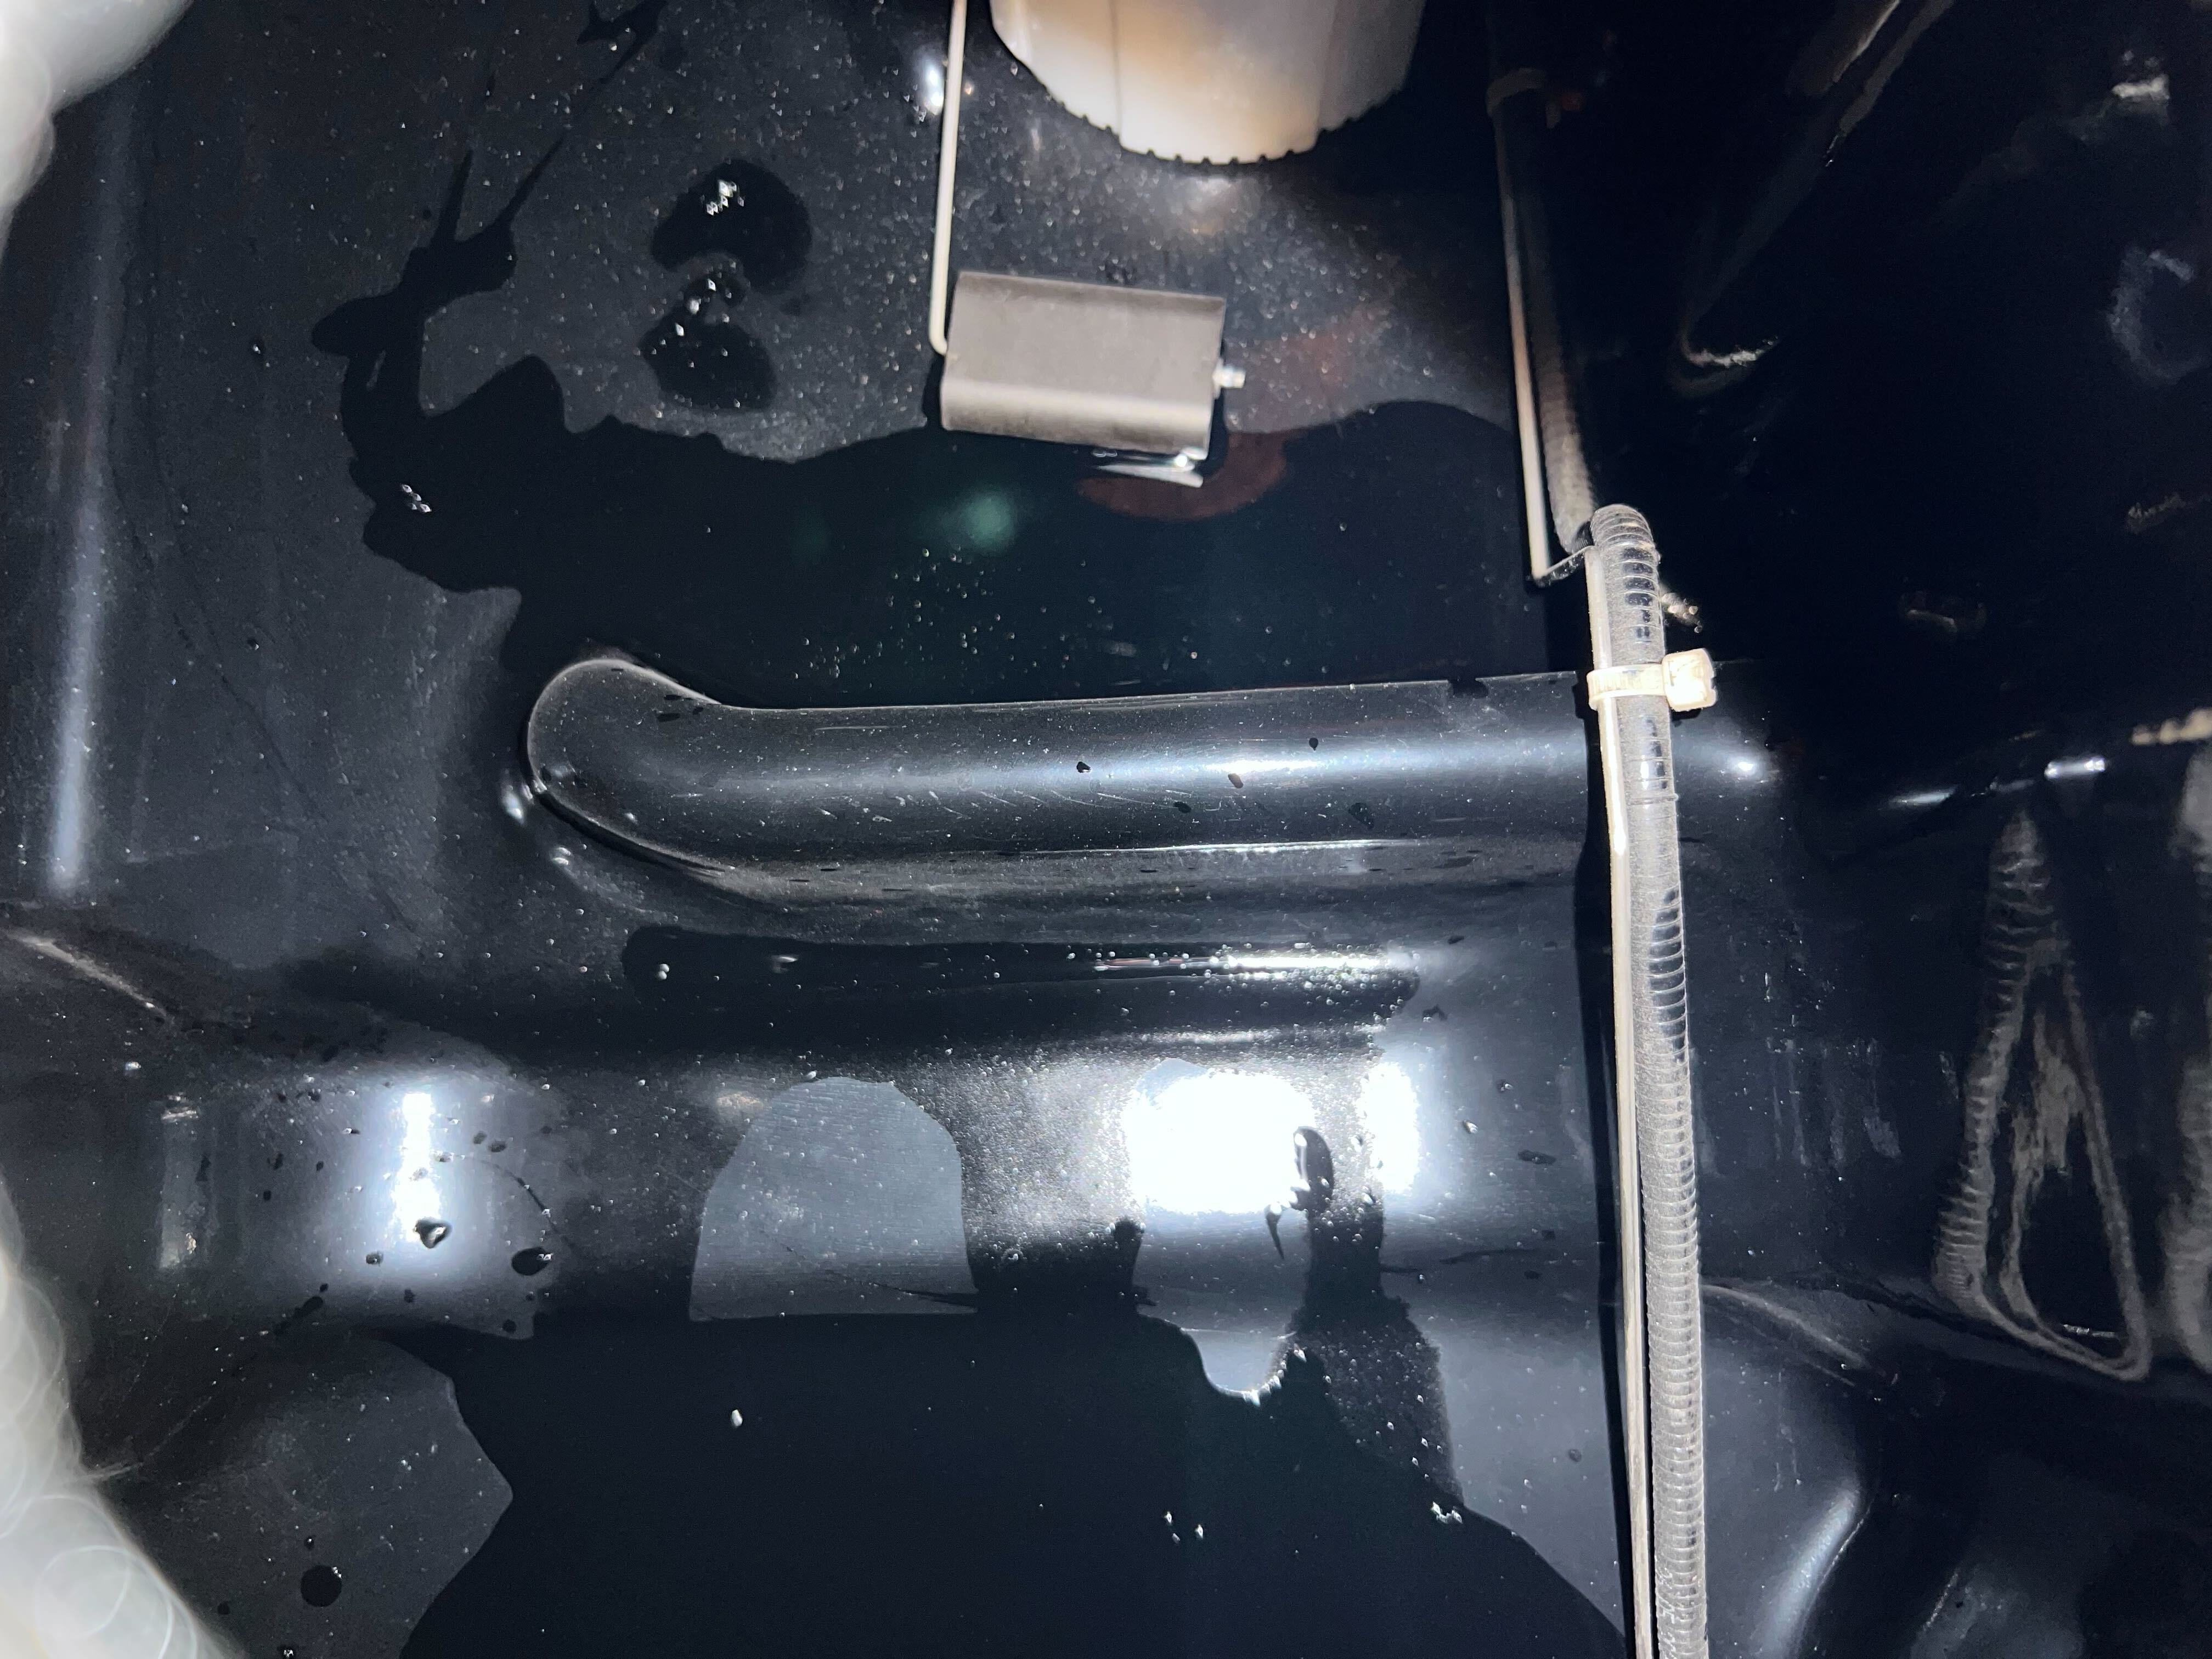
This is what it looks like if the sending unit is installed incorrectly and the tube is hitting the float. This would lead to the gauge getting stuck and the gauge eventually falling and not moving from empty.
Transfer over the main vent line from the OEM tank to the S&B Tank.
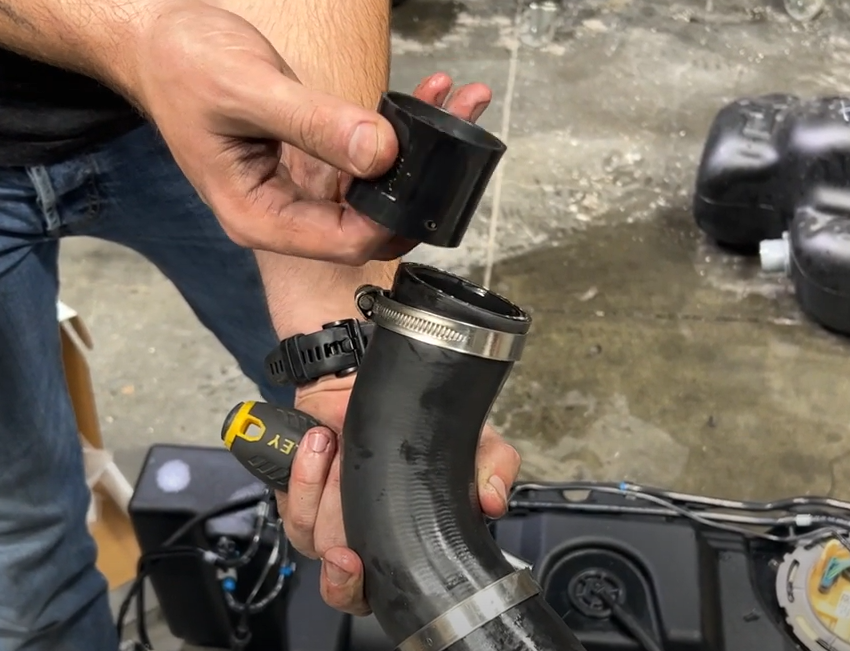
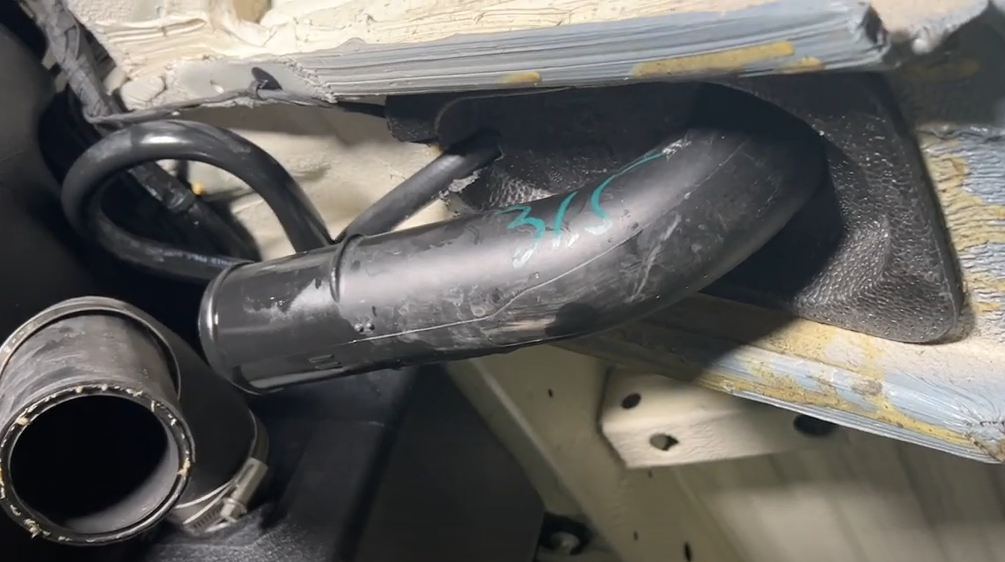
Remove the filler hose from the OEM tank. Before installing the filler onto the S&B Tank, insert the included check valve into the filler with the arrow facing the tank.
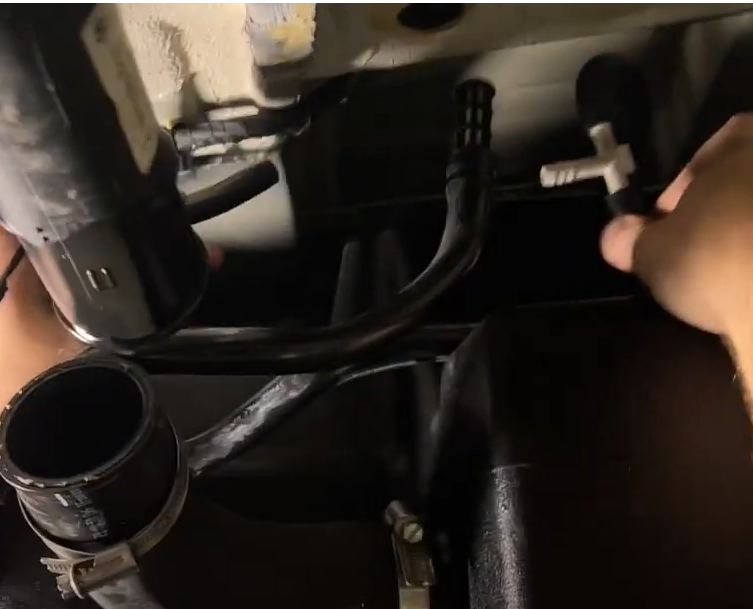
Now the S&B Tank is ready to be installed. Use a lift or straps to lift the tank into place. Before the S&B Tank is all the way installed, push the 5/16" hose that's coming from the filler door onto the T fitting on the S&B Tank. Make sure this line does not get pinched when the S&B Tank is fully in place.
Starting with the rear strap, install all 4 S&B Tank straps. The rear strap will use the included gold bolts and the other 3 straps will use the OEM bolts.
Reconnect the blue/white fuel lines and electrical connector. After connecting the fuel lines and locking them, gently tug on them to make sure they are fully connected.
Reinstall the Styrofoam cover and cut out a small section on the top so the 5/16" hose can pass through. Reconnect the fuel filler hose.
This final checklist is very important.
#1 Make sure all nuts are safely fastened and torqued.
#2 Ensure there is proper driveshaft clearance and the straps are tight
#3 Double check fuel line connections, the electrical connection as well as the vent and fill lines.
#4 Lastly, fill the tank full and check for any leaks. If you have any questions, call or text us at 909.675.1313