Step 1
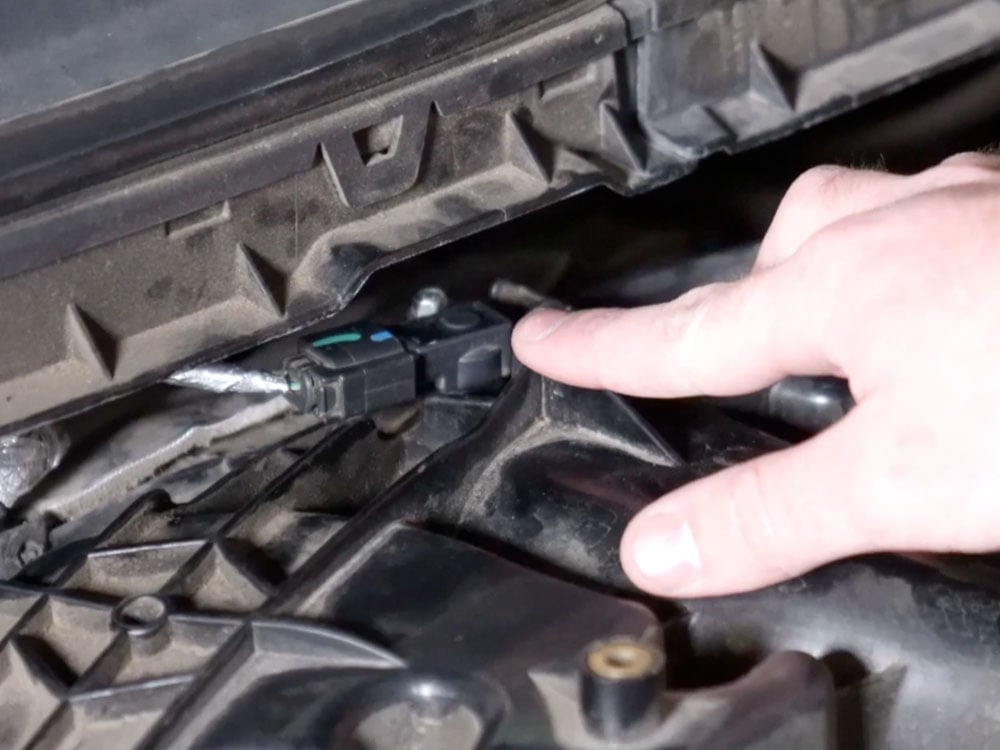
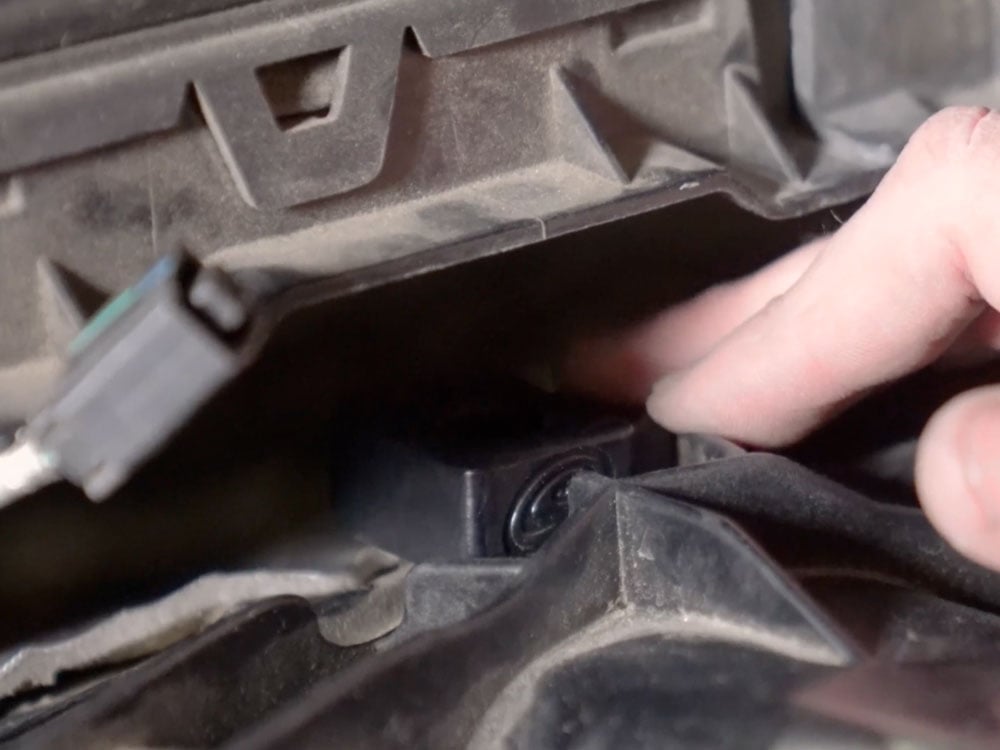
Unplug the map sensor harness.
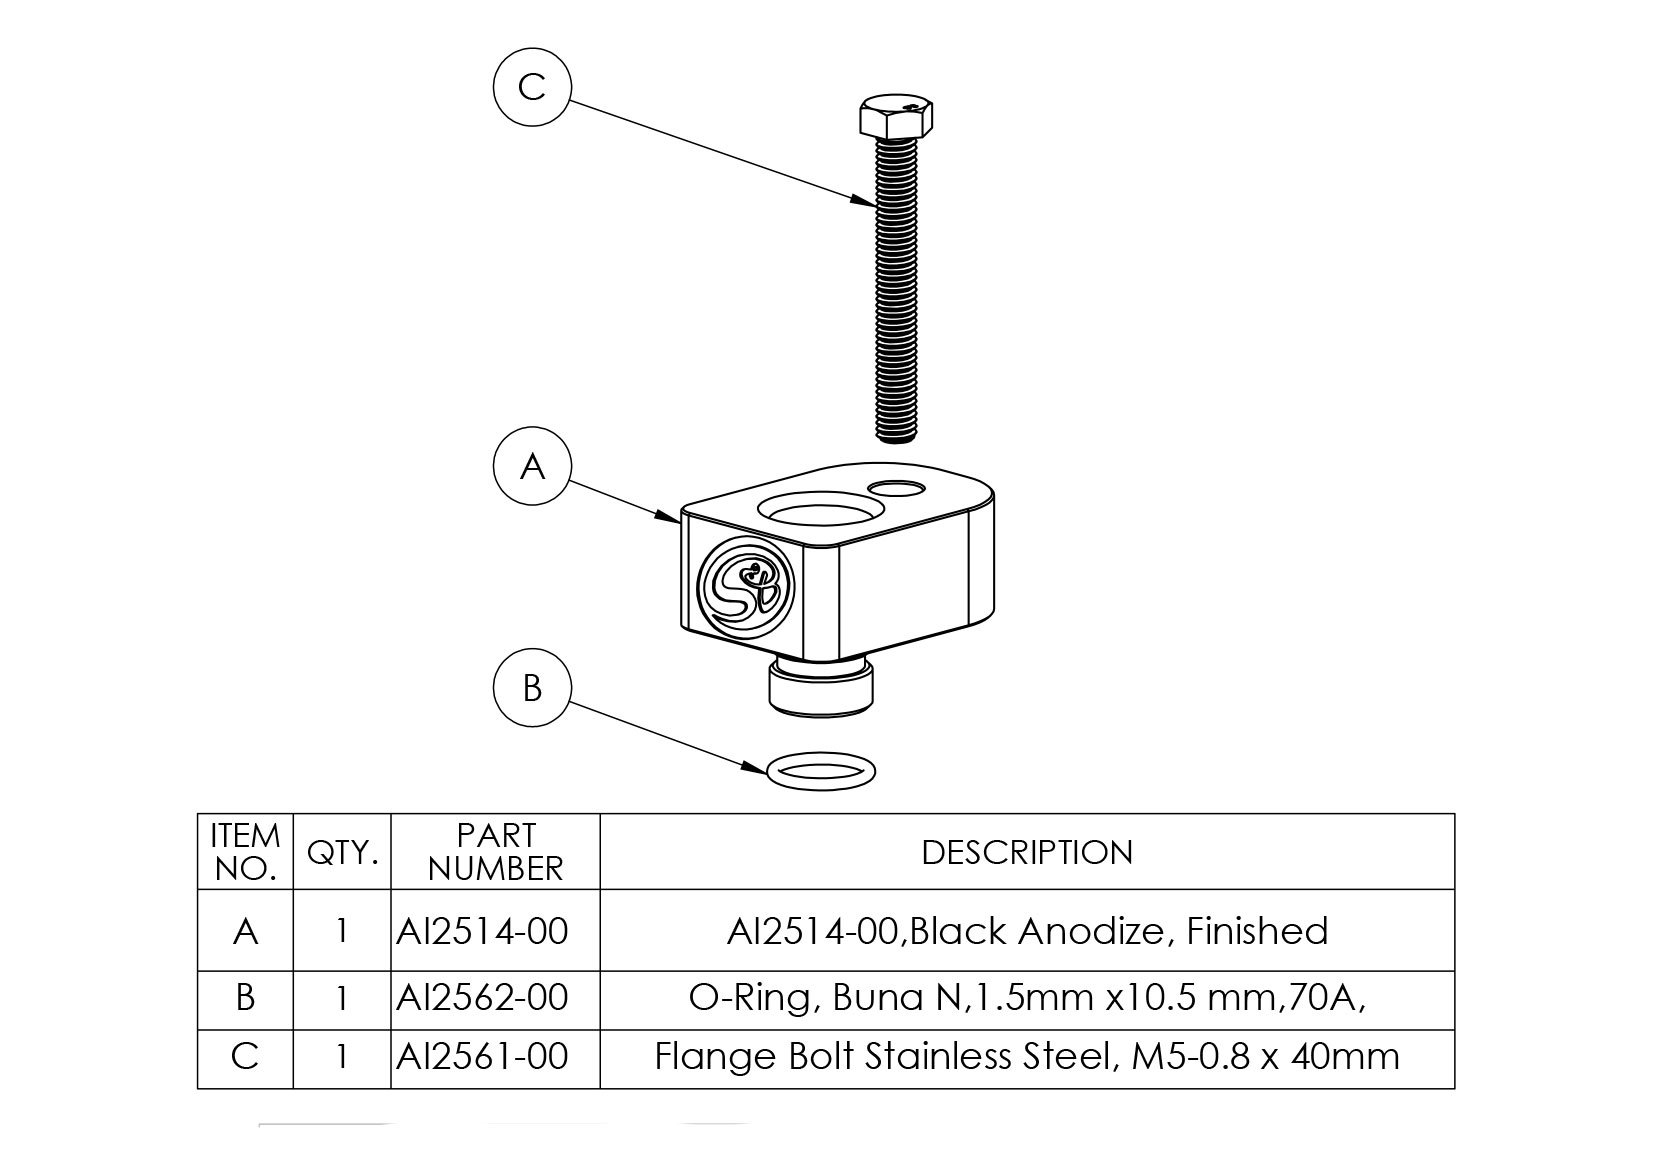
Thank you for purchasing your new S&B Filters Map Spacer. If at any time you need additional assistance with installation or have any other questions or comments, feel free to call our customer support team at 909-947-0015.
Approx. Install Time: 15 min
Unplug the map sensor harness.
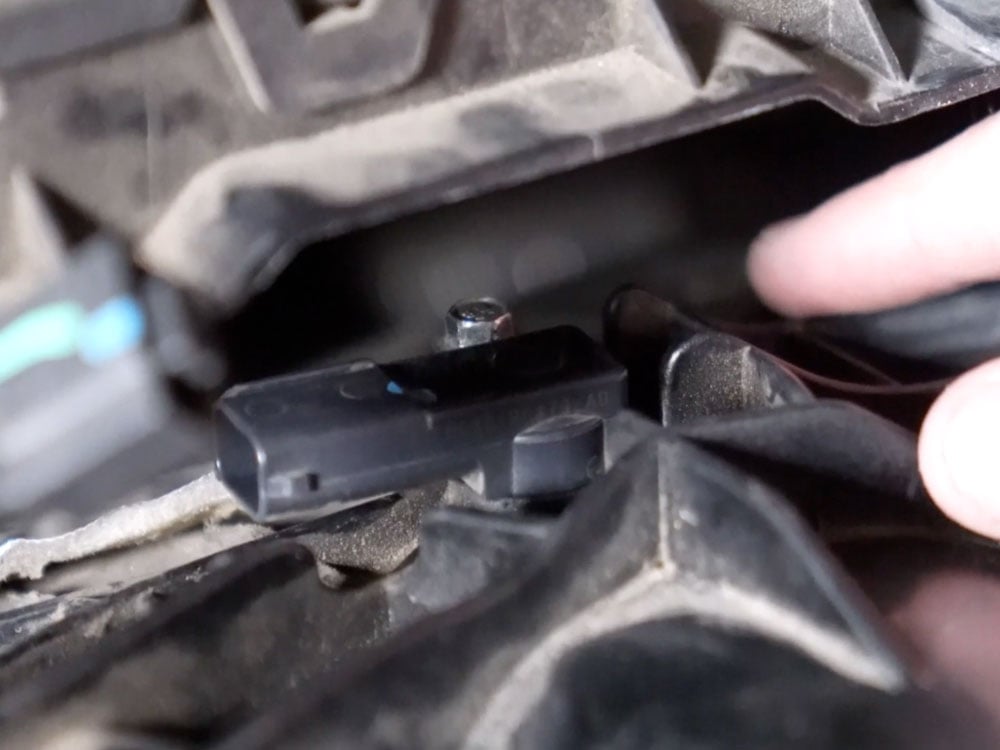
Remove the map sensor bolt using a 7mm wrench. Be careful not to drop this bolt in your engine bay. Access is limited on the 2017-2019 trucks so the shorter the wrench the better.
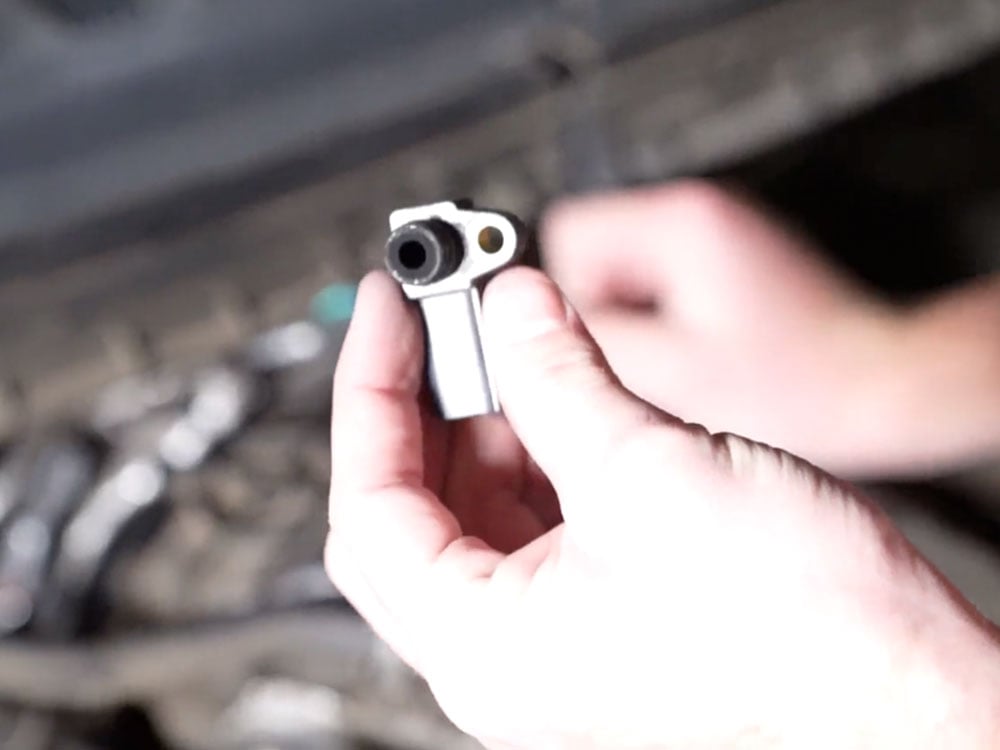
Remove the map sensor from the manifold. Pull up and wiggle on the spacer to get it free of the manifold.
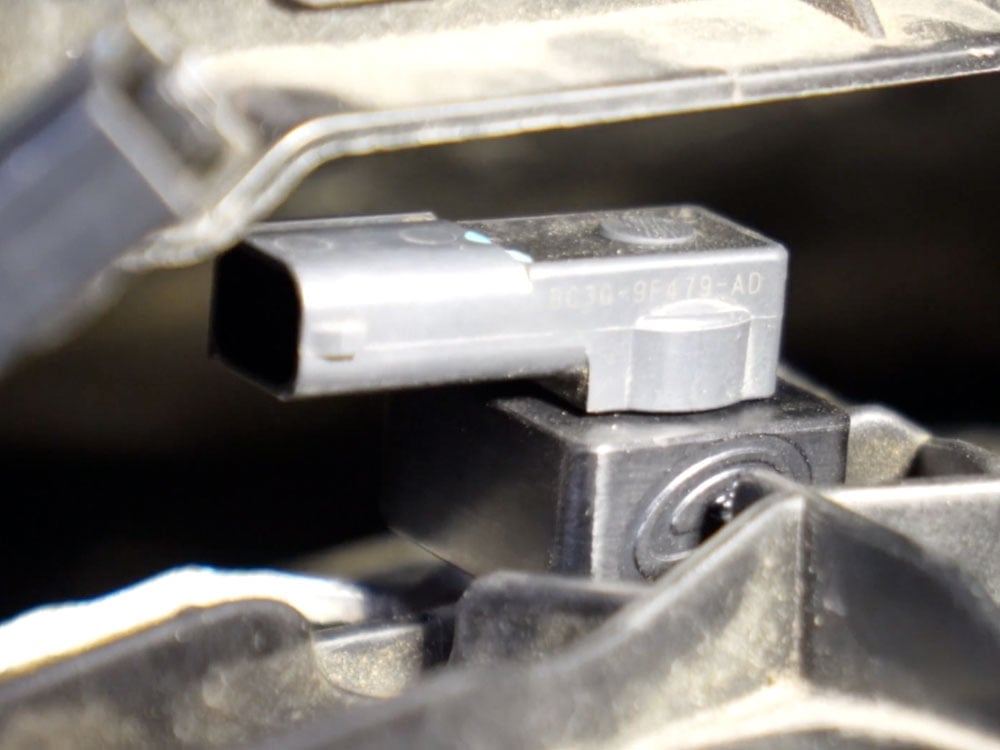
Install the provided O-ring onto the S&B Map sensor spacer and install the spacer into the manifold. Make sure the bolt hole is lined up with the threaded insert in the manifold.
Install the map sensor with the original o ring into the S&B spacer. Again, make sure the bolt hole is lined up with both the hole in the spacer and the threaded insert in the manifold.
Apply thread locker to the new bolt included with the S&B kit.
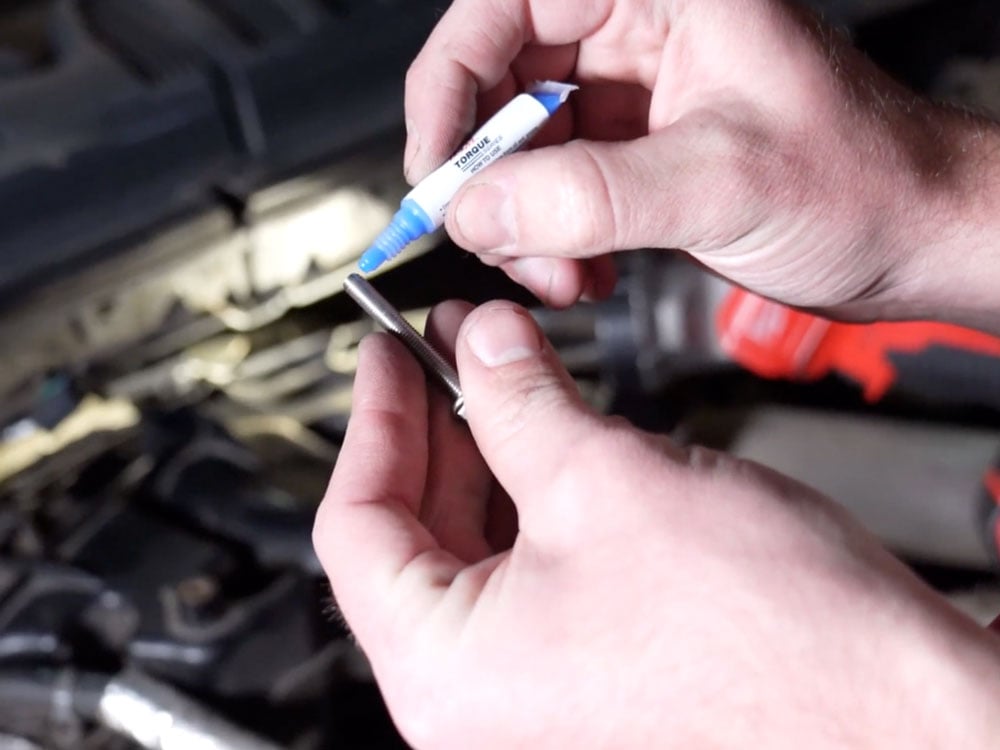
Thread the bolt in as far as possible by hand and then use a 8mm wrench to snug it up and complete the last few rotations. Be careful not to overtighten the bolt.
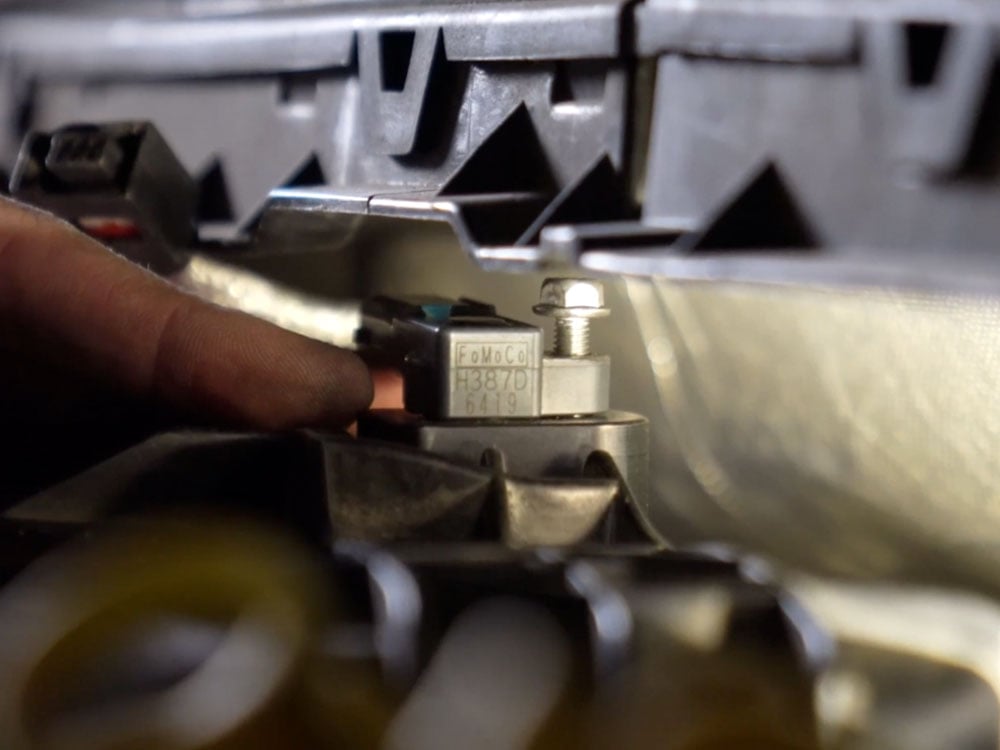
Reconnect the map sensor harness.
